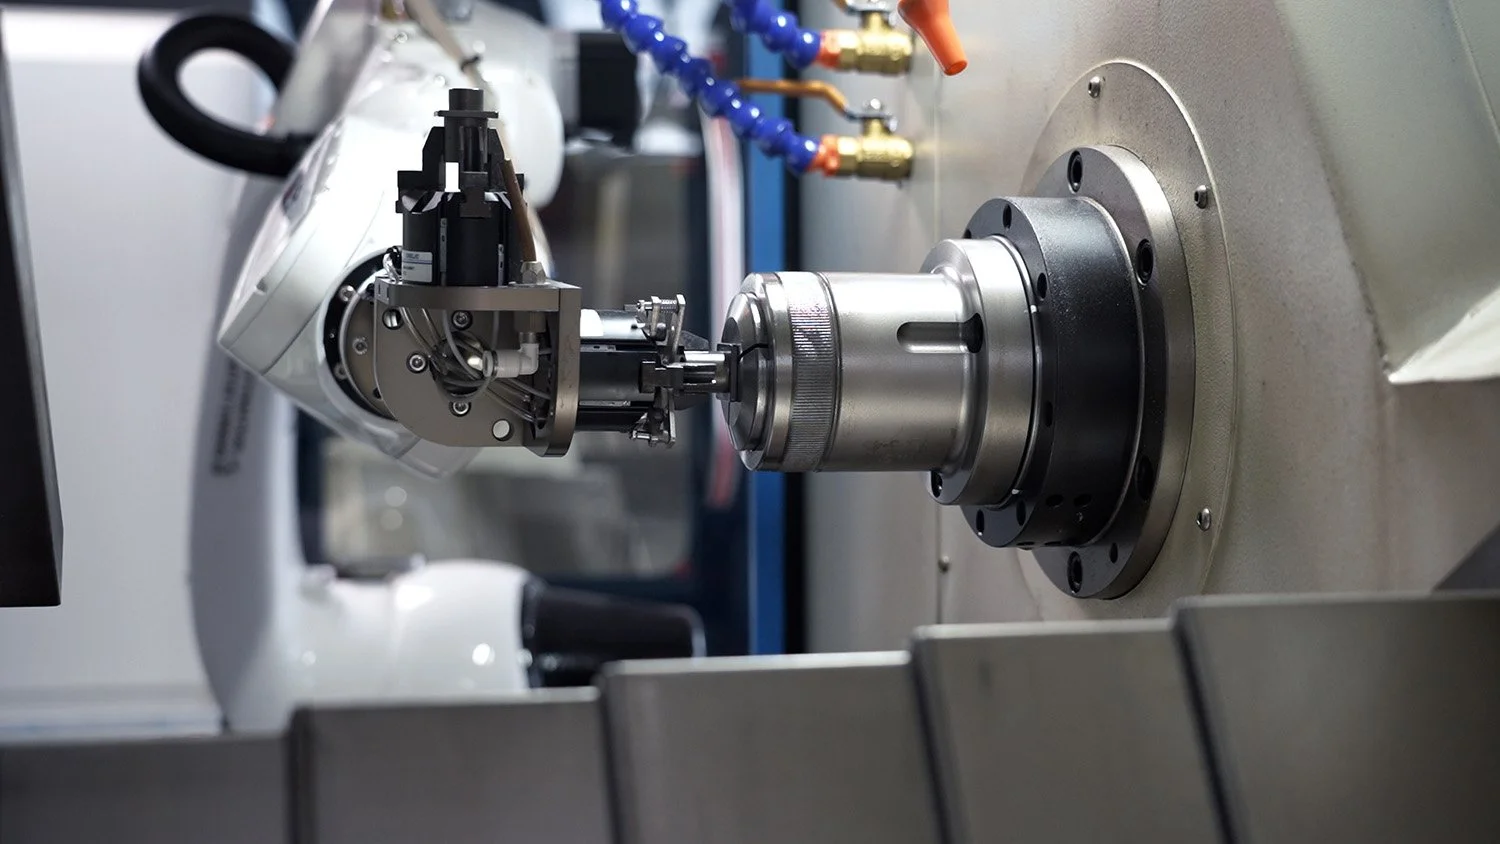
The Complete Guide to CNC Prototype Manufacturing: From Concept to Reality
In today’s competitive product development landscape, prototype manufacturing serves as the critical bridge between conceptual design and mass production. Among the various methods available, CNC machining has emerged as a premier choice for creating high-precision, functional prototypes with exceptional accuracy and material properties. This comprehensive guide explores how to navigate the CNC prototyping process effectively, ensuring your product development journey from initial concept to tangible reality is seamless and successful.
Why Choose CNC Machining for Your Prototype?
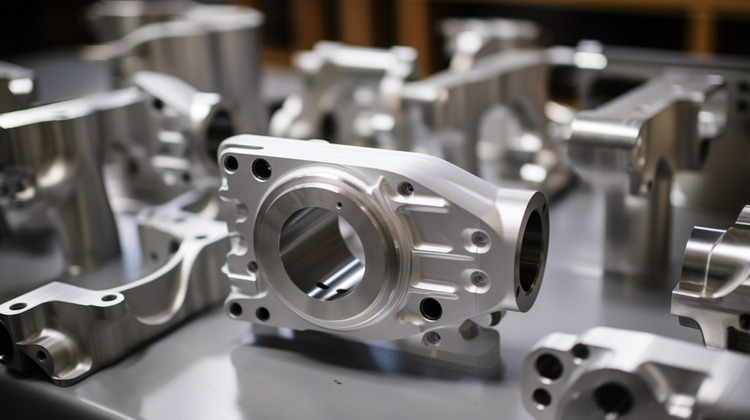
CNC (Computer Numerical Control) machining is a subtractive manufacturing process where pre-programmed computer software dictates the movement of factory tools and machinery. This process can control a range of complex equipment, from grinders and lathes to mills and routers, enabling the creation of three-dimensional prototypes with exceptional dimensional accuracy and tight tolerances as precise as ±4 μm .
Unlike additive manufacturing methods like 3D printing, CNC machining creates prototypes by removing material from a solid block (known as the workpiece) using specialized cutting tools. This fundamental difference offers several distinct advantages for prototype development, including superior surface finishes, exceptional mechanical properties identical to production parts, and broad material compatibility encompassing both metals and plastics .
Key Advantages of CNC Prototyping:
-
High Precision and Tight Tolerances: CNC machining provides micron-level accuracy, essential for prototypes requiring exact dimensional specifications, particularly in industries like aerospace, medical devices, and automotive manufacturing .
-
Material Versatility: The process accommodates an extensive range of materials, including various metals (aluminum, stainless steel, titanium, brass) and plastics (ABS, Nylon, PEEK, Polycarbonate), allowing designers to test prototypes with end-use production materials .
-
Exceptional Surface Quality: With proper toolpath planning and finishing operations, CNC-machined prototypes can achieve surface finishes comparable to production parts, sometimes even eliminating the need for additional post-processing .
-
Structural Integrity: Unlike layered additive manufacturing processes, CNC-machined prototypes feature homogeneous material properties without directional weaknesses, providing more accurate performance data during functional testing .
-
Rapid Turnaround: Modern CNC facilities with automated tool changing and multi-axis capabilities can produce complex prototypes within hours, significantly accelerating product development cycles .
The CNC Prototyping Process: A Step-by-Step Breakdown
Successfully navigating the CNC prototyping process requires understanding each phase from digital design to physical part. Following a structured approach ensures optimal results while minimizing iterations and costs.
Stage 1: Digital Design and CAD Preparation
The prototyping journey begins with comprehensive digital modeling using Computer-Aided Design (CAD) software. At this critical stage, designers create detailed 3D models that define every aspect of the prototype’s geometry, features, and nominal dimensions.
CAD Best Practices for CNC Machining:
-
Design for Manufacturability (DFM): Incorporate machining considerations during the design phase, including appropriate internal corner radii (matching potential tool sizes), avoiding excessively deep features, and designing self-supporting structures that don’t require specialized fixturing .
-
Wall Thickness Considerations: Maintain minimum wall thicknesses of at least 0.8mm for metals and 1.5mm for plastics to prevent deformation during machining and ensure structural stability during handling and testing .
-
Cavity Depth Limitations: Design cavities with depth-to-width ratios below 4:1 to minimize tool deflection, vibration, and potential inaccuracies in deep pocketing operations .
Table: Recommended Design Parameters for CNC Prototyping
| Design Feature | Metal Prototypes | Plastic Prototypes |
|---|---|---|
| Minimum Wall Thickness | 0.8 mm | 1.5 mm |
| Standard Tolerance | ±0.1 mm | ±0.15 mm |
| Tight Tolerance (Premium) | ±0.025 mm | ±0.05 mm |
| Recommended Internal Radius | > 1.0 mm | > 1.5 mm |
| Maximum Cavity Depth:Width | 4:1 | 3:1 |
Stage 2: CAM Programming and Toolpath Planning
Once the CAD model is finalized, the design transitions to Computer-Aided Manufacturing (CAM) programming. During this phase, manufacturing engineers define the toolpaths, cutting strategies, and machining parameters that will guide the CNC equipment in creating the physical prototype.
Advanced CAM Strategies for Prototyping:
-
Adaptive Clearing: High-efficiency roughing strategies that maintain constant tool engagement to reduce machining time while extending tool life, particularly beneficial for harder materials like stainless steels and titanium .
-
Contour Parallel Machining: This finishing approach generates consistent surface finishes by maintaining continuous tool contact with the workpiece, especially valuable for complex curvatures and organic geometries common in consumer products .
-
Model Compensation Techniques: As demonstrated in projects like Roguetoolpath’s heart-shaped boxes, applying negative radial stock values in CAM software can generate slightly undersized features to account for material springback or secondary finishing operations, ensuring perfect fitment between interacting components .
A 2017 study on CNC controller optimization demonstrated that systematic parameter optimization using methods like the Taguchi approach could reduce machining times by up to 62.52% while maintaining quality standards—a significant consideration for time-sensitive prototyping projects .
Stage 3: Material Selection and Workholding
Strategic material selection proves crucial for functional prototypes. While appearance prototypes might use easier-to-machine materials like ABS or aluminum, functional testing often requires prototypes made from production-equivalent materials to yield accurate performance data.
Common Material Choices for CNC Prototyping:
-
Metals: Aluminum (6061, 7075), Stainless Steel (303, 304, 316), Brass, Copper, and Titanium alloys
-
Plastics: ABS, Polycarbonate, Nylon, PEEK, Delrin, Acrylic, and UHMW
Workholding considerations must be addressed early in the process. Complex geometries might require custom fixtures or soft jaws to ensure secure clamping during machining operations while allowing the tool proper access to all required features.
Stage 4: CNC Machining Operations
The physical machining process typically involves a series of strategic operations transforming raw material into finished prototypes. Modern multi-axis CNC machining centers often complete these operations in a single setup, significantly reducing tolerance stack-up and accelerating production times.
Primary Machining Operations:
-
Milling: Utilizing rotary cutting tools to remove material from stationary workpieces, capable of creating complex geometries, pockets, slots, and contoured surfaces.
-
Turning: Employing single-point cutting tools against rotating workpieces to produce cylindrical or conical features, typically performed on CNC lathes.
-
Drilling and Tapping: Creating precision holes and threaded features for assembly and fastening requirements.
-
Multi-Axis Contouring: Simultaneous movement of cutting tools along 4 or 5 axes enables the creation of highly complex geometries in a single setup, eliminating the need for multiple refixturing operations.
Stage 5: Post-Processing and Finishing
After machining, prototypes often require various post-processing operations to meet aesthetic, functional, or testing requirements. These secondary operations enhance the prototype’s appearance, durability, or performance characteristics.
Common Post-Processing Options:
-
Manual Finishing: Support removal, deburring, sanding, and polishing to improve appearance and safety.
-
Surface Treatments: Bead blasting, anodizing (for aluminum), passivation (for stainless steel), or plating to enhance corrosion resistance and appearance.
-
Cosmetic Finishes: Painting, powder coating, silk screening, or laser etching for brand identification and product aesthetic evaluation.
CNC Prototyping vs. Alternative Methods
While CNC machining offers numerous benefits for prototype development, understanding its position relative to other available technologies ensures appropriate method selection for specific project requirements.
Table: CNC Prototyping Compared to Alternative Methods
| Manufacturing Method | Best Applications | Advantages | Limitations |
|---|---|---|---|
| CNC Machining | Functional prototypes, High-precision parts, Metal components, Production-equivalent testing | Excellent accuracy, Material versatility, Superior strength, Smooth surface finish | Higher cost for complex geometries, Material waste (subtractive process) |
| 3D Printing (FDM, SLA, SLS) | Concept models, Complex geometries, Small features, Design verification | Rapid turnaround for complex parts, Minimal material waste, Lower cost for intricate designs | Limited material properties, Anisotropic strength, Lower accuracy, Surface texture issues |
| Urethane Casting | Small batches of flexible parts, Multi-material prototypes, Low-volume production | Multiple copies from single pattern, Various material properties, Good surface quality | Limited to plastics, Pattern creation required, Less dimensional control |
| Rapid Injection Molding | Pre-production testing, Market evaluation, Bridge manufacturing | Production-equivalent parts, High-volume capability, Authentic material characteristics | Higher tooling costs, Longer lead times, Design changes difficult |
As highlighted in this comparison, CNC machining excels when prototypes require dimensional precision, material specificity, or functional testing under conditions similar to final production environments .
Real-World CNC Prototyping Case Studies
Case Study 1: Aerospace Component Development
An aerospace equipment manufacturer needed to validate a new titanium sensor housing for next-generation aircraft. The complex design included thin-walled sections (0.8mm minimum), precision internal cooling channels, and mounting features requiring tight tolerances of ±0.05mm.
Using 5-axis CNC machining with adaptive toolpaths and specialized carbide tooling, the engineering team produced three functional prototypes from Ti-6Al-4V titanium alloy. The prototypes underwent successful thermal cycling, vibration, and pressure testing, validating the design before committing to expensive production tooling. The CNC-machined prototypes identified a potential interference issue that wasn’t detectable in CAD models, saving an estimated $250,000 in mold rework costs.
Case Study 2: Medical Device Ergonomics Validation
A medical device startup developing a portable diagnostic unit required prototypes that accurately represented the final product’s ergonomics, functionality, and durability. The housing design incorporated complex organic curves, textured grips, and snap-fit assemblies using medical-grade polycarbonate.
Employing CNC machining with specialized texturing techniques and medical-grade materials, the team produced 25 prototypes for clinical evaluation and usability testing. The prototypes provided accurate feedback on assembly alignment, grip comfort, and drop resistance, resulting in four design iterations before finalizing the design for injection molding. The high-quality surface finish of the CNC-machined prototypes enabled accurate user perception testing, crucial for the product’s market acceptance.
Case Study 3: Automotive Systems Integration
An automotive supplier redesigned an aluminum throttle body to improve airflow while reducing weight. The new design incorporated an integrated mounting flange and complex internal passages that needed to interface with existing engine components.
Using CNC turning centers with live tooling and custom boring bars, the team machined five working prototypes from 6061 aluminum. The prototypes allowed for bench testing of airflow characteristics and fitment verification on actual engine assemblies. Testing revealed a 12% improvement in airflow efficiency and confirmed a 15% weight reduction. The CNC prototyping process from initial design to validated components took just three weeks, accelerating the product launch by approximately two months.
Optimizing Your CNC Prototyping Strategy
Maximizing the effectiveness of your CNC prototyping efforts requires both technical understanding and strategic planning. Implementing these best practices can significantly enhance outcomes while controlling costs and timelines.
Design Optimization Strategies
-
Implement Design for Manufacturing (DFM) Principles: Engage with your manufacturing partner early to identify potential production challenges and implement design modifications that enhance manufacturability without compromising functionality .
-
Standardize Features Where Possible: Utilize standard tool sizes for holes, radii, and pockets to minimize special tooling requirements and reduce machining time.
-
Consolidate Assemblies: When appropriate, combine multiple components into single machined parts to test integrated functionality and reduce assembly-related issues.
Project Management Considerations
-
Establish Clear Prototyping Objectives: Define whether the prototype serves for form, fit, or function validation—each requiring different levels of precision, material properties, and finish quality .
-
Implement Structured Iteration Processes: Plan for multiple design-build-test cycles, with each iteration progressively refining the design based on test results and feedback .
-
Leverage Digital Prototyping Where Appropriate: Use CAD visualization and simulation for initial design verification before committing to physical prototypes, particularly for assessing basic form and aesthetics.
Cost Management Approaches
-
Material Selection Strategy: Choose the most cost-effective material that still provides the necessary properties for testing, reserving expensive production-grade materials for later-stage prototypes.
-
Balance Precision and Cost: Specify tolerances based on actual requirements rather than defaulting to the tightest possible values, as tolerance directly impacts machining time and cost.
-
Quantity Considerations: While CNC machining doesn’t benefit from the same economies of scale as injection molding, producing multiple iterations or variations simultaneously can optimize machine time and reduce per-part costs.
Future Trends in CNC Prototyping
The landscape of CNC prototyping continues to evolve with advancing technologies and methodologies that enhance capabilities while reducing barriers to implementation.
Emerging Technologies
-
Hybrid Manufacturing: Combining additive and subtractive processes in a single system enables the creation of complex geometries with deposited material followed by precision machining, offering unprecedented design freedom.
-
AI-Driven Optimization: Implementing artificial intelligence and machine learning for automated toolpath optimization, predictive maintenance, and intelligent parameter selection continues to reduce programming time while enhancing machining efficiency .
-
IoT Integration: Smart machine monitoring provides real-time data on machining processes, tool condition, and dimensional accuracy, enabling proactive adjustments and ensuring consistent prototype quality.
Methodology Advancements
-
Accelerated Workflows: Continued development of integrated CAD/CAM systems with automated feature recognition and toolpath generation significantly compresses the timeline from design to physical prototype.
-
Digital Twin Technology: Creating comprehensive virtual models of both the prototype and machining process enables more accurate prediction of manufacturing challenges and performance characteristics before physical production begins.
-
Sustainable Practices: Increasing implementation of recycling systems for metal chips and coolant, along with energy-efficient equipment, addresses the environmental considerations of subtractive manufacturing processes.
Conclusion: Mastering the CNC Prototyping Journey
Successful prototype development through CNC machining requires a comprehensive understanding of both technical processes and strategic considerations. By leveraging CNC machining’s exceptional precision, material versatility, and capacity for producing functional prototypes, product developers can significantly de-risk the development process and accelerate time-to-market.
The structured approach outlined in this guide—from comprehensive digital modeling through strategic CAM programming to informed material selection and thorough validation testing—provides a roadmap for maximizing the effectiveness of your CNC prototyping initiatives. As manufacturing technologies continue to advance, CNC machining remains an indispensable solution for transforming innovative concepts into tangible, high-quality prototypes ready for evaluation and refinement.
Whether you’re developing cutting-edge medical devices, aerospace components, consumer products, or industrial equipment, mastering the CNC prototyping process delivers the competitive advantage of thorough validation before committing to production tooling—saving time, reducing costs, and ensuring your product’s success in the marketplace.

