CNC Turning Services for Drone Motor Shafts: Tolerances, Materials, Runout Control, Process Planning, and 3 Production Case Studies (JLYPT)
Drone motors look compact, but the rotating stack inside them lives in a world of unforgiving physics: high RPM, alternating loads, rapid thermal cycling, and vibration that will expose even small geometric errors. In that environment, the motor shaft is not “just a pin.” It is a precision component that directly sets bearing life, rotor balance behavior, thrust stability, and long-term reliability.
This is where CNC turning services for drone motor shafts become a specialized manufacturing discipline. The requirements aren’t limited to diameter and length. You also need:
- predictable bearing-seat fits (clearance or interference, as designed)
- low runout (TIR) and controlled coaxiality between functional diameters
- high-quality surface finish to prevent premature bearing wear
- robust groove geometry (E-clip, circlip) that won’t crack under impact loads
- heat-treatment strategy that delivers strength while managing distortion
- inspection methods that actually correlate to motor performance
This guide is written for engineering teams, drone motor brands, integrators building custom UAV propulsion, and procurement teams moving from prototype shafts to stable production.
If you’re sourcing turned UAV components and want a supplier who understands the rotating system—not only the print—JLYPT supports custom CNC UAV parts manufacturing here:
https://www.jlypt.com/custom-cnc-uav-parts-manufacturer/
Table of Contents
- Why Drone Motor Shafts Are Harder Than They Look
- What “Precision” Means for Motor Shafts (Functional Requirements)
- Typical Shaft Features for FPV and UAV Motors
- Material Selection: Stainless vs Alloy Steel vs Bearing Steel
- Heat Treatment, Distortion, and Why “Turn Only” Often Fails
- Process Routes: CNC Turn → Heat Treat → Grind (and Alternatives)
- CNC Turning Parameters and Workholding for Slender Shafts
- Tolerance Strategy: Fits, GD&T, and What to Control
- Surface Finish, Edge Conditions, and Bearing Life
- Grooves, Cross Holes, Flats, Threads: Feature-Specific DFM
- Inspection & Quality: Roundness, Cylindricity, TIR, SPC
- Packaging, Handling, and Traceability for High-Spec Shafts
- Cost Drivers and RFQ Checklist (with reusable tables)
- Three Production Case Studies
- Why JLYPT + How to Start Your Shaft Project
- Standards & External References (DoFollow)
1) Why Drone Motor Shafts Are Harder Than They Look
The fastest way to underestimate a motor shaft is to treat it like a generic turned part. Drone motor shafts are typically small in diameter (often 2 mm to 8 mm), relatively long compared to diameter (high L/D ratio), and expected to run with low vibration at high RPM. Even modest performance targets can push a shaft into “precision turning + precision finishing” territory.
Key challenges in shaft machining:
- Slenderness and deflection: A 3 mm shaft can deflect under cutting force, which creates taper, chatter marks, or inconsistent surface finish.
- Runout sensitivity: A tiny amount of eccentricity at the bearing seat becomes visible as vibration at RPM.
- Heat treatment distortion: Steel shafts frequently require hardening; hardening can warp a shaft and ruin a bearing seat if you don’t plan for it.
- Micro features: E-clip grooves, undercuts, and cross holes are stress concentrators if not designed and machined correctly.
- Assembly-driven requirements: Many shafts are press-fit into rotor bells or hubs; the fit must be consistent so assembly force and retention torque stay predictable.
This is why CNC turning services for drone motor shafts should be evaluated as a complete manufacturing system: turning method, material, heat treat, finishing, and inspection all need to align with how the motor behaves in the field.
2) What “Precision” Means for Motor Shafts (Functional Requirements)
A “tight tolerance” on diameter is only one part of the story. For drone motor shafts, functional precision typically includes:
- Dimensional control: bearing seat diameters, press-fit diameters, shoulder-to-shoulder length
- Geometric control: straightness, roundness, cylindricity, coaxiality/concentricity
- Surface integrity: surface finish (Ra), avoidance of tearing, burrs, or microcracks
- Edge control: chamfers and radii to protect bearings during installation
- Hardness and core strength: fatigue resistance under bending and torsional loads
Table 1 — Functional Requirements and Their Impact
| Requirement | Why it matters in the motor | Typical measurement method |
|---|---|---|
| Bearing-seat diameter (fit) | sets preload/clearance, bearing life | micrometer, air gauge |
| TIR runout (bearing seat to datum) | drives vibration and noise | V-block + dial indicator / roundness system |
| Roundness / cylindricity | reduces localized bearing stress | roundness tester, form measurement |
| Surface finish Ra | affects wear and friction | profilometer |
| Straightness | prevents rotor wobble | form measurement, dial sweep |
| Groove geometry | retention reliability, fatigue strength | optical comparator / CMM |
| Hardness | wear and deformation resistance | Rockwell / Vickers |
3) Typical Shaft Features for FPV and UAV Motors
Motor shafts vary by architecture (inrunner, outrunner, planetary gear motors), but many share common turned features:
- Bearing journals (often 2 seats)
- Shoulders to locate bearings axially
- Press-fit zone into rotor bell or hub
- Retaining ring groove (E-clip/circlip)
- Threaded end (less common on small outrunners, common on larger assemblies)
- D-flat for set screws (common in some hubs and adapters)
- Cross hole for pin retention (common in some modular designs)
- Center drilling for between-centers finishing or grinding
Table 2 — Common Drone Motor Shaft Feature Set
| Feature | Typical purpose | Machining notes |
|---|---|---|
| Bearing seat Ø | bearing fit | often requires grind or fine turning + control of roundness |
| Shoulder face | axial location | needs perpendicularity to shaft axis |
| Press-fit Ø | rotor hub retention | requires stable interference and surface finish planning |
| E-clip groove | axial retention | groove radii and burr control are critical |
| Chamfers | ease assembly | avoid sharp edges that nick bearing seals |
| D-flat | set screw drive | end milling or live tooling on lathe |
| Cross hole | pin retention | drill with support to avoid drift/burrs |
When you specify CNC turning services for drone motor shafts, the cleanest prints treat the shaft as a rotating datum system rather than a list of independent diameters.
4) Material Selection: Stainless vs Alloy Steel vs Bearing Steel
Material selection is a trade between mechanical performance, corrosion resistance, machinability, heat treat response, and cost.
Common shaft materials include:
- 420 stainless (hardenable; decent corrosion resistance)
- 440C stainless (high hardness potential; wear resistance; more demanding machining)
- 17-4PH stainless (strong, precipitation hardening; stable; good for corrosion resistance)
- 4140 / 4130 alloy steel (tough; excellent for shafts; needs coating if corrosion is a concern)
- 52100 bearing steel (high hardness; wear; used where extreme bearing surface performance is needed)
Table 3 — Material Comparison for Drone Motor Shafts
| Material | Strength/Hardness potential | Corrosion resistance | Machinability | Best-fit applications |
|---|---|---|---|---|
| 420 SS | high after hardening | medium | good | general drone shafts needing some corrosion resistance |
| 440C SS | very high | good | moderate | wear-resistant shafts, aggressive duty cycles |
| 17-4PH | high | very good | good | marine/industrial environments, stable heat treat |
| 4140 | high | low (needs coating) | good | high-impact FPV shafts, cost-effective |
| 52100 | very high | low | moderate | maximum wear resistance, grind-centric process |
Engineering note: If your design demands an extremely consistent bearing seat at tight tolerance, a “turn + heat treat + grind” route often outperforms “turn only,” regardless of alloy.
5) Heat Treatment, Distortion, and Why “Turn Only” Often Fails
Many drone motor shafts must resist bending and fretting at the bearing interface. That usually means hardened steel. But hardening introduces a manufacturing reality: distortion.
Even if the turned shaft is perfect before heat treat, the part can:
- bow slightly (straightness error)
- change diameter (growth/shrink)
- develop surface scale or decarburization (depending on process)
- shift coaxial alignment between diameters
This is why high-performing shafts are often finished by OD grinding after heat treat, especially on bearing seats.
Table 4 — Heat Treatment Options and Manufacturing Consequences
| Heat treat approach | Typical benefit | Risk for shafts | Mitigation |
|---|---|---|---|
| Through hardening | high wear resistance | distortion, size change | leave grind allowance; between-centers grind |
| Induction hardening | hard surface, tough core | localized distortion | controlled process + finish grind |
| Precipitation hardening (17-4PH) | dimensional stability | property depends on condition | specify condition (e.g., H900/H1025) |
| Nitriding (some steels) | surface hardness, wear | process limits by alloy | consider post-polish; verify depth |
If you want robust CNC turning services for drone motor shafts, ask the supplier how they plan grind allowance, post-HT finishing, and straightness verification.
6) Process Routes: CNC Turn → Heat Treat → Grind (and Alternatives)
There isn’t one “correct” route. The correct route is the one that hits runout, fit, and finish targets consistently at your required volume.
Typical production routes for motor shafts
- CNC turning (rough + semi-finish)
- Heat treat (as required)
- OD grinding (bearing seats and critical diameters)
- Deburr / edge conditioning
- Surface treatment (passivation, black oxide, plating, etc.)
- Final inspection (including form and TIR checks)
Alternative routes:
- Swiss turning with high-precision finish turning for softer materials or when tolerances permit (often prototypes or lower-duty shafts)
- Centerless grinding for high-volume diameter control (especially for simple shafts)
- Turn + roll (thread rolling) when threads must be fatigue-resistant
Table 5 — Process Route Selection Guide
| Requirement level | Recommended route | Why |
|---|---|---|
| moderate tolerance, non-hardened | CNC turn (finish) | fastest and economical |
| hardened shaft, tight bearing fits | Turn + HT + OD grind | best for diameter + form + finish |
| ultra-high volume, simple geometry | Centerless grind + secondary ops | speed and consistency |
| micro shafts (2–4 mm) with features | Swiss turning + controlled support | best for slender parts and micro features |
7) CNC Turning Parameters and Workholding for Slender Shafts
Small shafts are particularly sensitive to vibration and deflection. The machining plan must manage:
- tool geometry and sharpness (chip control matters at small diameters)
- spindle speed vs chatter stability
- feed rate and depth of cut to prevent taper
- workholding and support strategy
Workholding and support methods
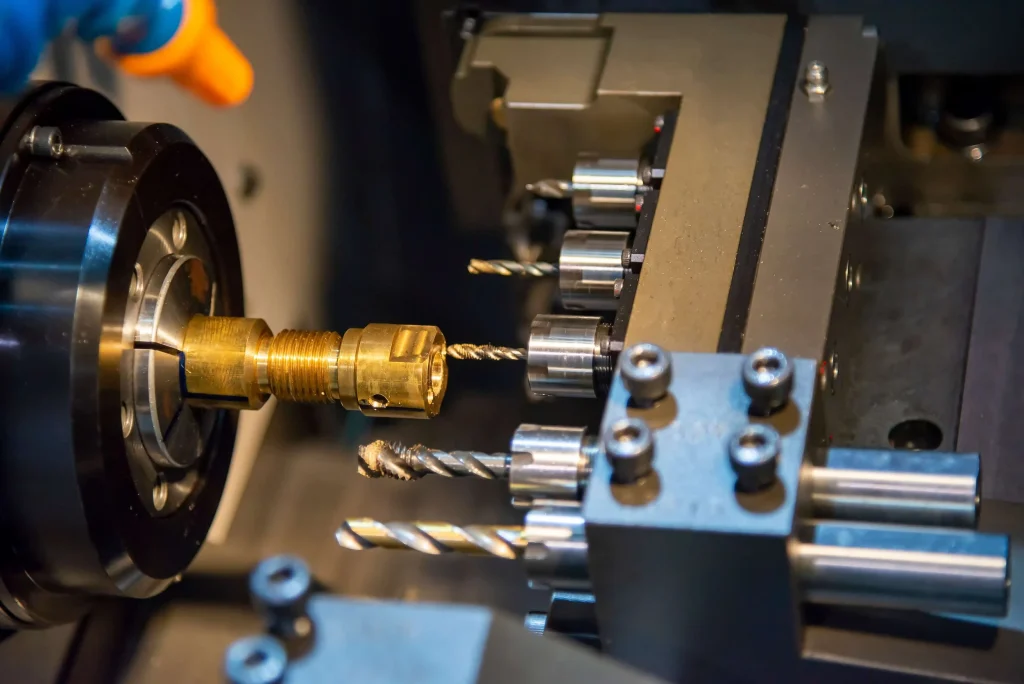
- Collet chuck (preferred over 3-jaw for concentricity and repeatability)
- Guide bushing (Swiss-type) for long, slender shafts
- Live center / tailstock support (for conventional lathes)
- Steady rest for longer shafts or heavier cuts
- Between-centers turning (less common but useful in certain grind-prep routes)
Table 6 — Workholding Options for Drone Motor Shafts
| Setup style | Best for | Pros | Cons |
|---|---|---|---|
| Collet-only | short shafts, stiff blanks | excellent concentricity | limited length support |
| Collet + tailstock | medium L/D shafts | reduces deflection | tailstock pressure can bend thin shafts |
| Swiss guide bushing | 2–4 mm shafts, long features | superb support at cut | requires Swiss machine + tuned process |
| Soft jaws | larger shafts with irregular end | flexible | repeatability depends on jaw quality |
A capable supplier offering CNC turning services for drone motor shafts should be comfortable discussing L/D ratio, support method, and how they protect surface finish during secondary operations.
8) Tolerance Strategy: Fits, GD&T, and What to Control
8.1 Fits: bearing seats and press fits
Shaft designs often require different fits for different interfaces:
- Bearing seat: typically clearance or transition fit depending on bearing type and thermal behavior
- Press-fit into rotor hub: often a controlled interference fit
Because drone motors can heat up during flight, thermal expansion and differential materials matter. For most steel shafts with standard bearings, engineers typically target a conservative, repeatable fit rather than an aggressive interference that risks bearing preload.
Table 7 — Typical Fit Targets (General Guidance, Must Match Your Design)
| Interface | Common intent | Practical manufacturing approach |
|---|---|---|
| Shaft to bearing inner ring | light clearance / transition | control diameter + roundness; consider grind |
| Shaft to rotor hub (press-fit) | controlled interference | stable diameter control, smooth finish, consistent chamfer |
8.2 GD&T: controlling what affects vibration
A shaft can meet diameter specs and still run poorly if geometric controls are missing. Useful GD&T callouts for shafts include:
- Total Runout on bearing seats relative to a datum axis
- Cylindricity on bearing seats (when you want form control without datums)
- Perpendicularity of shoulders to the datum axis
- Position of cross holes relative to the axis (when balance matters)
Table 8 — GD&T Controls That Map to Motor Performance
| Feature | Recommended control | Why it matters |
|---|---|---|
| Bearing seat Ø | total runout to datum axis | correlates strongly to vibration |
| Shaft axis | straightness | prevents rotor wobble |
| Shoulder face | perpendicularity | consistent axial bearing location |
| Groove | profile/position | retention reliability and fatigue strength |
| Cross hole | position | reduces imbalance and assembly drift |
Important drafting note: “Concentricity” is frequently misused on prints. In many cases, runout or position is a better functional control for turned shafts.
8.3 Where to be tight, where to be reasonable
Over-tolerancing drives cost and scrap. A practical shaft drawing typically sets:
- tight controls on bearing seats, press-fit zones, shoulders
- moderate tolerances on non-functional lengths and relief diameters
Table 9 — Tolerance Budgeting (Cost vs Benefit)
| Feature type | Suggested tolerance approach | Reason |
|---|---|---|
| bearing seat diameter + form | tight and inspectable | direct impact on bearing life |
| press-fit diameter | tight | sets assembly force and retention |
| non-functional OD | looser | reduces cycle time and inspection burden |
| overall length | only as tight as assembly needs | avoids unnecessary scrap |
| chamfers | defined range (e.g., C0.2–0.5) | prevents sharp edges without micromanaging |
9) Surface Finish, Edge Conditions, and Bearing Life
Even with correct fits, a rough bearing seat can reduce bearing life. A torn surface can create micro wear particles that accelerate failure. For high-quality CNC turning services for drone motor shafts, surface finish is treated as a controlled characteristic.
Surface finish targets (typical)
- Bearing seats often require a fine finish (commonly in the sub-micron Ra range depending on design).
- Press-fit surfaces also benefit from controlled finish to keep assembly force consistent and avoid galling.
Table 10 — Surface Finish and Functional Relevance
| Surface | Why it matters | Typical process to achieve |
|---|---|---|
| bearing seat | reduces wear and noise | OD grinding / superfinishing / fine turning (when allowed) |
| press-fit zone | consistent assembly force | fine turning or grinding + controlled chamfer |
| groove flanks | prevents crack initiation | controlled tool geometry + deburr |
| shaft ends | assembly protection | chamfer + deburr |
Edge conditioning: burr control is not cosmetic
Burrs on grooves and cross holes can:
- cut O-rings (if used)
- interfere with E-clips
- create stress risers
- contaminate bearings during assembly
A good print explicitly calls out:
- maximum burr height
- edge break specification
- deburr requirements for cross holes and grooves
10) Grooves, Cross Holes, Flats, Threads: Feature-Specific DFM
Motor shaft features are small, and “small” multiplies risk. Here are feature-specific manufacturing notes that matter in real production.
10.1 E-clip / circlip grooves
Groove geometry must match the retaining ring spec (width, diameter, corner radii). Sharp corners are fatigue magnets.
10.2 Cross holes
Cross holes are common for pins. Challenges include drill wander on slender shafts and burrs at exit.
Mitigations:
- use proper support close to drilling location
- use sharp tooling and controlled feed
- plan for deburr (mechanical, thermal, or manual depending on tolerance)
10.3 D-flats
D-flats are often machined with live tooling. Key is controlling the flat depth relative to the shaft axis.
10.4 Threads
If threads are functional and fatigue-sensitive, thread rolling can outperform single-point threading, but it has design constraints.
Table 11 — Feature DFM Checklist for Motor Shafts
| Feature | Common failure mode | DFM / machining remedy |
|---|---|---|
| E-clip groove | crack at sharp corner | add corner radius; verify groove tool |
| cross hole | burrs, drift | support; deburr plan; inspect position |
| D-flat | inconsistent depth | live tooling + datum strategy |
| thread | galling/weak roots | consider rolled threads; specify class |
| shoulder | bearing mislocation | perpendicularity and finish control |
11) Inspection & Quality: Roundness, Cylindricity, TIR, SPC
A shaft can “pass” a few caliper checks and still fail in the motor. Proper inspection focuses on characteristics that correlate with vibration and bearing performance.
11.1 Practical inspection stack
- Incoming material verification (heat/lot traceability when required)
- In-process checks (tool wear compensation; diameter trending)
- Final dimensional checks (micrometers, air gauges for seats)
- Form checks (roundness/cylindricity on critical seats)
- Runout checks (TIR relative to a controlled datum axis)
- Documentation: FAI, sampling plans, and SPC when scaling production
Table 12 — Inspection Methods Matched to Characteristics
| Characteristic | Recommended tool | Why |
|---|---|---|
| diameter (bearing seat) | air gauge / micrometer | fast, repeatable |
| shoulder-to-shoulder length | height gauge / CMM | reliable stack-up control |
| TIR runout | dial indicator + V-block / centers | correlates to vibration |
| roundness | roundness tester | detects lobing and form error |
| surface finish Ra | profilometer | confirms bearing compatibility |
| groove width/diameter | optical comparator / CMM | avoids retention failures |
11.2 SPC and capability (Cp/Cpk)
If you’re buying shafts in production volumes, ask for:
- a defined control plan on bearing-seat diameters
- evidence of stable process capability (Cpk targets depend on tolerance and risk)
- tool life management and offset control strategy
Table 13 — Example Control Plan Items (Production)
| CTQ item | Control method | Frequency | Reaction plan |
|---|---|---|---|
| bearing seat Ø | air gauge | every X pcs | adjust offset; quarantine drift |
| runout TIR | dial sweep | per lot / per setup | verify workholding; check tool wear |
| groove width | comparator | per lot | adjust grooving tool; deburr review |
| hardness (if HT) | Rockwell | per lot | hold shipment; re-certify |
12) Packaging, Handling, and Traceability for High-Spec Shafts
Precision shafts are easy to damage after machining. A single nick on a bearing seat can turn into a bearing killer.
Good handling practices:
- individual sleeves or partitioned trays
- rust protection where needed
- lot labeling with revision and heat treat batch
- controlled cleaning to remove abrasive debris
Table 14 — Packaging Requirements by Finish
| Finish/material | Main risk | Packaging recommendation |
|---|---|---|
| hardened steel | corrosion + nicks | rust inhibitor + partitioned trays |
| stainless | surface scratches | sleeves or compartment trays |
| ground bearing seats | micro scratches | no bulk-bagging; individual protection |
13) Cost Drivers and RFQ Checklist (Reusable)
Cost is shaped by what you ask the shop to control—and how.
Primary cost drivers for CNC turning services for drone motor shafts:
- tight tolerances on multiple diameters
- post-heat-treat grinding requirements
- form controls (roundness/cylindricity)
- micro features (tiny grooves, cross holes)
- inspection documentation level (FAI, SPC, traceability)
Table 15 — RFQ Checklist for Drone Motor Shafts
| RFQ item | What to provide | Why it speeds quoting and reduces risk |
|---|---|---|
| 2D drawing | PDF with dimensions + GD&T | defines functional controls |
| 3D model | STEP | reduces interpretation errors |
| material spec | alloy + condition | determines toolpath and HT route |
| heat treat | target hardness + method | impacts distortion and grind allowance |
| finish/coating | passivation/black oxide/plating | affects dimensions and corrosion behavior |
| quantities | prototype + production forecast | guides fixturing and capability planning |
| critical-to-quality list | top 5 CTQs | aligns inspection to real needs |
| packaging | protect bearing seats | prevents transit damage |
14) Three Production Case Studies (Shaft-Focused)
The following cases are representative industry scenarios. Details are presented in a way you can reuse for your own internal DFM conversations.
Case Study 1 — 3.00 mm Micro Shaft for FPV Outrunner: Swiss Turning + Runout Control
Application: Compact FPV outrunner motor with 3 mm shaft, high RPM, two miniature bearings.
Primary pain point: Early builds showed inconsistent vibration signatures even though the shaft diameters were within tolerance. The root cause was a combination of:
- small form errors (subtle lobing)
- inconsistent TIR between the bearing seats
Manufacturing strategy:
- Swiss-type turning with a guide bushing to stabilize the L/D ratio during cutting
- Controlled sequencing: finish critical bearing seats in a consistent thermal state
- Added a runout inspection step referencing a defined datum axis
Quality outputs:
- diameter trending records
- TIR runout check results per lot
- surface finish verification for bearing seats
Result: Vibration consistency improved, and bearing life became more predictable because the functional geometry—not only diameter—was controlled.
Case Study 2 — 5.00 mm Hardened Shaft for Heavy-Lift UAV Motor: Turn + Heat Treat + OD Grind
Application: Larger UAV motor with higher thrust loads; shaft requires high wear resistance and consistent bearing performance.
Primary pain point: When shafts were finish-turned and then heat treated, distortion pushed bearing seats out of spec and increased scrap rate.
Manufacturing strategy:
- Turn to leave a deliberate grind allowance on bearing seats
- Heat treat to target hardness
- Post-HT OD grinding for bearing seats and press-fit zones to achieve final size, form, and finish
- Shoulder faces controlled for perpendicularity to improve axial bearing location
Inspection plan:
- hardness check per heat lot
- air gauge checks on ground diameters
- sample roundness testing
Result: Scrap dropped significantly, and assembly behavior stabilized (press-fit force, bearing seating consistency).
Case Study 3 — Modular Shaft With Cross Hole + E-clip Groove: Burr-Control and Groove Integrity
Application: Shaft design with cross pin retention and E-clip groove for a modular rotor/hub architecture.
Primary pain point: Field failures traced to two manufacturing issues:
- burrs and sharp edges at cross-hole exits
- groove geometry variability affecting clip seating
Manufacturing strategy:
- Optimized drilling support and drill strategy to reduce burr formation
- Defined deburr method specifically for cross-hole exits
- Tightened groove tool control and added comparator inspection for groove width and diameter
- Specified edge breaks on groove transitions to reduce stress concentration
Result: Clip retention reliability improved, assembly became smoother, and field returns related to retention dropped.
15) Why JLYPT + How to Start Your Drone Motor Shaft Project
A good shaft supplier doesn’t just “hit the diameter.” They understand how your shaft behaves inside a rotating assembly, how heat treat changes geometry, and how to design an inspection plan that matches motor performance.
If you’re evaluating CNC turning services for drone motor shafts for prototypes or production, JLYPT can support custom UAV components with process planning, DFM feedback, and inspection documentation aligned to your CTQs.
Start here (internal link):
https://www.jlypt.com/custom-cnc-uav-parts-manufacturer/
Main site:
https://www.jlypt.com/
To accelerate quoting and avoid back-and-forth, send:
- STEP + 2D drawing with datums and CTQs called out
- material + heat treat targets (hardness range if applicable)
- annual volume estimate and pilot build quantity
- required inspection outputs (FAI, SPC, form measurement)
