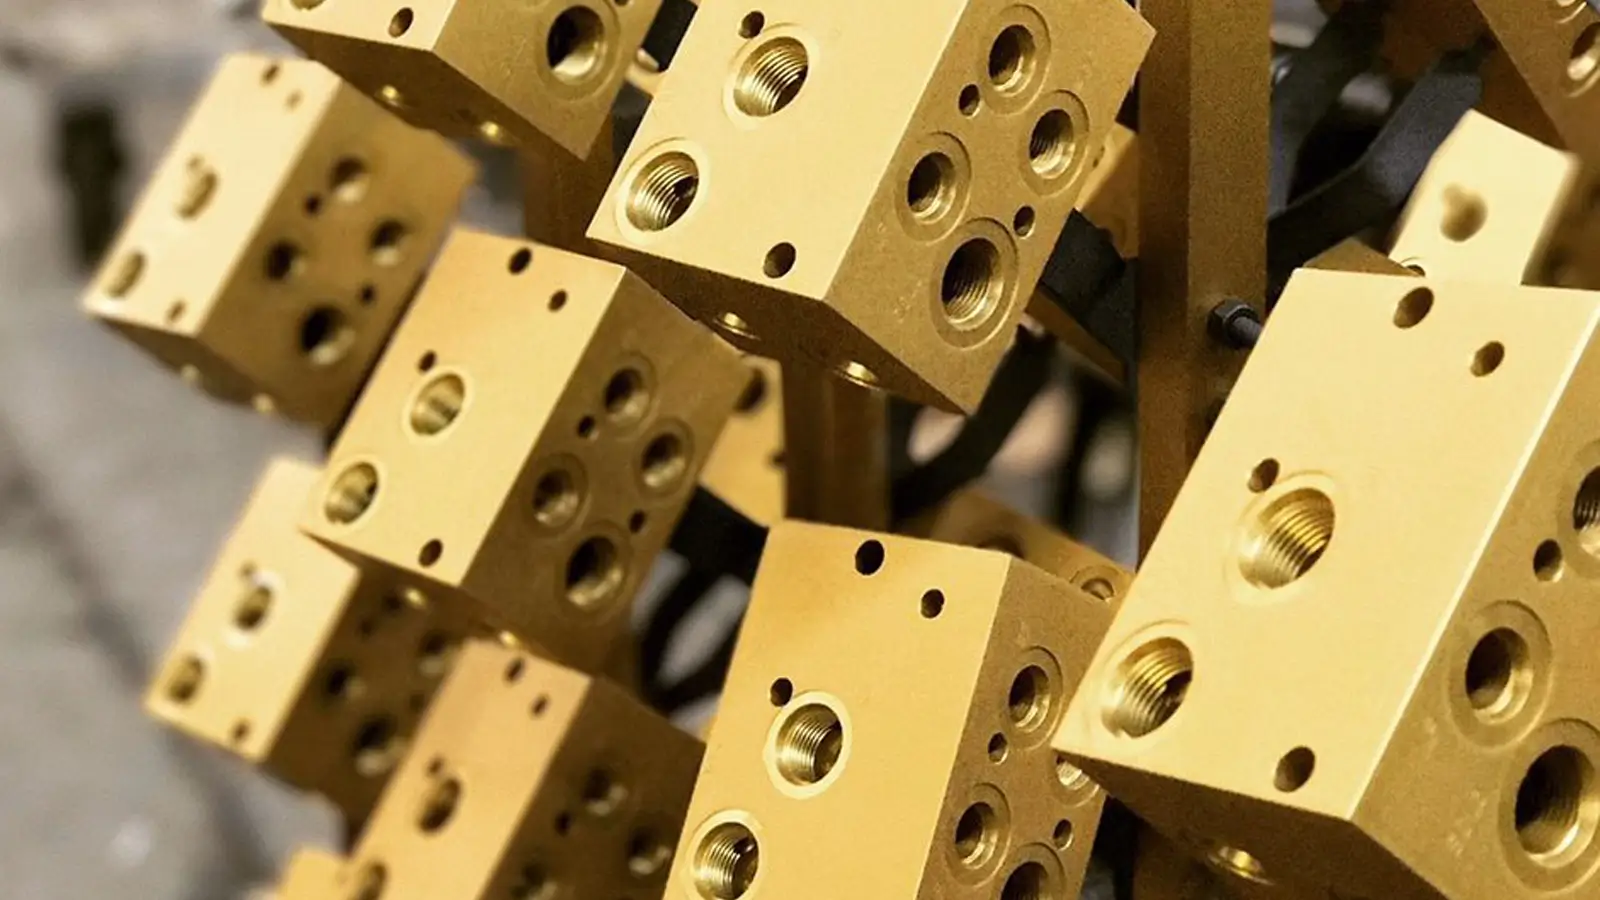
Drone Propeller Adapters CNC: The Machining-First Guide to Low Runout, Reliable Torque Transfer, and Production Repeatability
Propellers look simple. The interface between a propeller and a motor shaft is not.
In real flight conditions, the propeller interface is one of the most punishing mechanical joints on a drone: high RPM, cyclic loads, frequent starts/stops, temperature changes, and vibration that can amplify any geometric error. A small eccentricity at the hub becomes a large tip displacement at the blade. A thread that feels “fine” by hand can loosen after a few minutes of resonance. A nice-looking adapter can still cause motor bearing wear if coaxiality is uncontrolled.
That’s why Drone propeller adapters CNC manufacturing is not just about “making a round part.” It is about controlling runout, preserving concentricity after finishing, ensuring predictable clamping, and maintaining repeatable datums from prototype to production.
This long-form, machining-focused article explains how to design and build CNC-machined propeller adapters that behave like real precision components. It covers adapter styles, materials, CNC turning and mill-turn process planning, GD&T strategy, inspection methods, surface finish impacts (especially anodize growth), and the cost drivers that determine whether your part quotes smoothly—or becomes a rework magnet.
If you want to discuss a specific adapter geometry or request manufacturing support from prototype to production, start here:
https://www.jlypt.com/custom-cnc-uav-parts-manufacturer/
Table of Contents
- Why Drone Propeller Adapters Fail (and How CNC Prevents It)
- Drone propeller adapters CNC: Common Adapter Types and When to Use Each
- Functional Requirements: Runout, Torque Transfer, Balance, and Serviceability
- CNC Process Options: Turning, Mill‑Turn, 4‑Axis, Secondary Ops
- Material Selection for Prop Adapters (6061 vs 7075 vs Ti vs Stainless)
- Interfaces and Fits: Shaft, Bore, Taper, Key Flats, Splines
- Threads, Clamps, and Anti-Loosening Strategies
- GD&T That Helps (Coaxiality, Position, Perpendicularity)
- Surface Finishes and Dimensional Change (Anodize, Hardcoat, Passivation)
- Workholding and Toolpath Strategy to Control Runout
- Inspection Plans: Runout Setup, CMM Reports, Balance Verification
- Detailed Engineering Tables (DFM, tolerances, process routing, QC gates)
- Three Case Studies (Prototype → Pilot Run → Production)
- Why JLYPT for Drone propeller adapters CNC
- Standards & Metrology Links (DoFollow)
1) Why Propeller Adapters Fail (and Why CNC Details Matter)
The propeller adapter sits at the exact point where errors are punished. Common failure modes cluster into four groups:
1.1 Geometry-related failures
- Excessive radial runout at the prop seat
- Angular misalignment between the prop seating face and the shaft axis
- Bolt circle position error causing assembly stress or warped props
- Poor surface contact leading to micro-slip and fretting
1.2 Joint integrity failures
- Set screws that brinell the shaft or loosen under vibration
- Clamp interfaces that don’t generate enough normal force
- Threads that gall, bind, or strip—especially after anodizing
1.3 Material/finish-related failures
- Soft alloys that deform at the clamp split
- Hardcoat build that changes the fit and shifts concentricity
- Corrosion or galvanic interaction at mixed-metal joints
1.4 Inspection gaps
- Parts that are “within dimensions” but still run out because datums were chosen poorly
- No verification after finishing
- No functional runout measurement—only calipers and hope
A capable Drone propeller adapters CNC supplier plans around those failure modes from the first operation: datums, workholding, toolpaths, finishing allowances, and inspection sequencing.
2) Drone propeller adapters CNC: Adapter Styles and Best Use Cases
Different drones and motor/prop combinations require different adapter architectures. The “right” adapter is the one that centers reliably, transfers torque without slipping, and remains serviceable.
Table 1 — Prop Adapter Types Used in Drone propeller adapters CNC Projects
| Adapter style | How it centers | Torque transfer | Best for | Risks if designed poorly |
|---|---|---|---|---|
| Set-screw adapter | typically by bore fit (sometimes loose) | screw point friction + local indentation | quick prototypes, light loads | shaft damage, loosening, high runout variability |
| Clamp-style collet adapter | bore + clamping uniformity | friction over larger area | high RPM, frequent swaps | split design cracks, uneven clamp if slit geometry wrong |
| Taper-seat adapter | taper contact (self-centering) | taper friction + axial preload | low runout priority | finish build changes taper engagement |
| Bolt-on hub adapter | bolt circle + pilot diameter | bolts + pilot friction | heavier props/payload drones | bolt circle tolerance stack-up |
| Integrated prop hub (custom) | controlled pilot + face | robust; design-specific | production builds | higher cost; needs strict datums |
| Dual-interface (pilot + taper) | pilot + taper | high torque, high repeatability | demanding vibration environments | machining complexity; inspection must match |
When people search Drone propeller adapters CNC, they usually want one of two outcomes:
- reduce vibration (runout + balance), or
- stop loosening/slip (joint design + finish + torque seats).
This guide targets both.
3) Functional Requirements: What “Good” Looks Like at 8,000–20,000 RPM
Before discussing machining, define what matters functionally. For prop adapters, the most important requirements are:
3.1 Runout and concentricity (the vibration multiplier)
Runout is not abstract. A small eccentricity at the hub becomes significant at the blade tips. Lower runout reduces:
- vibration amplitude
- IMU noise and control oscillation
- fastener loosening
- bearing wear
- fatigue in frames and mounts
3.2 Axial face squareness (prop seat stability)
If the seating face is not perpendicular to the axis of rotation, the propeller can “wobble,” even if the bore is close.
3.3 Torque transfer (avoid micro-slip)
A joint that micro-slips under changing load will:
- heat up locally
- wear the shaft/adapter
- loosen over time
- introduce unpredictable runout as surfaces fret
3.4 Serviceability
Adapters are removed and installed repeatedly. Design must consider:
- thread life (especially in aluminum)
- consistent torque seats
- avoidance of damage during field maintenance
4) CNC Process Options for Drone Propeller Adapters CNC
Most prop adapters are rotational parts, so the backbone process is turning. The differentiator is how you integrate cross-holes, bolt circles, key flats, and split-clamp features.
4.1 CNC Turning (2‑axis) — fast and stable for coaxial features
Best when:
- geometry is mostly cylindrical
- you need high-quality bores, faces, and threads
- you want excellent coaxial control in one chucking
4.2 Mill‑Turn with Live Tooling — the production sweet spot
Best when:
- you need bolt circles, radial holes, drive flats, engraving, or slots
- you want to avoid moving the part to a mill (reducing datum stack-up)
- you want consistent relationships between the turned axis and milled features
4.3 Secondary milling / 4‑axis indexing — for split clamps and complex hubs
Best when:
- the adapter includes a clamp split, pinch ears, or asymmetric features
- you need strict positional tolerance relative to the turned axis
- you want optimized deburring and edge control
Table 2 — Process Selection Map for Drone propeller adapters CNC
| Design requirement | Recommended route | Why it works |
|---|---|---|
| tight bore-to-face relationship | turning in one setup | minimizes re-chucking error |
| bolt circle + pilot diameter | mill-turn | bolt pattern kept true to spindle axis |
| clamp split and pinch screw bosses | mill-turn + secondary mill | best tool access + deburr control |
| taper + pilot + thread | turning + thread milling | controlled geometry + thread quality |
| ultra-low runout demand | soft jaws + finish in one chucking | protects coaxial stack |
5) Material Selection for Drone Propeller Adapters CNC
Material selection is not a brand preference. It is engineering trade space: strength-to-weight, machinability, fatigue behavior, corrosion, finish compatibility, and how threads behave after repeated service cycles.
Table 3 — Materials Common in Drone propeller adapters CNC Manufacturing
| Material | Typical use | Pros | Cautions | Finish compatibility |
|---|---|---|---|---|
| 6061‑T6 Aluminum | general adapters, prototypes | stable machining, good corrosion resistance, cost-effective | lower strength at clamp ears | Type II/III anodize, conversion coat |
| 7075‑T6 Aluminum | high-load hubs, clamp adapters | high strength-to-weight, better fatigue than 6061 for many designs | slightly more sensitive to stress concentrations | Type II/III anodize (plan tolerances) |
| Titanium (selected grades) | compact high-torque adapters | excellent strength, corrosion resistance | slower machining, tool wear, cost | passivation/coatings; less typical anodize approach |
| 17‑4PH Stainless | wear parts, threaded hubs | strength, thread durability | heavier; machining requires good chip control | passivation |
| 303/304/316 Stainless | corrosion-heavy environments | corrosion performance | weight penalty; galling risk | passivation |
| Engineering polymers (POM/PEEK) | isolating bushings | vibration isolation, galvanic break | creep under load | typically no coating |
For many production drones, 7075‑T6 becomes the default when you need clamp integrity and reduced deformation at high preload. For lightweight prototypes, 6061‑T6 is often adequate and economical.
6) Interfaces and Fits: Shaft, Bore, Taper, and Pilot Diameters
Adapters exist to reconcile mismatched interfaces:
- motor shaft diameter (e.g., 3 mm / 4 mm / 5 mm / 6 mm / 8 mm)
- propeller bore diameter (varies by prop ecosystem)
- prop hub geometry (flat, tapered, bolt-on)
6.1 Bore fit strategies (practical machining view)
- Slip fit: easier assembly, but centering depends on other features (taper/pilot)
- Transition fit: improved concentricity; assembly may require controlled force
- Interference fit: rarely ideal for field service unless it’s a permanent hub
6.2 Pilot diameters and locating bosses
A pilot diameter that locates the prop (or prop plate) reduces dependence on screw torque to “find center.” If you rely on bolts to locate, you risk positional variation and stress.
6.3 Taper interfaces (self-centering, finish-sensitive)
A taper seat can give excellent centering—if you plan:
- toolpath for taper finish
- surface finish targets
- finish build allowances if anodized
- inspection method that verifies contact geometry, not just diameters
Table 4 — Interface Strategy for Drone propeller adapters CNC
| Interface feature | Function | Machining priority | Inspection suggestion |
|---|---|---|---|
| pilot diameter | repeatable centering | finish-turn in final chucking | mic + runout check on pilot |
| seating face | axial stability | finish-face late, protect from dings | perpendicularity/runout check |
| shaft bore | torque transfer + centering | ream/finish-bore, control roundness | bore gauge + runout on arbor |
| taper | self-centering | controlled taper pass + surface finish | taper gauge / contact check |
| bolt circle | retention | position tolerance to spindle datum | CMM position report |
7) Threads, Clamps, Set Screws, and Anti-Loosening Design
A prop adapter is a joint under vibration. Anti-loosening is mostly design-driven; machining can support it by producing consistent seats and threads.
7.1 Thread creation options
- Rigid tapping: fast, good in aluminum with correct hole size
- Thread milling: better control, cleaner thread, ideal for difficult materials
- Single-point threading: useful for external threads with tight control
- Thread inserts: useful when aluminum threads are frequently cycled
7.2 Clamp split geometry (common CNC pitfalls)
Clamp adapters fail when:
- split is too thin or has sharp corners → crack initiation
- pinch screw seat is not flat → uneven clamp
- slit ends are not stress-relieved with drilled relief features
- surface finish is too rough → clamp stick-slip and inconsistent preload
7.3 Set screw considerations (if you must use them)
If a set screw is unavoidable:
- use a controlled flat on shaft contact area (design side)
- ensure screw point style is appropriate
- avoid “random” contact that indents the shaft and creates imbalance
Table 5 — Anti-Loosening Features for Drone propeller adapters CNC
| Problem | Root cause | Better design feature | CNC / QC action |
|---|---|---|---|
| set screw loosens | insufficient friction + vibration | clamp hub or taper interface | verify clamp gap + seat finish |
| prop wobbles | face not perpendicular or pilot off | datum-controlled seat + pilot | measure axial runout on arbor |
| thread strips in Al | repeated service cycles | inserts or thread milling | go/no-go + torque test sample |
| bolts back out | uneven seat, burrs | spotfaces + controlled edge break | deburr spec + seat inspection |
8) GD&T for Drone propeller adapters CNC (What to Control, What to Relax)
Prop adapters don’t need “everything tight.” They need the correct features controlled to the correct datums—so machining and inspection are both straightforward.
8.1 Recommended datum scheme (typical)
- Datum A: shaft bore axis (primary rotational datum)
- Datum B: prop seating face (controls axial location)
- Datum C: a key flat or bolt hole (controls clocking if needed)
8.2 Controls that matter most
- Coaxiality / runout of pilot and seating features to bore axis
- Perpendicularity of seating face to bore axis
- True position of bolt circle to bore axis
- Profile of taper if used
GD&T reference standards (helpful for consistent language):
Table 6 — GD&T-to-Function Map for Drone propeller adapters CNC
| Feature | Function | Suggested GD&T | Why it helps |
|---|---|---|---|
| bore axis | rotational reference | cylindricity (if needed) | stable datum for everything else |
| pilot diameter | centering | circular runout to datum A | reduces vibration |
| seating face | axial stability | perpendicularity to datum A | minimizes wobble |
| bolt circle | retention + symmetry | true position to datum A | consistent assembly |
| taper | self-centering | profile to datum A | predictable contact geometry |
9) Surface Finishes: Dimensional Change and Wear Behavior
Finishing is where “perfect in machining” can become “tight in assembly.” This is especially true with anodizing.
9.1 Anodize planning (finish-aware tolerancing)
Anodize grows from the surface; part of the layer is build-up. That means:
- bores can shrink
- pilots can grow
- tapers can shift contact position
- thread feel can change
9.2 Where hard anodize helps (and where it hurts)
Hard anodize can be excellent for wear surfaces (tapers, pilots, clamp contact areas) but demands:
- controlled pre-finish dimensions
- masking plan for critical fits if necessary
- post-finish verification for CTQs
9.3 Stainless passivation
For stainless adapters, passivation supports corrosion resistance without the same dimensional buildup concerns.
Balance quality background (useful when discussing vibration targets):
Table 7 — Finish Strategy for Drone propeller adapters CNC
| Finish | Best use | Dimensional risk | Notes |
|---|---|---|---|
| Type II anodize | general corrosion resistance | medium | good for general hubs; plan fits |
| Type III hard anodize | wear interfaces | high | must be tolerance-planned |
| conversion coat | conductivity needs | low | not typical for prop hubs unless grounding required |
| passivation | stainless adapters | minimal | corrosion resistance without build-up |
10) Workholding and Toolpath Strategy to Control Runout
If your goal is low runout, the worst decision is to “just flip it and hope.” For Drone propeller adapters CNC, the top runout killers are re-chucking error, distorted clamping, and finishing after the datum is lost.
10.1 Workholding tactics that protect coaxiality
- machine critical diameters and faces in one chucking where possible
- use soft jaws bored to the part for a repeatable nest
- use collet workholding for small adapters to reduce jaw distortion
- avoid over-clamping thin-wall clamp hubs (they distort, then spring back wrong)
10.2 Toolpath details that matter (not marketing)
- finish pass with stable engagement and controlled feed
- avoid tool deflection on long boring bars
- consider a dedicated finishing tool for the bore and pilot
- use consistent approach for tapers to avoid scallops
Table 8 — Runout Control Checklist (Drone propeller adapters CNC)
| Potential runout source | What happens | Prevention strategy |
|---|---|---|
| re-chucking between ops | axis shifts | mill-turn integration or one-setup finish |
| jaw distortion on thin hubs | bore becomes tri-lobed | collet/soft jaws + controlled clamp force |
| anodize build | fit changes | finish-aware dimension planning + post-finish check |
| burrs on seat | prop rocks | deburr spec + 100% seat inspection for early lots |
| threaded pull-up misalignment | prop “finds” new center | pilot diameter + controlled bolt circle |
11) Inspection Plans: Runout, CMM, and Balance Verification
A strong inspection plan is not a pile of measurements. It’s the minimum set of checks that catches the failures that matter.
11.1 Runout measurement setup (practical)
Common approach:
- use a datum arbor that represents the motor shaft
- mount adapter to arbor with the correct clamping method
- measure radial runout on pilot diameter
- measure axial runout on seating face
- record results pre- and post-finish when coatings are used
11.2 CMM where it adds real value
CMM is most valuable for:
- bolt circle true position relative to bore axis
- perpendicularity/flatness on critical faces
- profile evaluation on taper geometry (if specified)
Metrology background reference:
11.3 Balance: what you can (and can’t) guarantee
Balancing is a system property (prop + adapter + fasteners). But a good adapter helps by:
- being symmetric
- controlling runout so the prop runs true
- maintaining consistent mass distribution (avoid asymmetric machining unless necessary)
Table 9 — Inspection Plan Template for Drone propeller adapters CNC
| CTQ feature | Measurement tool | When to check | Typical action limit |
|---|---|---|---|
| pilot radial runout | dial indicator on arbor | pre-finish + post-finish | set per RPM/vibration target |
| seat axial runout | dial indicator | pre-finish | tighter than general face tolerance |
| bore size | bore gauge / plug | pre-finish | fit-driven |
| bolt circle position | CMM | first article + sampling | per true position spec |
| thread quality | go/no-go gauge | 100% for critical threads | functional acceptance |
| clamp gap | feeler / optical | early lots | ensures clamp range |
12) Detailed Engineering Tables (DFM, Tolerances, Process Routing, QC Gates)
Table 10 — DFM Guidelines for Drone propeller adapters CNC
| DFM item | Common mistake | Better practice | Result |
|---|---|---|---|
| sharp internal corners at split ends | crack initiation | relief hole / generous fillet | improved fatigue life |
| ultra-thin clamp ears | distortion | thicker ears + controlled slit | stable clamping |
| no pilot diameter | bolts “locate” prop | add pilot + face datum | better repeatability |
| tight tolerances everywhere | cost + inspection overload | tighten only CTQs | faster quoting, fewer disputes |
| no finish plan | post-anodize assembly issues | finish-aware dimensions | fewer reworks |
Table 11 — Practical Tolerance Targets (Conceptual Guidance)
(Final targets depend on motor/prop system, RPM, and vibration requirements.)
| Feature | Typical priority | Notes for CNC planning |
|---|---|---|
| bore-to-pilot coaxiality | highest | finish in one chucking if possible |
| seat face perpendicularity | very high | finish-face after boring to datum axis |
| bolt circle true position | high | mill-turn reduces stack-up |
| cosmetic OD | low | use general tolerances |
| engraving/marking | low | do after CTQs to avoid handling damage |
Table 12 — Example Process Routing (Mill‑Turn Clamp Adapter, 7075‑T6)
| Op | Process step | Machine | Key control | Output |
|---|---|---|---|---|
| 10 | saw cut + material ID | prep | traceability | blank ready |
| 20 | rough turn OD + face | CNC lathe | stable chucking | stock cleaned |
| 30 | bore shaft interface | CNC lathe | bore finish + roundness | datum axis established |
| 40 | finish turn pilot + seat face | CNC lathe | runout-focused finishing | CTQ surfaces finished |
| 50 | live-tool drill bolt circle | mill-turn | position to datum axis | bolt holes complete |
| 60 | mill flats / features | mill-turn | orientation control | anti-rotation features |
| 70 | mill clamp split + relief | VMC or mill-turn | edge control | clamp functionality |
| 80 | deburr + edge break | manual + spec | burr-free seats | safe assembly |
| 90 | anodize / hardcoat | finishing | masking (if needed) | wear/corrosion protection |
| 100 | final inspection | CMM + runout setup | CTQ report | ship-ready |
Table 13 — QC Gates That Prevent Costly Scrap
| Gate | Check | Why it matters |
|---|---|---|
| after bore finish | bore size + roundness | establishes datum axis quality |
| after seat face finish | axial runout | catches wobble early |
| pre-finish audit | CTQs before anodize | avoids coating scrap |
| post-finish verification | fit + runout | ensures assembly success |
| packaging audit | protection of seating faces | prevents shipping damage |
13) Three Case Studies (Realistic, Machining-Centric)
Case Study 1 — 7075‑T6 Clamp-Style Adapter for High RPM (Mill‑Turn + Type II Anodize)
Problem: A quadcopter platform showed vibration spikes after prop swaps. Props were fine; the adapter runout varied between batches.
Key requirements
- improved repeatability after repeated installations
- consistent clamp behavior without shaft damage
- stable runout performance after anodizing
Machining strategy
- establish datum on the bore first; finish the pilot and seating face in the same chucking
- move bolt-circle drilling to live-tool mill-turn to lock position to spindle axis
- add controlled relief geometry at the split ends to reduce stress concentration
- implement a defined edge-break spec on seating and pilot transitions to remove micro-burrs
Inspection
- runout check on datum arbor (pilot + seat) pre- and post-anodize
- CMM check for bolt circle true position on first article, then sampling after stability
Outcome A clamp adapter built with a runout-first process plan behaves like a precision component—not a generic spacer. This is the practical value of Drone propeller adapters CNC done correctly: stable vibration performance across installations.
Case Study 2 — Taper-Centering Adapter with Hard Anodize (7075‑T6, Finish-Aware Tolerancing)
Problem: A taper-seat design delivered excellent centering in bare metal, but became tight and inconsistent after hard anodize.
Key requirements
- keep the self-centering taper concept
- preserve assembly feel after hard anodize
- maintain repeatable axial seating
Machining strategy
- refine taper toolpath and surface finish target to avoid scallops that “telegraph” through coating
- plan pre-finish taper dimensions with coating build in mind
- mask select areas only if needed for functional fits (design-dependent)
Inspection
- taper contact check (functional approach) plus axial runout measurement
- post-finish verification emphasized on taper and pilot, not cosmetic diameters
Outcome Hard anodize can be a win for wear, but it must be designed into the tolerance strategy. This case highlights how Drone propeller adapters CNC work is often about managing the machining–finish–inspection chain as one system.
Case Study 3 — Stainless (17‑4PH) Bolt-On Hub Adapter for Heavy Props (Thread Durability + Positional Control)
Problem: A heavier-lift drone used bolt-on prop hubs with repeated field servicing. Aluminum threads wore quickly, and bolt circle alignment issues caused assembly stress.
Key requirements
- improved thread life and wear resistance
- consistent bolt circle true position to minimize assembly stress
- corrosion resistance for outdoor operation
Machining strategy
- move to 17‑4PH stainless for threaded durability (program-driven)
- use mill-turn to drill/ream bolt pattern relative to bore axis in one controlled process
- specify controlled spotfaces to ensure uniform bolt seating torque
Inspection
- CMM bolt circle report for first article
- go/no-go thread gauging 100% on critical threads
- runout verification on pilot/seat interface to keep vibration controlled
Outcome Weight increased versus aluminum, but thread performance and reliability improved significantly. This is a common trade in Drone propeller adapters CNC when service cycles and joint integrity are the dominant risks.
14) Why JLYPT for Drone propeller adapters CNC
A prop adapter is small, but it sits at the center of your vibration and reliability chain. The difference between “machined” and “engineered” is whether the supplier understands:
- how to build datums around the rotational axis
- how to reduce re-chucking and stack-up with mill-turn planning
- how to manage anodize/hardcoat dimensional change
- how to inspect what matters (runout, perpendicularity, bolt circle position)
- how to scale from prototype to consistent lots
JLYPT supports custom UAV components and machining programs here:
https://www.jlypt.com/custom-cnc-uav-parts-manufacturer/
You can also explore general CNC manufacturing capabilities here:
https://www.jlypt.com/