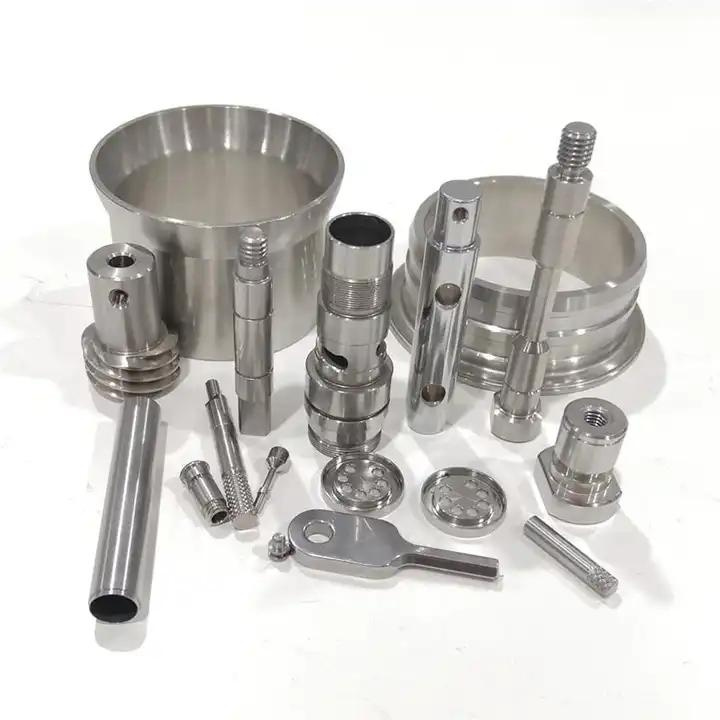
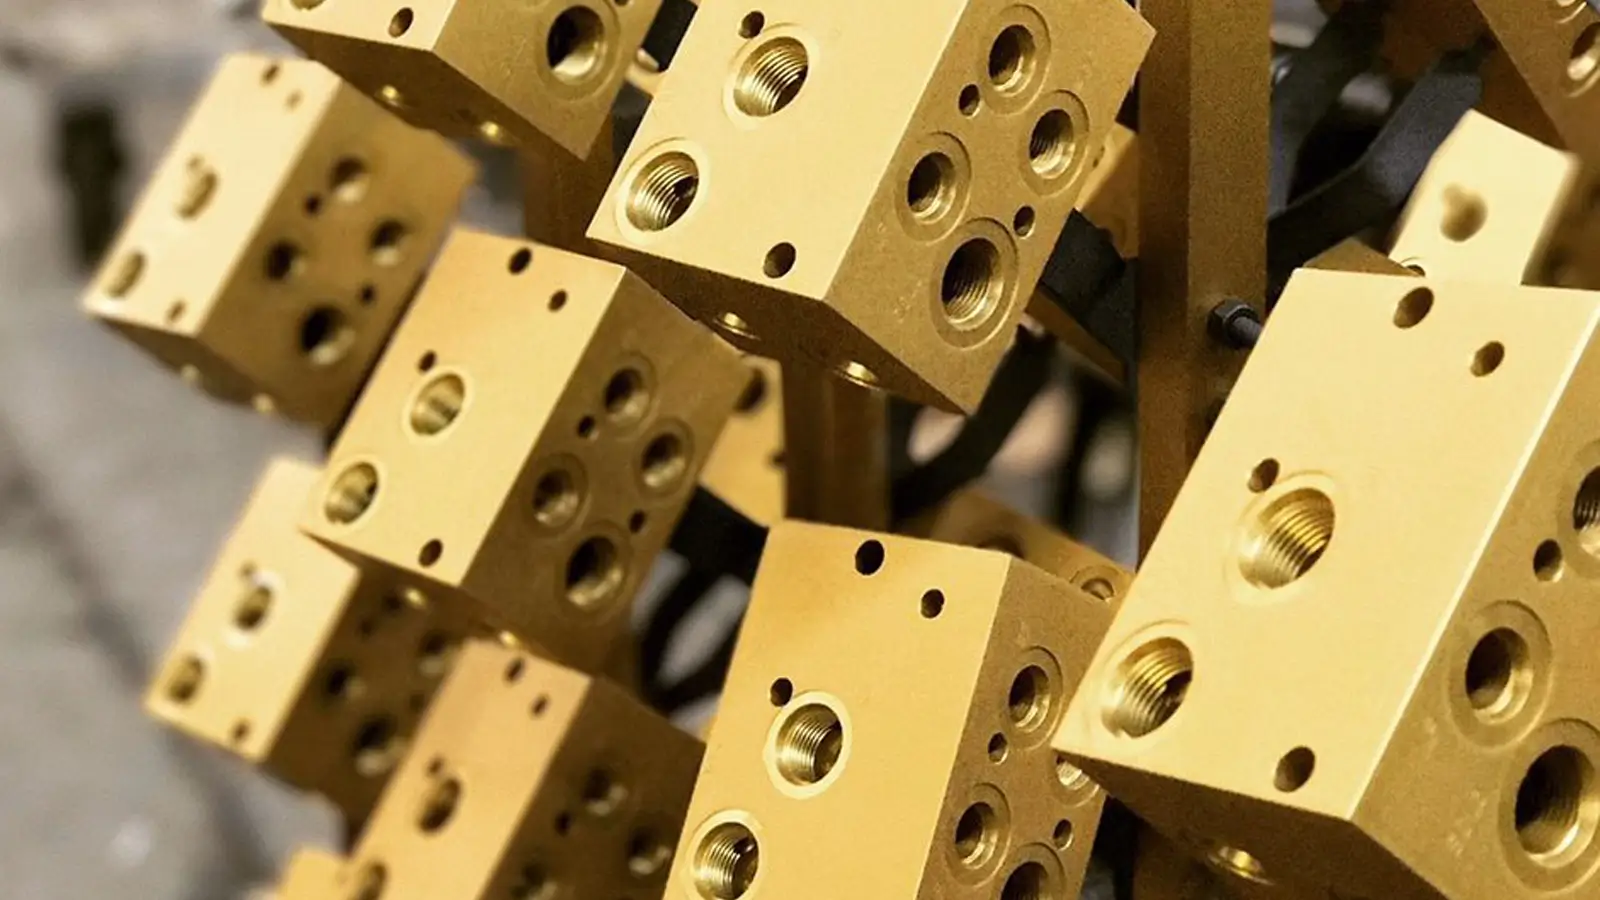
CNC Surface Finishing Services: How to Specify, Control Tolerances, and Get a Fast Surface Finishing Quote
A “surface finishing quote” should never be a guessing game. If your RFQ only says “anodize black” or “powder coat” without defining thickness intent, masking boundaries, cosmetic faces, and inspection expectations, you’ll get one of two outcomes:
- A quote padded with assumptions (higher cost, longer lead time), or
- A low quote that turns into delays and ECO-like back-and-forth once the shop discovers fit problems after finishing.
This article is a practical guide to CNC surface finishing services for machined parts—written for people who release drawings, approve first articles, and own assembly performance. It focuses on how finishes interact with:
- Tolerances and fits (press fits, slip fits, datum schemes, GD&T)
- Threads (gaging after finish, torque variation, galling risk)
- Masking (what must stay bare, conductive, or dimensionally unchanged)
- Cosmetics (A-side/B-side, rack mark zones, tool mark expectations)
- Inspection planning (what is measurable, what is visual, what is subjective)
- RFQ structure (the minimum information needed for accurate quoting)
JLYPT is a CNC machining supplier that supports finishing workflows for production-ready parts. If your job includes aluminum anodizing, you can reference and inquire here (internal link):
https://www.jlypt.com/custom-aluminum-anodizing-services/
Why CNC surface finishing services must be specified like a manufacturing operation (not a “color choice”)
Surface finishing is often treated as a cosmetic selection. In reality, many finishes are dimensional processes with side effects you must design around:
- Coating thickness changes feature size
- Current density / line-of-sight effects can shift thickness distribution
- Racking/contact points can create controlled defects (marks) in unavoidable locations
- Surface preparation changes texture (and therefore appearance)
- Post-treatment sealing/curing can affect hardness, porosity, and adhesion behavior
A good specification makes the finish predictable. A good surface finishing quote is simply the cost of executing that predictability.
CNC surface finishing services: the quote drivers (what changes price, yield, and lead time)
Before you pick a finish, it helps to understand what actually drives quoting. The same finish name can be cheap or expensive depending on geometry, masking, cosmetic standards, and reporting requirements.
Table 1 — What drives a surface finishing quote (and how to control it)
| Quote driver | What the finisher must do | Why it increases cost/risk | What to provide to reduce uncertainty |
|---|---|---|---|
| Masking complexity | Apply plugs/tapes/fixtures; verify mask integrity | Labor + rework risk on leaks | A marked masking map tied to datums |
| Tight tolerance interfaces | Control buildup on fits and threads | Scrap risk, extra inspection | Identify fit surfaces; specify “no-coat” zones |
| Cosmetic requirements | Manage handling, racking, packaging | Higher reject risk | A-side/B-side definition + acceptance criteria |
| Color matching | Control batches, process windows | Variation across lots/alloys | Define color system or provide a master sample approval plan |
| Material/alloy differences | Adjust process settings | Appearance shifts, thickness behavior | State exact alloy/temper and any mixed-alloy assemblies |
| Geometry (deep bores, pockets) | Deal with coverage limitations | Thin areas, uneven coating | Flag deep features; accept limitations or redesign |
| Reporting/cert packs | Document process and inspection | Adds time and cost | Only request documentation you truly need |
| Post-finish processing | Deburr, chase threads, lap, or re-machine | Extra operations | Decide whether you allow post-finish sizing or require masking instead |
If you want consistent assembly performance, your goal is not “the cheapest finish.” Your goal is a finish definition that protects critical geometry and makes acceptance measurable.
How to choose CNC surface finishing services by function (not by habit)
Engineers usually need one or more of the following: corrosion resistance, wear resistance, conductivity, paint adhesion, cleanability, or cosmetics. Start there.
Table 2 — Finish selection by engineering objective (screening level)
| Primary objective | Common finish families | Typical base materials | Notes for CNC-machined geometry |
|---|---|---|---|
| Corrosion resistance | Anodizing, conversion coating, passivation, metallic plating, paint/powder systems | Aluminum, stainless, steel | Corrosion spec should match environment; avoid vague “corrosion resistant” notes |
| Wear resistance | Hard anodize, certain plating routes (application-dependent) | Aluminum, steel | Wear surfaces should be clearly identified and measured post-finish |
| Electrical conductivity | Conductive conversion coating, masked contact pads | Aluminum, steel | Many decorative/corrosion finishes are insulating; define bonding areas |
| Paint/powder adhesion | Pretreatment + topcoat | Aluminum, steel | Pretreatment quality often governs adhesion; specify the system intent |
| Cleanability | Electropolish (stainless), controlled roughness + passivation | Stainless | Specify the final surface requirement rather than “polish” |
| Cosmetics | Anodize (with prep), powder coat, controlled blast/brush | Aluminum, steel | Cosmetic acceptance must be explicit: faces, viewing distance, allowable marks |
CNC surface finishing services and dimensional control: thickness buildup is a design variable
If a coating adds thickness, you have to decide where that thickness is allowed to live. Otherwise, the finish will “spend” your tolerance budget randomly.
A few practical realities that affect CNC parts:
- IDs shrink when coated (bores, slots, internal threads)
- ODs grow when coated (shafts, bosses, external threads)
- Edges can behave differently than flats (edge thinning, edge burning, chipping risk)
- Datums change if your inspection plan references post-finish surfaces
Table 3 — Where thickness causes the most assembly failures
| Feature | Typical failure after finish | Why it happens | Best control method |
|---|---|---|---|
| Press-fit bore | Interference increases; bearing won’t seat | ID reduction from buildup | Mask bore or define post-finish sizing strategy |
| Slip-fit alignment hole | Fit becomes tight; assembly force increases | Small clearance consumed by coating | Mask or adjust nominal to account for finish |
| Internal thread | Go gage fails; high torque | Pitch diameter shifts with buildup | Mask threads or require gaging “after finish” |
| External thread | Nut binds; galling risk | Crest/root geometry shifts | Mask or specify functional class after finish |
| Datum surfaces | Measurement disagreement | Datum defined pre-finish but measured post-finish (or vice versa) | State whether datums are pre- or post-finish surfaces |
| Sealing land | Leak path or chipping | Thickness/texture changes | Mask sealing land and specify roughness if needed |
The most effective way to protect fits is not “tightening machining tolerances.” It’s intelligent masking and clear “after finish” acceptance rules.
Masking is not optional: it is part of CNC surface finishing services engineering
Masking is the most underestimated line item in a surface finishing quote. It’s also one of the most powerful ways to prevent assembly issues.
A good masking plan is:
- Visual (drawing highlight or separate masking map)
- Referenced to datums
- Specific about edges (where the mask line is allowed)
- Consistent with inspection (critical surfaces remain measurable)
Table 4 — Masking plan checklist (use this before quoting)
| Surface/feature | Mask? (often) | Reason | How to communicate it clearly |
|---|---|---|---|
| Internal threads | Yes | Preserve thread class and gaging | “MASK all internal threads” + call out thread IDs |
| External threads | Yes | Prevent assembly torque drift | Mark thread zone length and start datum |
| Fit bores / dowel holes | Yes | Preserve tolerance and roundness | “NO COATING” callout with feature IDs |
| Electrical bonding pads | Yes (or conductive finish) | Maintain conductivity | Mark pad boundaries by datum dimensions |
| Sealing lands | Yes | Avoid leaks/chipping | Identify face and define allowable mask boundary |
| Precision datums | Often | Stabilize CMM plan | Note: “Datums A/B/C are as-machined (uncoated)” |
| Cosmetic faces | No (but protect) | Ensure appearance | Define A-side and handling requirements |
What to put on the drawing: finish callouts that survive production
A finishing note must be specific enough to prevent “shop interpretation,” while still manufacturable. The most reliable notes are structured and repeatable.
Table 5 — Finish callout building blocks (use as a template)
| Callout element | What to specify | Why it matters for CNC parts |
|---|---|---|
| Process name | Anodize / conversion coat / passivate / plate / black oxide / powder coat | Prevents accidental substitutions |
| Applicable standard | Your program’s required standard/spec | Aligns chemistry and acceptance |
| Type/Class (if used) | Defines performance category | Avoids mismatched “similar” finishes |
| Thickness intent | Minimum/target/range as required | Enables tolerance planning and inspection |
| Color/appearance | Color definition + acceptance plan | Stabilizes cosmetics across batches |
| Masking requirements | “No-coat” zones and boundaries | Protects fits, threads, datums, bonding |
| Cosmetic definition | A-side/B-side + rack mark allowance | Reduces subjective rejections |
| Inspection/reporting | Thickness checks, certs, sampling | Avoids overpaying for unnecessary reports |
If you can’t measure it, you can’t control it. Replace vague terms like “nice finish” or “no scratches” with: cosmetic faces, viewing distance, allowed rack zones, and packaging requirements.
CNC surface finishing services: process overview with machining-specific considerations
This section avoids marketing language and focuses on what changes the part—and what must be called out.
Anodizing (aluminum): cosmetics vs wear surfaces
Anodizing is widely used for aluminum machined components. The key is to define the functional goal (cosmetic corrosion protection vs wear surface) and then protect critical geometry via masking.
For anodizing inquiries and aluminum-specific capability context (internal link):
https://www.jlypt.com/custom-aluminum-anodizing-services/
Chemical conversion coating (aluminum): conductivity and paint base
Conversion coatings are commonly used when conductivity is required or when the part will be painted/powder coated. Dimensional impact is typically lower than thicker coatings, but handling and packaging still matter.
Passivation (stainless): post-machining corrosion stability
Passivation is frequently specified after machining stainless components to improve corrosion behavior by removing free iron contamination. Cleanliness is critical—residual machining fluids can cause inconsistent results.
Electropolishing (stainless): cleanability and surface smoothing
Electropolishing can improve cleanability and reduce micro-peaks. It can also soften sharp edges on small features—call out edge conditions if they matter.
Electroless nickel and other plating routes: dimensional awareness
Plating can provide corrosion protection and other functional properties, but the key risk is thickness on threads and fits. If your assembly depends on a specific class of fit, your drawing must define whether dimensions are pre-finish or post-finish.
Black oxide / zinc / phosphate (steel): choose based on environment and assembly behavior
These are frequently used on machined steel parts. The correct choice depends on the environment, cosmetic expectations, and whether the part is high-strength (program-dependent requirements may apply).
Powder coating: excellent cosmetics, thickness-heavy
Powder coating is durable and attractive, but it is typically thickness-heavy compared with conversion coatings. Masking threads, bores, datum surfaces, and grounding pads is often necessary.
Comparison tables (quote-friendly): relative cost/complexity and geometry risk
You asked for detailed tables without inventing numeric performance claims or lead times. The following tables use relative rankings and practical notes—useful for RFQs without implying unverified values.
Table 6 — CNC surface finishing services comparison (relative rankings)
| Process family | Relative dimensional risk on fits/threads | Masking demand | Cosmetic controllability | Best for | Notes for quoting |
|---|---|---|---|---|---|
| Anodizing (aluminum) | Medium | Medium | High (with proper prep) | Aluminum housings, brackets, panels | Quote depends heavily on color, cosmetic class, rack mark restrictions |
| Hard anodize (aluminum) | Higher | Higher | Medium | Wear faces, sliding areas | Clarify wear surfaces vs cosmetic surfaces; define edge break |
| Conversion coating | Low | Low–Medium | Medium | Conductive requirements, pretreat | Usually simpler dimensional control; packaging matters |
| Passivation | Very low | Low | Medium | Stainless parts post-machining | Quote depends on documentation/testing requirements |
| Electropolishing | Low–Medium | Low | High | Cleanability-driven stainless | Geometry affects accessibility; define scope surfaces |
| Plating (general) | Medium–High | High | Medium | Corrosion, functional surfaces | Thickness intent and gaging plan are mandatory for accurate quotes |
| Black oxide | Low | Low | Medium | Steel appearance + mild protection | Define oiling/handling expectation if required |
| Powder coating | High | High | High | Aesthetic + durability | Masking drives cost; define A-side/B-side and thickness sensitivity |
Table 7 — Geometry features that change the surface finishing quote the most
| Geometry feature | Why finish cost increases | How to reduce cost without sacrificing function |
|---|---|---|
| Blind holes and deep recesses | Coverage limits, handling complexity | Accept limitations on non-critical surfaces or redesign access |
| Thin walls / sharp edges | Risk of defects and chipping | Add edge breaks; avoid knife edges |
| Dense thread population | Masking labor and verification | Consolidate thread specs; mask by zones; consider inserts where appropriate |
| Tight datum-based features | Measurement ambiguity post-finish | Declare datums as pre- or post-finish |
| High cosmetic coverage | Reject risk and special packaging | Define cosmetic faces only where needed; allow rack marks in non-cosmetic areas |
How to request a surface finishing quote that comes back fast (and accurate)
If you want speed, remove ambiguity. The fastest surface finishing quotes come from RFQs that define finish like an engineering requirement.
H2: CNC surface finishing services quote checklist (send this every time)
Table 8 — RFQ checklist for CNC surface finishing services
| RFQ item | What to include | Why it matters |
|---|---|---|
| 3D model | STEP file | Reduces interpretation errors |
| 2D drawing | PDF with GD&T and notes | Defines acceptance criteria |
| Material | Alloy/temper or grade | Affects appearance and process route |
| Finish definition | Process + standard + type/class + thickness intent | Prevents default assumptions |
| Masking map | Highlighted PDF with “no-coat” zones | Protects fits, threads, bonding pads |
| Cosmetic definition | A-side/B-side, rack mark zones | Converts subjective to objective |
| Quantity | Prototype vs production | Affects batching and fixturing approach |
| Delivery requirement | Target ship window | Enables scheduling realism |
| Inspection needs | Certs, thickness checks, sampling plan if required | Keeps cost aligned with actual needs |
| Packaging | Scratch protection for cosmetic faces | Prevents post-finish damage and disputes |
Table 9 — Information that sounds helpful but often slows quoting
| Common RFQ phrase | Why it slows the quote | Better alternative |
|---|---|---|
| “Best finish” | Too many unknown objectives | State objective: corrosion, wear, cosmetic, conductivity |
| “No scratches” | Not measurable without context | Define cosmetic faces + viewing distance + allowed defects |
| “Anodize black” only | Missing thickness, prep, masking | Add thickness intent + surface prep + mask zones |
| “Protect all dimensions” | Impossible without a plan | Identify critical fit features; mask or post-size those features |
| “Must match sample” | Needs approval workflow | Provide a master sample plan and lot-to-lot expectations |
Inspection and acceptance: make finishes verifiable
Finishes fail at receiving inspection when acceptance is based on interpretation rather than defined rules.
Table 10 — Acceptance criteria that reduce disputes
| Requirement type | Good acceptance definition | What to avoid |
|---|---|---|
| Cosmetic surfaces | A-side/B-side + defined viewing distance + allowed rack zones | “Perfect finish” / “no visible defects” without conditions |
| Thickness | Defined test location(s) + method + acceptance range (if your spec uses one) | Measuring “wherever” and arguing about variability |
| Threads | “Threads must gauge after finish” + thread class definition | Assuming “as-machined” thread class will survive coating |
| Conductivity | Define bonding pads as uncoated or conductive finish areas | Hoping anodized surfaces will conduct |
| Sealing | Specify no-coat zones and required roughness on sealing land | Coating sealing faces without defining texture and edge condition |
For standards and metrology references (external links, non-competitive):
Three case scenarios (presented honestly as examples, not claims)
You requested three cases and also required no fabrication. Without your verified project records and approvals, it would be inaccurate to present specific customer outcomes. The scenarios below are common, real-world patterns in CNC programs and are provided as examples you can adapt with your confirmed internal data.
Case Example 1 — Cosmetic aluminum control panel: consistent appearance across lots
Part profile: CNC-milled aluminum panel with visible faces, chamfers, and tight hole patterns
Primary goal: controlled cosmetics + corrosion resistance
Typical risk points:
- Tool paths telegraphing through finish
- Inconsistent texture across batches
- Rack mark placement on visible faces Spec strategy (example):
- Define cosmetic A-side faces
- Specify surface preparation method (e.g., bead blast or brushed direction)
- Include rack mark allowance zone on a hidden edge
- Mask threaded holes and any fit-critical locating holes Where JLYPT link is relevant: anodizing inquiry and aluminum finish discussion
https://www.jlypt.com/custom-aluminum-anodizing-services/
Case Example 2 — Aluminum bracket with grounding requirement: protect bonding pads
Part profile: machined bracket used near electrical components
Primary goal: corrosion protection while maintaining electrical contact at defined pads
Typical risk points:
- Insulating finish unintentionally applied to bonding pads
- Coating buildup altering locating features Spec strategy (example):
- Mark bonding pads by datum dimensions
- Mask bonding pads (or specify a conductive conversion coating route where required by your program)
- Declare datums as uncoated if inspection references as-machined surfaces
Case Example 3 — Stainless fluid component: finish defined by cleanliness and inspectability
Part profile: CNC-machined stainless part with ports and internal features
Primary goal: corrosion stability and cleanability
Typical risk points:
- Residual machining oils reducing process consistency
- Ambiguous “polish” requirement leading to mismatched expectations Spec strategy (example):
- Specify passivation standard required by your program
- If cleanability is critical, specify the surfaces that matter (internal/wetted zones)
- Use measurable surface texture requirements only on functional surfaces (avoid blanket “mirror finish” notes)
Conversion section: how to get a quote that is fast, comparable, and production-safe
If you’re collecting quotes from multiple suppliers, the only way to compare apples-to-apples is to quote against the same finish definition and the same masking/cosmetic scope.
H2: Request CNC surface finishing services with a drawing-based review (what to send)
To receive a fast, accurate surface finishing quote, send:
- STEP + PDF drawing (include GD&T and finish notes)
- Material specification (alloy/temper or grade)
- Finish requirement (process + standard/type/class + thickness intent + color if applicable)
- Masking map (threads, press fits, sealing lands, datum surfaces, bonding pads)
- Cosmetic definition (A-side/B-side + rack mark zones)
- Quantity + schedule (prototype vs production)
If anodizing is included, use this internal link and attach your files for review:
https://www.jlypt.com/custom-aluminum-anodizing-services/
You can also start from the JLYPT main site (internal):
https://www.jlypt.com/
Add at least one on-page image (SEO requirement)
Place this near the introduction or before the first comparison table.
- Image filename: cnc-surface-finishing-services-surface-finishing-quote-jlypt.jpg
- ALT text: CNC surface finishing services for machined parts—surface finishing quote workflow at JLYPT
If you add a second image for masking clarity:
- Image filename: cnc-surface-finishing-services-masking-map-threads-bores.jpg
- ALT text: CNC surface finishing services masking map for threads and precision bores
Get Your CNC Surface Finishing Services Quote—Without Tolerance Surprises
If your part has tight fits, functional threads, cosmetic faces, or electrical bonding surfaces, finishing can make or break assembly. The quickest path to a reliable quote is a finish definition that is specific, measurable, and tied to your datums and critical features.
Send your STEP + drawing with a masking map and cosmetic definition, and request a drawing-based review for CNC surface finishing services. For anodizing-related requests, start here:
https://www.jlypt.com/custom-aluminum-anodizing-services/
