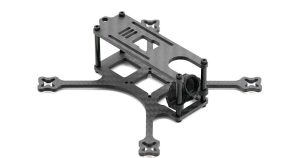
Custom FPV Drone Frame Machining: CNC Design, Materials, GD&T, and Production Strategy (with Tables + 3 Case Studies)
FPV pilots have a brutally honest test lab: the ground. Frames don’t fail in slow motion—an arm clips a gate, a quad cartwheels into asphalt, or a cinewhoop “kisses” concrete while carrying a full-size action camera. In that world, the difference between “looks good in CAD” and “survives real flights” is not subtle.
That’s why Custom FPV drone frame machining is a specialty within CNC manufacturing. It blends lightweight structural design, vibration behavior, assembly repeatability, and surface durability—often under aggressive timelines and frequent revisions. The goal is not simply to cut parts; it’s to deliver a frame architecture that builds the same way every time, keeps the stack aligned, protects the camera, and still feels crisp in flight.
This long-form guide is written for:
- FPV brands building a signature frame line
- engineering teams developing a new platform (racing, freestyle, cinewhoop, long-range)
- integrators needing custom mounts, cages, and electronics trays
- anyone moving from “one-off prototype” into controlled small-batch production
Throughout, you’ll see CNC-specific terminology and practical manufacturing choices: datum schemes, GD&T, setup reduction, toolpath strategy, finish allowances, inspection plans, and quoting inputs that keep lead times predictable.
If you’re sourcing machined UAV/FPV components and want a supplier who understands production machining—not just prototyping—JLYPT supports custom CNC drone parts here:
https://www.jlypt.com/custom-cnc-uav-parts-manufacturer/
Table of Contents
- What Makes FPV Frames Unique in CNC Manufacturing
- Where CNC Makes Sense (and Where It Doesn’t)
- FPV Frame Architecture: Interfaces That Must Be Controlled
- Custom FPV Drone Frame Machining: Core Process Flow
- Material Selection (6061 vs 7075 vs Titanium vs Polymers)
- DFM Rules for Crash Resistance and Manufacturability
- Fixturing and Setup Strategy for Plates, Arms, and Cages
- Tooling + Toolpaths: High-Speed Milling Without Warping Parts
- GD&T for FPV Frames: Datums, True Position, Flatness, Perpendicularity
- Threads, Inserts, and Fastener Reliability
- Surface Treatments: Anodize, Hardcoat, Conversion Coating, Paint
- Inspection and Documentation: CMM, FAI, Sampling Plans
- Cost Drivers and RFQ Package (with Tables You Can Reuse)
- 3 Case Studies: Racing, Cinewhoop, Long-Range
- Why JLYPT for FPV Frame Components + Next Steps
- Standards & References (External Links)
1) What Makes FPV Frames Unique in CNC Manufacturing
FPV frames look simple—plates and arms—but the performance demands are surprisingly tight:
- Stiffness-to-weight matters because flex shows up as oscillation and noisy gyro data.
- Symmetry matters because small asymmetries can create persistent vibration modes.
- Stack alignment matters because electronics sit on standard patterns (20×20, 30.5×30.5, sometimes 25.5×25.5), and misalignment can preload soft mounts or twist a flight controller.
- Impact survivability matters because arms are sacrificial but the center should remain stable.
- Assembly ergonomics matters: pilots will swap arms, change camera angle, and rebuild quickly between packs.
A CNC-machined frame component is often chosen when a design needs:
- high dimensional repeatability across batches
- tight interface control (camera cage, motor pattern, stack hole pattern)
- robust threads and reliable clamp behavior
- integrated features (keyed pockets, wire channels, heat spreaders)
Table 1 — FPV Requirements vs Manufacturing Implications
| FPV requirement | What it means in flight | CNC implication |
|---|---|---|
| high stiffness | crisp response, less oscillation | minimize thin webs, control flatness, reduce setup-induced twist |
| low weight | longer flight time, agility | pocketing strategy, avoid over-building, choose 7075 where needed |
| crash survivability | fewer broken parts, consistent geometry | fillets, controlled grain direction in plate stock, proper edge finishing |
| rebuild speed | pilots swap parts often | standardized fasteners, repeatable tolerances, thread durability |
| vibration control | cleaner gyro, better footage | datum-driven symmetry, runout control on rotating interfaces |
2) Where CNC Makes Sense (and Where It Doesn’t)
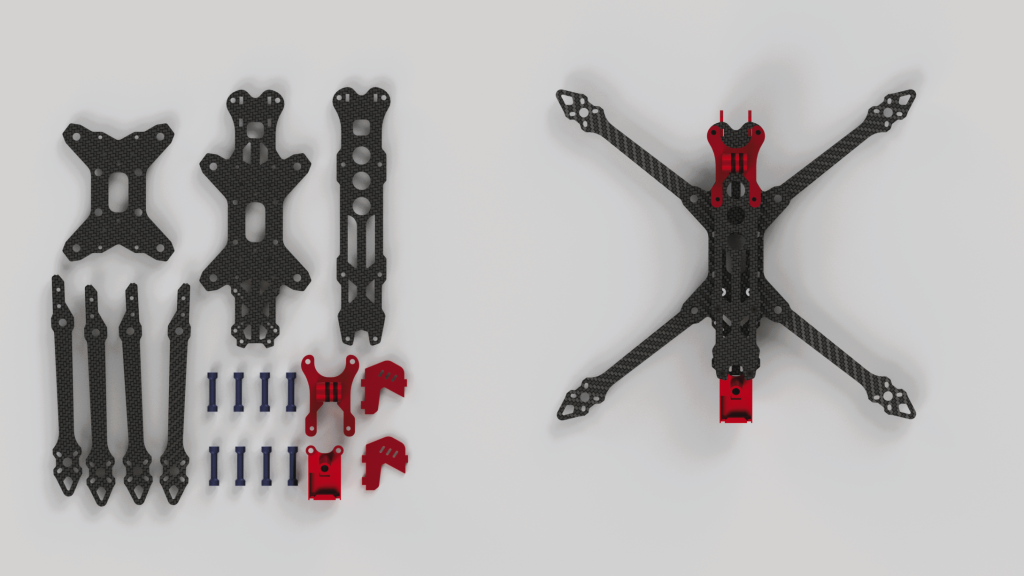
Not every FPV frame should be fully CNC-machined. Many successful frames combine:
- carbon fiber laminates (for main plates/arms)
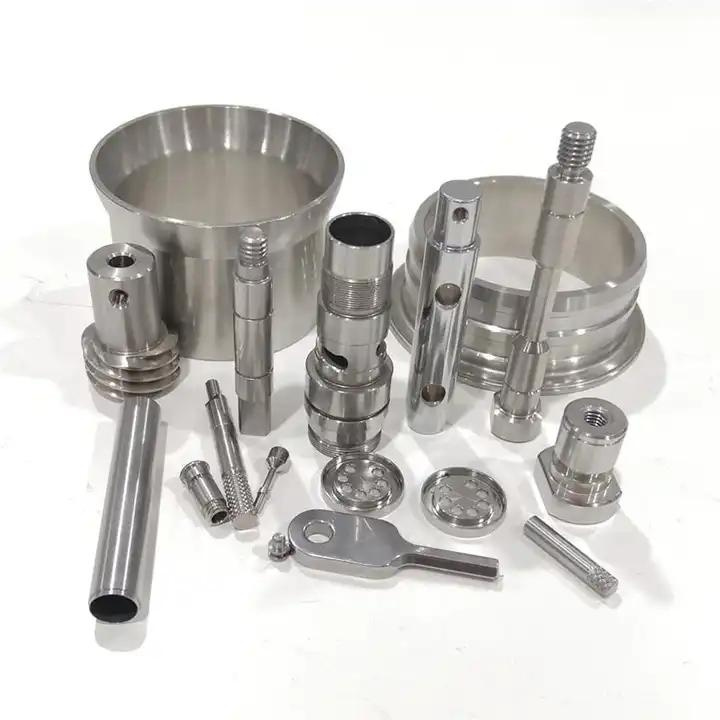
- CNC aluminum (for camera cage, braces, mounts, hubs)
- molded TPU (for bumpers, antenna mounts, vibration isolators)
So when does Custom FPV drone frame machining become the right answer?
CNC is a strong choice for:
- camera cages / side plates that must protect and align the camera
- stack standoffs, braces, and clamps that must hold torque without creeping
- motor mount adapters (especially for unusual patterns or ducted platforms)
- specialty arms (e.g., thick 7075 arms for high-power 6S/8S builds)
- integrated heat-sink trays for VTX or digital systems
- precision quick-release mechanisms for payloads
CNC is usually not the best choice for:
- large, simple flat plates where carbon fiber laminate is lighter and cheaper at scale
- high-volume commodity standoffs that are already standardized
- purely cosmetic aluminum plates without functional value (unless branding demands it)
Table 2 — Component-by-Component “Should We CNC This?”
| Component | Typical material | CNC value | Recommendation |
|---|---|---|---|
| main plate | CF laminate / Al | medium | CNC for prototypes/small runs; CF for production if weight-critical |
| arms | CF laminate / 7075 | high | CNC 7075 for impact resistance or special geometry; CF for lightest builds |
| camera cage | 6061/7075/7075 | very high | CNC is ideal (datums + protection + threads) |
| ducts (cinewhoop) | polymer / Al | medium-high | CNC for rigid duct rings or mounts; polymer for lightweight damping |
| stack mounting plate | CF/Al | high | CNC helps keep stack hole true position and flatness |
| antenna mount bracket | Al/polymer | medium | CNC for rigidity and repeatability; TPU for crash compliance |
| motor adapter plate | 7075 | high | CNC recommended; controls hole pattern and perpendicularity |
3) FPV Frame Architecture: Interfaces That Must Be Controlled
In CNC manufacturing, success starts by identifying the features that control the build. For FPV frames, these are the interfaces that should drive your datum scheme and inspection plan:
- Stack hole pattern (20×20 or 30.5×30.5)
- Camera side plate alignment (yaw symmetry + tilt repeatability)
- Arm pockets / arm clamp faces (if replaceable arms)
- Motor mounting pattern and seat (hole true position, face flatness)
- Center plate flatness (prevents twisting the stack)
- Grounding surfaces (for EMI control in some builds)
Table 3 — “Functional Interfaces” Checklist
| Interface | Common FPV symptom when wrong | What to control |
|---|---|---|
| stack hole pattern | soft mounts preload; FC bends; gyro noise | true position + flatness of mounting plane |
| camera cage | jello, skewed camera, broken lens | symmetry, pocket width, perpendicularity |
| arm clamp faces | arm slips or cracks near clamp | surface finish, parallelism, clamp relief radii |
| motor mount | vibration, hot motors, loose screws | hole position, spotface, face flatness |
| center plate | inconsistent tune between builds | flatness + thickness consistency |
This is where Custom FPV drone frame machining differs from generic CNC plate cutting: you’re machining a structural system with repeatable interfaces, not independent parts.
4) Custom FPV Drone Frame Machining: Core Process Flow
A robust workflow for Custom FPV drone frame machining looks like a scaled-down version of aerospace discipline—without slowing down iteration. The goal is “fast, but controlled.”
Typical CNC process flow
- RFQ intake + DFM review (critical features, tolerances, finish plan)
- CAM programming (setup plan, tool selection, toolpath simulation)
- Fixturing strategy (soft jaws, fixture plates, dowel pin locating)
- Rough machining (adaptive clearing / HSM)
- Semi-finish (leave consistent stock for finish pass)
- Finish machining (critical datums and hole patterns)
- Deburr + edge break (controlled chamfer/radius)
- Surface treatment (anodize/hardcoat, masking if needed)
- Inspection (FAI/CMM + functional checks)
- Packaging (scratch protection, labeled lots, revision control)
Table 4 — Process Controls That Prevent “Pilot Run Surprises”
| Stage | Failure mode | Preventative control |
|---|---|---|
| CAM | collision / gouge | verified simulation + standard tool library |
| machining | part lift or distortion | correct workholding + conservative clamp force |
| finishing | hole pattern drift | machine datums and patterns in same setup when possible |
| deburr | chamfer inconsistency | specify edge break (e.g., C0.2–0.4) |
| anodize | fit changes | mask fits or compensate dimensions |
| inspection | parts “look fine” but don’t build | CMM true position + flatness on functional planes |
5) Material Selection for Machined FPV Frame Parts
Material choice is one of the fastest ways to change stiffness, crash resistance, and machining cost. For machined FPV components, aluminum dominates—but not all aluminum behaves the same.
6061-T6 vs 7075-T6 (in practical FPV terms)
- 6061-T6: excellent machinability, consistent anodize, cost-effective, good general purpose.
- 7075-T6: higher strength and stiffness; better for arms, clamps, and high-load mounts; more sensitive to cosmetic anodize variation; can be less forgiving in thin sections.
Titanium and stainless are usually used selectively for:
- threaded wear points
- ultra-compact high-load brackets
- specialty camera protection elements
Table 5 — Material Matrix for Custom FPV Drone Frame Machining
| Material | Best use in FPV | Pros | Cons | Notes |
|---|---|---|---|---|
| 6061-T6 Al | cages, trays, brackets | fast machining, good anodize | less stiff than 7075 | great for iterative revisions |
| 7075-T6 Al | arms, clamps, motor plates | high strength/stiffness | higher cost, anodize variation | ideal for “crash-critical” parts |
| 2024 Al | specialty structural | strong, fatigue properties | corrosion resistance concerns | needs finish planning |
| Ti-6Al-4V | wear + strength | high strength, durable threads | slow machining, expensive | use only where justified |
| 304/316 stainless | wear points | corrosion resistance | heavy | consider inserts instead |
| POM (acetal) | spacers, isolators | stable, machinable | lower stiffness | good for vibration isolation components |
| PEEK | high-temp, stiff polymer | premium performance | expensive | niche FPV applications (high heat zones) |
6) DFM Rules: Designing FPV Frame Parts for CNC Reality
DFM (Design for Manufacturability) is where you win lead time and cost—without sacrificing performance. For Custom FPV drone frame machining, good DFM also improves survivability because it reduces stress risers and distortion.
DFM principles that matter most in FPV
- Avoid knife-edge features: thin edges dent and crack; specify a controlled edge break.
- Use internal radii: don’t force micro end mills unless necessary.
- Keep pocket depths reasonable: deep pockets increase chatter and cycle time.
- Plan thread engagement: don’t ask M3 threads to hold in 2 mm of aluminum.
- Design around stock thickness: choose thickness that is common and stable.
Table 6 — Recommended Geometry Guidelines (Practical Starting Points)
| Feature | Racing 5″ (typical) | Freestyle 5–6″ | Cinewhoop | Long-range 7–10″ |
|---|---|---|---|---|
| arm thickness (Al) | 4–6 mm | 5–7 mm | 4–6 mm (plus duct structure) | 6–8 mm |
| minimum wall in cages | 2.0–2.5 mm | 2.5–3.0 mm | 2.0–3.0 mm | 2.5–3.5 mm |
| internal fillet radius | ≥ 1.0 mm | ≥ 1.5 mm | ≥ 1.0 mm | ≥ 1.5 mm |
| pocket floor thickness | ≥ 1.2–1.8 mm | ≥ 1.5–2.0 mm | ≥ 1.2–1.8 mm | ≥ 1.8–2.5 mm |
| edge break | C0.2–0.5 | C0.2–0.5 | C0.2–0.4 | C0.3–0.6 |
These are not universal rules, but they are solid defaults when you’re trying to keep Custom FPV drone frame machining efficient and predictable.
7) Fixturing and Setup Strategy (Where Accuracy Is Won or Lost)
Most FPV frame parts are thin relative to their footprint. Thin parts love to move:
- they vibrate under cutting loads
- they distort under clamp force
- they spring when released
So the machining strategy must be built around two goals:
- minimize distortion during cutting
- protect the datums that define assembly alignment
Common workholding strategies
- Vacuum fixturing for flat plates (excellent when designed correctly)
- Soft jaws for odd-shaped cages or clamps
- Fixture plates with dowel pins for repeatable location across batches
- Adhesive fixturing (special cases) for ultra-thin components
- Op sequencing that keeps parts “stiff” as long as possible (don’t fully free the perimeter too early)
Table 7 — Fixturing Options for FPV Parts
| Part type | Best fixturing option | Main risk | Mitigation |
|---|---|---|---|
| flat center plates | vacuum or fixture plate + pins | lift/slip under load | add stops + conservative stepdown |
| arms | soft jaws + datum stops | clamp distortion | torque control + support pads |
| camera cage sides | soft jaws + 3+2 indexing | yaw asymmetry | machine matched pairs, same setup |
| duct rings | custom fixture plate | chatter and ovality | balanced toolpath + finish passes |
| stack trays | fixture plate | hole position drift | drill/ream in same setup as datum face |
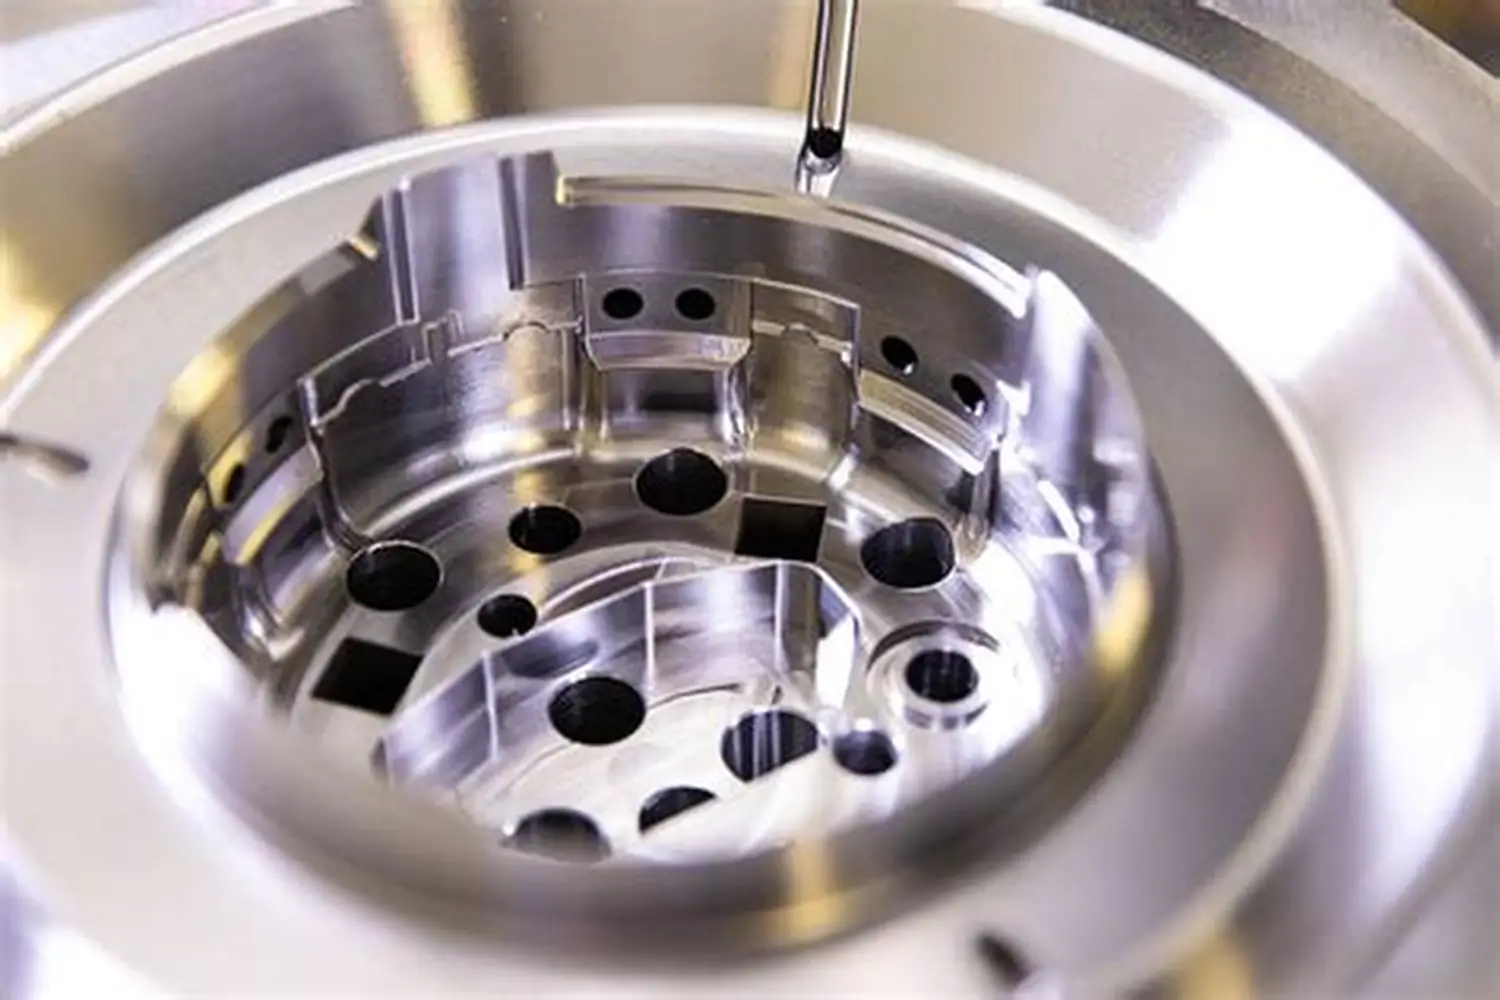
8) Tooling + Toolpaths: High-Speed Milling Without Warping the Part
A lot of people think FPV parts are “easy aluminum.” In reality, thin sections and aggressive pocketing are where sloppy toolpaths create heat, chatter, and warp.
For Custom FPV drone frame machining, the toolpath style matters:
- adaptive clearing (constant engagement) reduces chatter and improves tool life
- rest machining prevents leftover cusps
- finish passes should be consistent and light, especially on thin walls
- climb milling is typically preferred for surface finish and tool load stability
- helical interpolation for bores often produces better positional control than plunging
Table 8 — Tooling Recommendations (Aluminum FPV Components)
| Operation | Typical tool type | Why it works | Notes |
|---|---|---|---|
| rough pocketing | variable-helix carbide end mill | stable engagement | adaptive/trochoidal toolpaths |
| finishing walls | 3-flute Al end mill | better chip evacuation | light radial DOC, consistent step |
| drilling stack holes | carbide drill | positional stability | spot drill + drill; ream if needed |
| counterbores/spotfaces | flat end mill | fast + clean seating | control depth tightly |
| chamfering | 90° chamfer mill | consistent edge break | specify chamfer size on drawing |
9) GD&T for FPV Frames: Datums That Match Real Assembly
If you want repeatable builds, you need a drawing that tells the shop what “repeatable” means. GD&T is the cleanest way to do that without over-tightening everything.
For Custom FPV drone frame machining, datum selection should reflect how the frame is actually used:
- the plane that the flight stack sits on is often Datum A
- one stack hole (or a defined axis) can be Datum B
- another hole in the pattern can be Datum C to clock rotation
What to control (high value)
- true position of stack hole patterns relative to A|B|C
- flatness of the stack mounting plane
- perpendicularity of camera side plates to the base plane (if relevant)
- profile of clamp faces that set arm position
- hole-to-hole distances only when they directly affect assembly or symmetry
Table 9 — Practical GD&T Callouts for FPV Parts
| Feature | Recommended control | Why |
|---|---|---|
| stack pattern holes | true position to A | B |
| base plane under FC | flatness | stabilizes gyro behavior and assembly |
| camera plate bores/slots | position + symmetry | prevents yaw skew and tilt mismatch |
| motor screw holes | true position + spotface flatness | consistent motor alignment and torque |
| arm pocket faces | profile / parallelism | repeatable arm replacement |
Tolerance guidance (realistic and manufacturable)
Overly tight tolerances add cost quickly. For many FPV frame features:
- ±0.10 mm is usually adequate for non-critical geometry
- ±0.05 mm can be appropriate for repeatable assembly interfaces
- tighter than ±0.02 mm should be reserved for true functional needs (bearing seats, precision dowel locations, special mechanisms)
The win is not “tight everywhere”—the win is “controlled where it matters.”
10) Threads, Inserts, and Fastener Reliability (M2/M3/M4 Reality)
FPV frames live on small fasteners. In aluminum, the limiting factors are:
- thread engagement length
- repeated assembly cycles
- vibration loosening
- crash impulse loads
Recommendations that improve durability
- Avoid shallow aluminum threads for frequently removed screws (camera screws, arm clamps).
- Use helicoil-style inserts or key-locking inserts where cycles are high.
- Consider through holes + locknuts where packaging allows.
- Specify thread class and inspection method when it matters.
Table 10 — Thread Strategy by Feature
| Feature | Typical fastener | Best practice | Why |
|---|---|---|---|
| camera side screws | M2/M3 | inserts if frequent adjustment | avoids stripping |
| arm clamp bolts | M3/M4 | longer engagement + good seat | clamp stability |
| stack mounting | M3 | controlled hole position; clean spotface | avoids stack twist |
| motor screws | M3 | spotface + thread depth clarity | prevents motor rock and loosening |
In Custom FPV drone frame machining, thread reliability is a design decision as much as a machining decision.
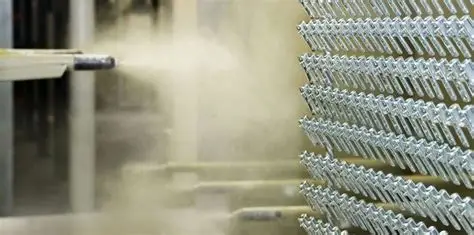
11) Surface Treatments: Anodize, Hardcoat, and Masking Plans
Surface treatment affects both durability and assembly fits.
Common finishes for machined FPV parts:
- Type II anodize (good corrosion resistance, good appearance)
- Type III hardcoat (wear resistance, thicker build-up)
- conversion coating (conductive surfaces, corrosion protection)
- paint / Cerakote-style coatings (branding, added protection; thickness variability)
Why masking matters
If you hardcoat a bore or a tight-fit pocket without a plan, you can accidentally create interference where you expected clearance. Masking is often the simplest solution for critical fits or grounding faces.
Table 11 — Finish Selection for FPV Frame Components
| Finish | Best for | Pros | Risks | Control method |
|---|---|---|---|---|
| Type II anodize | cages, braces | good look, corrosion resistance | minor dimensional change | define cosmetic class + edge break |
| Type III hardcoat | clamps, wear faces | abrasion resistance | significant build-up | mask fits or compensate |
| conversion coating | grounding areas | conductive, thin | limited color options | mask zones clearly on drawing |
| paint coating | branding | color flexibility | thickness variation | avoid on precision interfaces |
12) Inspection: How to Keep Frames Building the Same Way
Inspection doesn’t need to be heavy, but it must be aligned with function. The biggest “silent failure” in FPV hardware is hole pattern drift that’s invisible until assembly.
Recommended inspection stack
- FAI (First Article Inspection) per revision
- CMM report for critical features (stack pattern true position, plane flatness, motor pattern)
- in-process probing for repeatability during the run
- sampling plan scaled to batch size (especially for low-volume production)
Table 12 — Inspection Plan Template for Machined FPV Parts
| Batch type | Quantity | Inspection level | Outputs |
|---|---|---|---|
| prototype | 1–5 | critical dimensions + functional checks | check sheet + photos |
| pre-production | 10–50 | FAI + partial CMM | FAI report + key CMM pages |
| production small-batch | 50–300 | CMM sampling + in-process checks | CMM sampling report + lot ID |
| ongoing production | 300+ | control plan on criticals | trend charts + periodic FAI |
For Custom FPV drone frame machining, a useful CMM report is less about showing “everything” and more about proving the interfaces that determine build consistency.
13) Cost Drivers + RFQ Package (Use This to Get Better Quotes)
A clean RFQ speeds up quoting and prevents “surprise” charges later (extra setups, special deburr, masking complexity).
What drives cost in machined FPV parts
- number of setups (each clamp = risk + time)
- deep pocketing and thin webs (cycle time + scrap risk)
- tight tolerances on non-functional surfaces
- finish requirements (especially hardcoat + masking)
- inspection requirements (CMM time is real time)
Table 13 — RFQ Checklist for Custom FPV Drone Frame Machining
| RFQ item | Provide | Why it matters |
|---|---|---|
| CAD | STEP file | unambiguous geometry |
| drawing | PDF with GD&T | tells what must be controlled |
| material | alloy + temper | affects machining strategy and cost |
| finish | anodize/hardcoat + color | impacts masking and allowances |
| quantity | per revision | fixture planning and scheduling |
| critical features | top 5–10 | focuses inspection where it pays back |
| packaging | scratch protection? | anodized parts mar easily |
| target lead time | desired ship date | realistic scheduling and priority |
14) Three Case Studies (Realistic FPV Scenarios)
The following cases are anonymized but technically specific. Each reflects common points where Custom FPV drone frame machining either fixes a persistent problem or enables a design that’s hard to achieve with plate-only construction.
Case Study 1 — 5″ Racing Frame Arms in 7075-T6: Reducing “Arm Walk” After Impacts
Goal: Create replaceable 5″ arms that remain dimensionally stable after repeated gate strikes and tumbles, without adding unnecessary mass.
Initial issue: A previous design used a softer aluminum and sharp internal corners near the arm root pocket. After impacts, pilots reported:
- subtle arm toe-in/out changes
- motor alignment shifting
- inconsistent PID feel between rebuilds
Machining + design actions:
- Switched to 7075-T6 for improved stiffness and yield strength.
- Added generous internal fillet radii at stress concentration zones.
- Reworked the arm root geometry to maintain thicker “load paths” while pocketing non-critical regions.
- Implemented datum-driven machining so the arm clamp interface and motor pattern were controlled relative to the same reference scheme.
Inspection focus:
- true position of motor holes
- flatness of arm clamp faces
- thickness consistency at the root region
Result: Crash survivability improved, and “rebuild-to-rebuild” handling became more consistent because the interfaces that define geometry were more stable.
Case Study 2 — Cinewhoop Camera Cage: 5-Axis Machining to Protect Lens Alignment
Goal: Build a compact cage that protects a full-size action camera while keeping the lens axis centered and repeatable at multiple tilt angles.
Initial issue: Multi-piece cages with simple brackets tended to:
- loosen over time
- shift under vibration
- create small yaw offsets that were obvious in stabilized footage
Machining strategy:
- Used a 5-axis / 3+2 approach to reduce setups and hold camera-side symmetry.
- Machined matched left/right features in a controlled sequence to minimize mirrored error.
- Added controlled chamfers and lead-ins to improve assembly speed and reduce fastener cross-threading.
- Planned surface finish zones: cosmetic exterior vs functional interior seats.
Finish + assembly considerations:
- Type II anodize with controlled edge break
- spotfaces for screw heads to reduce clamp loss
Result: Camera alignment remained stable across rebuilds, tilt changes were repeatable, and the cage delivered a “premium” feel without relying on excessive bolt count.
Case Study 3 — 7″ Long-Range Frame: Integrated VTX Heat-Spreader Tray + Stack Alignment Control
Goal: Create a long-range platform with improved electronics thermal behavior (digital VTX) while maintaining stack flatness and hole pattern accuracy to reduce gyro noise.
Initial issue: Off-the-shelf solutions used thin plates and multiple standoffs, leading to:
- slight warp after assembly torque
- inconsistent contact between VTX and heat sink pads
- minor twist in the FC soft-mount stack
Machining + DFM actions:
- Designed an aluminum tray with integrated heat-spreader geometry and controlled mounting plane flatness.
- Used a setup plan that machined the stack mounting plane and hole pattern in a single controlled operation.
- Added a clear masking plan for any surfaces intended to remain electrically conductive or to preserve fit.
Inspection plan:
- CMM verification of stack hole true position
- flatness verification of the FC mounting plane
- spot check of heat-spreader thickness uniformity
Result: Stack build became more repeatable, gyro noise improved, and thermal consistency increased—especially during long hovering segments and hot-weather operation.
15) Why JLYPT for Custom FPV Drone Frame Machining (and How to Start)
If you’re building a frame platform that needs repeatable assembly and real-world toughness, the supplier matters as much as the CAD. JLYPT supports CNC machining for UAV/FPV parts with an emphasis on:
- manufacturable DFM feedback
- datum-driven process planning
- finish planning (including masking logic)
- inspection outputs that match functional needs (FAI/CMM/sampling)
You can review our custom UAV machining capability and start an RFQ here:
https://www.jlypt.com/custom-cnc-uav-parts-manufacturer/
Main site:
https://www.jlypt.com/
To move quickly, send:
- STEP + drawing (with datums/GD&T where relevant)
- material and finish requirements
- quantities by revision/build stage
- a short list of critical features (what must not move)
- target lead time and application notes (racing vs cine vs long-range)
That package allows Custom FPV drone frame machining to be quoted accurately and produced with fewer surprises.