The Eyes of Automation: A Comprehensive Guide to Robotic Vision Systems for CNC Machining
Introduction: Beyond Pre-Programmed Paths – The Indispensable Role of Robotic Vision Systems in Adaptive Manufacturing
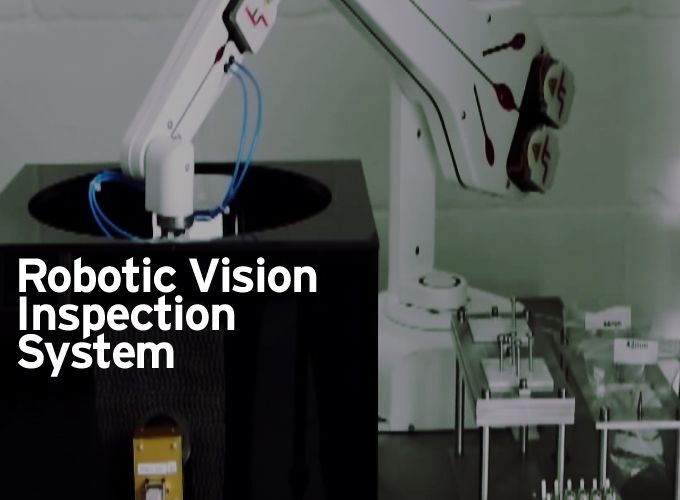
The pursuit of fully autonomous, flexible, and high-reliability manufacturing hinges on a system’s ability to perceive and interpret its environment. While industrial robots execute pre-programmed motions with flawless repeatability, and CNC machines follow G-code with deterministic precision, both operate in a state of functional blindness. They lack the fundamental human capability to see, understand, and adapt to the inevitable variances of the physical world—a casting with slight dimensional drift, a part placed on a conveyor with random orientation, or a tool showing early signs of wear. This gap between programmed expectation and physical reality is where robotic vision systems transition from a sophisticated accessory to the central nervous system of intelligent automation. For CNC machining operations seeking to move beyond simple tending into the realms of adaptive processing, mixed-flow production, and closed-loop quality control, the integration of robust robotic vision systems is the critical enabling technology.
At JLYPT, our core expertise in precision CNC machining provides a unique lens through which we view automation challenges. We understand that the value of automation is nullified if it cannot handle the natural micro-variations present in even the most carefully machined components or the raw materials that feed them. Robotic vision systems provide the essential feedback that transforms a rigid, fragile automation cell into a resilient, flexible production unit. These systems grant machines the ability to locate, identify, measure, and inspect, making informed decisions in real-time. This guide is engineered for automation engineers, manufacturing system designers, and production managers who recognize that true flexibility and quality assurance require sensory perception. We will dissect the core components and types of robotic vision systems, detail their transformative applications within CNC workflows, and provide a structured framework for successful implementation and integration.
Section 1: Core Components and Technology Stack of Robotic Vision Systems
A robotic vision system is an integrated assembly of hardware and software designed to extract meaningful data from visual input. Its performance is dictated by the synergy between its components.
1.1 Hardware Foundation: The Sensing Triad
-
Vision Sensor/Camera: The primary data acquisition device. Selection is critical:
-
2D Cameras (Area Scan): Capture flat, grayscale or color images. Ideal for reading labels, verifying presence/absence, and performing high-speed inspections on features with consistent lighting and depth. Limited for handling parts with height variation.
-
3D Cameras: Generate point cloud data representing an object’s surface geometry. Technologies include:
-
Stereo Vision: Uses two calibrated cameras to calculate depth, similar to human eyes.
-
Structured Light: Projects a known pattern (e.g., grids, lines) onto an object; distortions in the pattern are analyzed to calculate 3D shape. Excellent for detailed shape analysis.
-
Time-of-Flight (ToF): Measures the time for light to reflect back from the object. Faster for larger volumes but typically with lower spatial resolution.
-
-
-
Lighting: Perhaps the most critical yet underestimated component. Proper illumination eliminates shadows, highlights features of interest, and ensures consistency. Types include:
-
Back Lighting: Creates high-contrast silhouettes for dimensional checking.
-
Dome Lighting: Provides diffuse, shadow-free illumination for inspecting reflective or curved surfaces (common on machined parts).
-
Dark Field Lighting: Highlights surface texture and defects like scratches by illuminating at a shallow angle.
-
Structured Light Projectors: Integrated with 3D cameras to project the necessary patterns.
-
-
Lens: Determines the field of view, working distance, and sharpness. Factors include focal length, aperture (affecting depth of field and light intake), and potential need for filters (e.g., polarizing filters to reduce glare from shiny metals).
1.2 Software Intelligence: From Pixels to Actions
The hardware captures raw data; the software extracts meaning.
-
Image Processing Library: The core algorithmic engine (e.g., OpenCV, proprietary libraries from Cognex, Keyence, or Fanuc). It performs operations like filtering, edge detection, blob analysis, pattern matching, and optical character recognition (OCR).
-
Calibration: The process of defining the relationship between the camera’s pixel coordinates and the real-world coordinates of the robot. This involves capturing images of a calibration target (checkerboard or dot pattern) at known robot positions. Accurate calibration is paramount for the robot to act upon the visual data correctly.
-
Communication Interface: The processed data (e.g., X, Y, Z coordinates and rotation) must be sent to the robot controller. This is typically done via Ethernet protocols (TCP/IP, Ethernet/IP) or dedicated fieldbuses.
Table 1: Comparison of Robotic Vision System Types for CNC Machining Applications
| System Type | Core Technology | Typical Output Data | Key Strengths | Key Limitations | Ideal CNC Application |
|---|---|---|---|---|---|
| 2D Vision Guidance | Single area-scan camera with controlled lighting. | 2D X, Y coordinates and rotation (theta Z). | High speed, lower cost, simple setup, excellent for high-contrast features. | Cannot handle part height (Z) variation or provide 3D orientation; sensitive to lighting changes. | Reading engraved serial numbers, verifying tapped hole presence, aligning flat parts on a conveyor for loading. |
| 3D Stereo Vision | Two synchronized cameras (binocular). | 3D point cloud (X, Y, Z). | Good for objects with natural texture; passive system (no projected light). | Requires surface texture for correlation; performance can degrade on shiny, featureless surfaces common in machined metal. | Picking textured castings from a bin, rough alignment of forgings. |
| 3D Structured Light | One or more cameras + a pattern projector. | High-resolution 3D point cloud. | Excellent accuracy and resolution; works on featureless, shiny surfaces. | Sensitive to ambient light interference; slower acquisition than 2D. | Precise robot guidance for machining datum alignment, detailed weld seam profiling, high-accuracy dimensional inspection of complex contours. |
| Laser Profiling (Line Scan) | A laser line projector and a camera. | A 2D profile (cross-section) along the laser line. Can build 3D by moving the part or sensor. | Very accurate for profile measurement; high speed for continuous inspection. | Typically provides data only along a single line; requires relative motion for full 3D. | In-process inspection of turned part diameters, verifying the profile of an extruded or milled feature. |
| Integrated Vision-Enabled Robot | Camera(s) and processor embedded in the robot wrist or arm. | Direct coordinate offsets for the robot path. | Simplified integration, calibrated at the factory, compact. | Often less flexible in terms of camera/lens selection; may have limited processing power for complex tasks. | General-purpose part picking and simple inspection tasks where ease of use is prioritized. |
Section 2: Transformative Applications of Robotic Vision Systems in CNC Workflows
Robotic vision systems solve specific, costly problems in the machining value chain, moving automation from deterministic to adaptive.
Application 1: Random Bin Picking and Flexible Part Feeding
This is the “holy grail” application that eliminates the need for expensive, dedicated part feeders or meticulously arranged pallets.
-
Challenge: Loading raw castings, forgings, or even semi-finished parts that are delivered in bulk containers with random, overlapping orientations.
-
Solution: A 3D robotic vision system mounted above the bin generates a point cloud. Advanced software algorithms analyze the scene, identify individual parts, calculate a stable pick point and orientation, and send the coordinates to the robot. The robot’s gripper (often a vacuum or mechanical gripper) then picks the part and places it into a CNC machine fixture or onto a staging conveyor.
-
Technical Consideration: Requires robust collision-avoidance algorithms in the vision software to prevent the gripper from hitting other parts in the bin. The system must handle occlusions and varying lighting conditions within the bin.
Application 2: Precise Part Localization and Datum Alignment
For high-precision machining, a part must be located within the machine’s coordinate system with extreme accuracy.
-
Challenge: Even with CNC-machined fixtures, a part may not seat perfectly due to chips, burrs, or thermal effects. Manual indication is time-consuming.
-
Solution: A vision system (often high-resolution 2D or structured light 3D) is integrated into the machine tool or a robotic cell. The system scans critical datum features on the loaded part (e.g., a machined boss, a drilled hole pattern). It compares the actual position to the theoretical CAD model, calculates any offset (in X, Y, Z, and rotations), and automatically transmits this offset to the CNC controller as a work coordinate system (WCS) shift (G10 L2 P_ or similar) or to the robot for path adjustment.
-
Value: This enables “first-part-correct” machining, eliminating scrap caused by misalignment and drastically reducing setup time. JLYPT’s expertise in machining high-tolerance datum features directly enhances the reliability of such vision-based alignment systems.
H2: Application 3: In-Process and Post-Process Quality Inspection
Moving inspection from the separate CMM room to the point of production.
-
Challenge: Waiting for a batch to complete before discovering a tool-wear-induced defect leads to catastrophic scrap losses. Manual inspection is slow and subjective.
-
Solution: Robotic vision systems can be deployed for 100% inspection. A robot equipped with a high-accuracy vision sensor can present a machined part to the camera, or a fixed vision system can inspect parts on a conveyor exiting the CNC.
-
Inspection Capabilities:
-
Dimensional: Measuring critical diameters, lengths, hole positions, and geometric tolerances (GD&T) like position and profile.
-
Surface Defect Detection: Identifying scratches, dents, pits, or chatter marks using specialized lighting and algorithms.
-
Assembly Verification: Confirming the presence and correct installation of inserts, fasteners, or seals.
-
-
Closed-Loop Feedback: The most advanced systems can feed inspection data back to the CNC to compensate for tool wear in real-time or flag a tool for change.
Section 3: Implementation Framework: Integrating Robotic Vision Systems Successfully
Deploying a robotic vision system is a cross-disciplinary project requiring careful planning.
:Phase 1: Define Requirements with Precision
Vague goals lead to failed projects. Quantify requirements:
-
Accuracy & Repeatability: Needed in mm or microns. This drives camera resolution, lens selection, and calibration method.
-
Field of View (FOV): The area the camera must see.
-
Working Distance: Distance from the camera lens to the target object.
-
Cycle Time: How fast the entire “image-capture-process-communicate-act” cycle must be.
-
Environmental Factors: Presence of coolant mist, oil, vibrations, or ambient light variations.
Phase 2: Design the Mechanical and Optical Environment
-
Mounting Rigidity: The camera, lights, and robot must be mounted to minimize vibration, which blurs images.
-
Controlled Lighting Enclosure: For reliable 2D vision, an enclosed, light-tight station is often necessary to block inconsistent ambient light.
-
Part Presentation: Even for bin picking, some constraints (e.g., a vibratory tray to singulate parts) can dramatically simplify the vision task and improve reliability.
Phase 3: Software Development and Integration
This is where the system becomes intelligent.
-
Tool Training: Using “golden samples” (known good parts), the vision software is taught what to look for—edges, patterns, or specific 3D shapes.
-
Robust Algorithm Design: Algorithms must be tolerant to acceptable part variations (e.g., different finishes) while rejecting defects. This often involves setting appropriate thresholds and using multiple inspection tools in sequence.
-
Communication Protocol Development: Ensuring the vision controller can reliably send the correct data format (e.g., XYZ-RX-RY-RZ) to the robot’s specific input register (e.g., a PR register on a Fanuc robot).
Table 2: Technical Specification and Justification Matrix for a Vision-Guided Robotic Cell
| System Aspect | Specification Consideration | Impact on Performance & Cost | Justification & Trade-off Analysis |
|---|---|---|---|
| Vision Sensor Type | Choice between 2D, 3D Structured Light, 3D Stereo. | Major cost and capability driver. 3D systems are 3-10x the cost of 2D. | Justify 3D: Is part orientation random in 3D space? Are there height variations? If yes, 2D is insufficient. |
| Camera Resolution | Megapixels (e.g., 2 MP, 5 MP, 12 MP). | Higher resolution allows measurement of smaller features over the same FOV but increases processing time and data load. | Required accuracy dictates resolution. Use: Spatial Resolution (mm/pixel) = FOV (mm) / Sensor Width (pixels). |
| Lighting Strategy | Type (Dome, Back, Dark Field), color (Red, Blue, White), strobed vs. continuous. | The single largest factor in 2D system reliability. Poor lighting guarantees failure. | Analyze part surface (shiny, matte, textured). Test with samples. Strobing can freeze motion for conveyor applications. |
| Processing Hardware | Embedded sensor processor vs. industrial PC. | Affects speed and complexity of algorithms possible. PCs offer more power for deep learning. | For simple presence/alignment, embedded is fine. For complex AI-based defect classification, a GPU-equipped PC is needed. |
| Calibration Method | Simple 2-point (2D) vs. full hand-eye calibration using a calibration target. | Accuracy of the entire guided operation depends on this. Full 3D calibration is more complex but far more accurate. | Non-negotiable for precision tasks. Budget time and expertise for meticulous calibration. |
| Robot Interface | Digital I/O (simple triggers) vs. Ethernet messaging (complex data). | I/O is simple but limited to pass/fail or few positions. Ethernet allows streaming of full 6-DOF pose data. | For bin picking or precise offset guidance, Ethernet communication is required. |
| Environmental Rating | IP65, IP67 for dust/water resistance. | Critical for survival in machine shop environments with coolant and chips. | Never specify a commercial-grade camera for a shop floor. Industrial hardening is mandatory. |
Section 4: Case Studies – Robotic Vision Systems Solving Real CNC Challenges
Case Study 1: Automotive Foundry – Machining Cast Aluminum Cylinder Heads
-
Challenge: Rough cast cylinder heads arrived at the machining line in large bins with random, nested orientations. Manual loading was slow and ergonomically taxing. Traditional automation failed due to part variability.
-
Solution: A robotic vision system centered on a high-power 3D structured light scanner was deployed. The scanner, mounted on a gantry above the bin, captured detailed point clouds. Advanced vision software used a CAD model of the casting to perform 3D pattern matching, identifying viable pick points on the complex geometry, even when partially occluded. A heavy-duty 6-axis robot with a custom multi-claw gripper executed the picks.
-
Outcome: The system successfully picked over 99.5% of castings, feeding the machining line at a consistent rate. It eliminated two manual loading stations, reduced part damage from clumsy manual handling, and enabled a continuous flow. The robotic vision system paid for itself in 18 months through labor savings and productivity gains.
Case Study 2: Medical Device Manufacturer – High-Precision Implant Machining
-
Challenge: Machining custom orthopedic implants from titanium blanks required absolute precision. Each blank, though pre-machined to a standard, had micro-variations. Setting the workpiece zero (WCS) manually for each part was a major bottleneck and risk.
-
Solution: Integration of a micro-precision 2D vision system directly into a 5-axis CNC machining center. The system used a telecentric lens and coaxial backlighting for sub-pixel accuracy. After the robot loaded a blank into a standard vise, the vision system automatically located two precision-machined datum holes on the blank, calculated the offset from nominal, and applied the correction directly to the CNC’s work offset table (G54).
-
Outcome: Setup time for each implant reduced from 10-15 minutes to under 60 seconds. The elimination of human error in datum setting reduced scrap by an estimated 4%. The robotic vision system ensured that the expensive CNC machining process always started from a perfectly known part location, guaranteeing dimensional integrity.
Case Study 3: Aerospace Supplier – Final Inspection of Complex Structural Components
-
Challenge: Large, monolithic aircraft wing spars, machined from aluminum alloy, required 100% inspection for surface defects (scratches, dings) and verification of over 200 drilled hole positions. Manual inspection was prohibitively slow and inconsistent.
-
Solution: A mobile robotic inspection cell was created. A 6-axis robot carried a high-resolution color camera and a laser profiler. The robotic vision system was programmed to follow the complex contours of the spar. The color camera, using dark-field lighting, detected and classified surface defects. The laser profiler measured the position and diameter of each hole. All data was compared against the CAD model tolerance limits.
-
Outcome: Inspection time was reduced from 8 hours to 90 minutes per part. A complete digital record of every part’s inspection was generated, providing immutable traceability for aviation authorities. The system consistently identified defects missed by human inspectors, significantly improving outgoing quality.
Conclusion: From Automation to Perception – The Strategic Imperative of Machine Sight
The integration of robotic vision systems represents the definitive evolution from blind, rigid automation to perceptive, adaptive manufacturing intelligence. For CNC machining operations, it is the key to unlocking the next tier of efficiency, flexibility, and quality control. These systems directly address the costly realities of part variation, random presentation, and the need for instantaneous process feedback.
Implementing a successful vision system is part science and part art, requiring a deep understanding of optics, software, robotics, and the specific manufacturing process. The investment, while significant, delivers a compelling return by eliminating manual tasks, preventing expensive errors, and enabling production models (like high-mix, low-volume) that were previously unprofitable to automate.
As components become more complex and quality standards more stringent, the ability to “see” and adapt becomes a core competitive advantage. For manufacturers looking to build truly resilient and intelligent production systems, mastering robotic vision systems is no longer optional; it is the pathway to future-proofing their operations.
Ready to explore how robotic vision systems can bring adaptive intelligence to your CNC machining workflow? Contact JLYPT to discuss your specific challenges in part handling, alignment, and inspection. Learn about our precision-driven approach to manufacturing solutions at JLYPT CNC Machining Services.
