The Critical Role of Sensors in Robotic CNC Machining for Unmatched Precision
Introduction: The Sensory Foundation of Modern Precision Machining
In the high-stakes world of precision manufacturing, the distinction between a functional component and a flawless one often lies in microns. At JLYPT CNC Machining, achieving and consistently repeating tolerances within ±0.005 mm requires more than just advanced 5-axis mills and expertly written G-code. It demands a continuous, real-time conversation between the machine and the physical world—a conversation facilitated by a sophisticated array of sensors used in robotics. These sensors transform a programmed machine into an intelligent, adaptive system capable of self-correction, predictive maintenance, and unparalleled quality assurance.
While industrial robotic arms and multi-axis CNC machining centers differ in form, their operational intelligence is built on an identical sensory foundation. Force-torque sensors, vision systems, laser trackers, and thermal compensation sensors act as the machine’s eyes, skin, and nervous system. They provide the critical feedback necessary to navigate the inherent variables of machining: tool wear, material microstructure inconsistencies, thermal drift, and fixture vibration. This article will delve into the specific sensor technologies integrated into advanced CNC systems, illustrating how they bridge the gap between digital design intent and physical part perfection. We will explore their function, their direct impact on machining outcomes for materials ranging from aerospace-grade titanium alloys to medical PEEK, and present concrete case studies from JLYPT’s production floor that demonstrate their indispensable value in delivering precision at scale.
The Sensory Suite: Key Sensors and Their Machining Functions
A modern CNC machining center, especially a 7-axis hybrid or a Swiss-type lathe with robotic tending, is a network of interdependent sensory systems. Each sensor category addresses a specific challenge in the machining process, feeding data to the machine’s controller or a supervisory Programmable Logic Controller (PLC) to enable closed-loop control.
1. In-Process Monitoring & Control Sensors
These sensors operate during the cutting process itself, making real-time adjustments to ensure quality and prevent catastrophe.
-
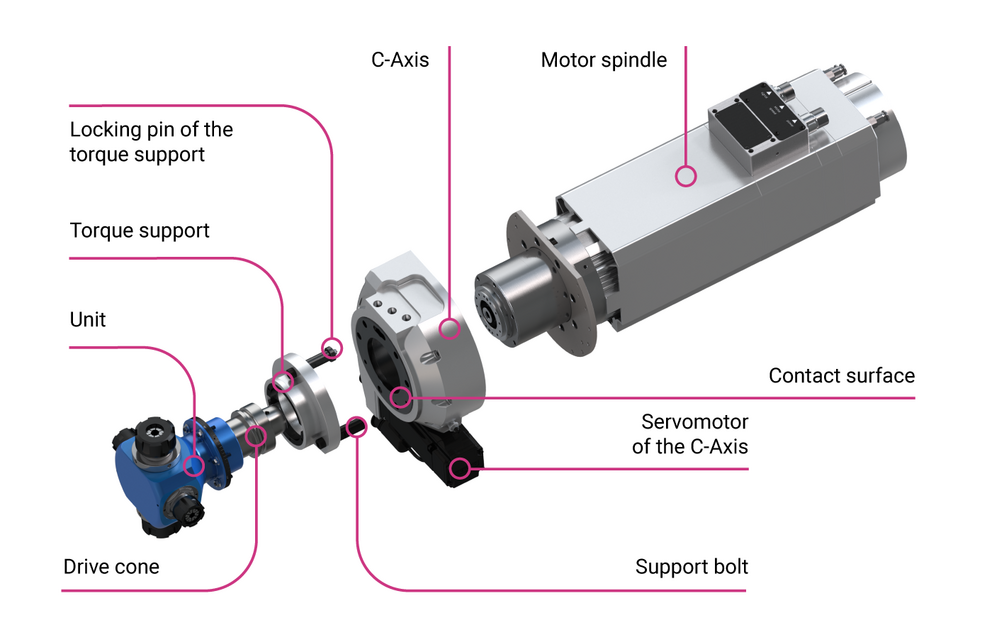
Force/Torque Sensors: Often integrated into the spindle or tool holder, these sensors measure cutting forces in multiple axes. A sudden spike in force can indicate a broken tool or a collision, triggering an immediate emergency stop. Gradual increases can signal tool wear, allowing for adaptive feed rate adjustment or tool change scheduling before part quality degrades. This is crucial when machining hard materials like Inconel 718 or during delicate fine boring operations.
-
Vibration/Acoustic Emission (AE) Sensors: Mounted on the spindle or machine structure, these sensors detect high-frequency vibrations and stress waves generated during cutting. AE sensors are exceptionally sensitive to the onset of micro-cracking in tools, enabling predictive maintenance and protecting expensive workpieces from damage caused by a failing tool. They are vital in high-speed machining of aluminum alloys, where chatter can ruin surface finish rapidly.
-
Thermal Displacement Sensors: Precision is thermal. Machine tools expand and contract with temperature fluctuations. Non-contact laser interferometers or inductive sensors measure the thermal growth of the spindle and axis components. This data is fed into the controller for real-time thermal error compensation, dynamically adjusting axis positions to counteract drift. This is non-negotiable for holding micron-level tolerances in an uncontrolled shop floor environment during long cycle times.
2. Metrology & Quality Assurance Sensors
These sensors verify geometry and surface integrity, often functioning as integrated inspection units or on-machine probing systems.
-
Touch-Trigger Probes: A staple in modern CNC, these Renishaw-style probes are automatically loaded into the spindle. They precisely touch part features to establish datums, measure feature locations, and even perform post-machining inspection without removing the part from the chuck. This enables “first-part correct” manufacturing and in-process adjustment for fixture offsets.
-
Laser Scanners & Line Profilers: For complex, organic contours or for creating a digital twin of a rough casting, on-machine laser scanners project a line onto the part and use a camera to capture its deformation. This generates a dense point cloud, allowing the CNC program to adapt toolpaths to the actual stock condition, maximizing material removal efficiency for near-net-shape parts like investment-cast titanium components.
-
Machine Vision Systems: High-resolution cameras, often with strobe lighting, perform automated visual inspection (AVI). They can check for the presence of drilled holes, verify thread integrity, read engraved serial numbers, or identify surface defects like micro-burrs after a milling operation. This automates final quality checks, especially in high-volume production.
3. Robotic Integration & Automation Sensors
For cells with robotic part load/unload, pallet changers, or automated guided vehicles (AGVs), another layer of sensors ensures safe and precise coordination.
-
2D/3D Vision Guidance: Robots equipped with cameras can locate parts randomly placed in a bin (bin picking), verify part orientation on a conveyor, or perform precise alignment for inserting a machined part into a sub-assembly.
-
Collaborative Robot (Cobot) Force Sensors: In cells where humans and cobots interact, 6-axis force-torque sensors in the robot’s wrist allow it to sense contact. This enables compliant motion for tasks like hand-guided teaching of a deburring path or safely stopping if an unexpected collision occurs.
Table 1: Sensor Taxonomy in Advanced CNC Machining Systems
| Sensor Category | Specific Sensor Types | Primary Function in CNC Process | Key Benefit for JLYPT Clients |
|---|---|---|---|
| Process Monitoring | Spindle-Integrated Force Sensors, Acoustic Emission (AE) Sensors | Real-time monitoring of cutting forces, tool condition, and chatter detection. | Prevents scrap parts and catastrophic tool failure. Enables predictive maintenance, reducing downtime. |
| Dimensional Metrology | Touch-Trigger Probe, Laser Micrometer, On-Machine Laser Scanner | In-process measurement of part features, stock verification, and surface contour mapping. | Ensures ±0.005mm tolerance compliance without secondary CMM setup. Enables adaptive machining of castings. |
| Environmental Compensation | Linear Scale Feedback, Laser Interferometer, Thermocouples | Closed-loop position feedback, real-time measurement and compensation of thermal growth. | Maintains precision over long production runs and varying ambient conditions. Critical for deep-hole boring with high L/D ratios. |
| Automation & Safety | 2D/3D Vision Systems, Safety Laser Scanners, Cobot Force-Torque Sensors | Part presence verification, robotic guidance, and safe human-machine collaboration. | Enables lights-out manufacturing and flexible cells. Reduces labor costs and minimizes safety risks. |
| Surface Integrity | White-Light Interferometry (Offline), On-Machine Roughness Probes | Measurement of surface finish (Ra, Rz) and post-machining texture analysis. | Validates that finishes meet spec (e.g., Ra 0.4µm for EDM surfaces) for functional or aesthetic requirements. |
Integration in Action: Sensor-Driven Machining Workflows
The true power of these sensors is unlocked through their integration into a cohesive digital workflow. At JLYPT, this typically follows a sense-process-actuate cycle.
-
Sense: A spindle force sensor detects an anomaly in the Z-axis force signature during a pocket milling operation in a hardened steel mold block.
-
Process: The machine’s CNC (or a connected Industrial PC – IPC) analyzes the data against a known-good baseline. It correlates the force signature with tool wear patterns and calculates that the end mill is at 85% of its usable life and is beginning to generate excessive heat.
-
Actuate: The CNC automatically adjusts the federate and spindle speed to less aggressive parameters for the remainder of the toolpath, ensuring the final surface finish is not compromised. Simultaneously, it alerts the manufacturing execution system (MES) to prepare the same tool for replacement in the automatic tool changer (ATC) after the cycle completes. This prevents a catastrophic tool breakage that could scrap a valuable mold and maintains consistent part quality from the first part to the thousandth.
This closed-loop, sensor-informed process is what separates automated machining from intelligent machining. It moves the quality checkpoint from the end of the line (post-process inspection) to the very moment of creation (in-process verification), guaranteeing that every action taken by the machine is validated and, if necessary, corrected.
Case Studies: Sensor Technology Solving Real Manufacturing Challenges
Case Study 1: Guaranteeing Medical Implant Consistenc
-
Challenge: A client required 10,000 units of a proprietary spinal fusion cage from Ti-6Al-4V ELI (Grade 23). The cage featured a complex lattice structure machined via 5-axis micromilling. The primary challenge was ensuring every single lattice strut had identical dimensional accuracy and surface finish to guarantee consistent osseointegration. Manual post-inspection of every strut was impossible.
-
Sensor Solution: JLYPT engineers integrated a high-frequency spindle force sensor and an on-machine white-light interferometer probe. The force sensor monitored the micro-cutting forces for each strut, creating a digital fingerprint for every toolpath. Any deviation from the established force profile would halt the process. After machining, the interferometer probe performed a automated, sampled surface scan of lattice nodes to measure critical dimensions and surface roughness (Sa).
-
Outcome: The sensor-driven process achieved zero defect rate across the entire production run. The force sensor data also revealed optimal tool life, allowing us to maximize tool utilization without risk. The client received fully documented, sensor-verified batches, streamlining their FDA regulatory submission process and providing unparalleled traceability.
Case Study 2: Adaptive Machining of High-Value Aerospace Forgings
-
Challenge: An aerospace client supplied large, near-net-shape aluminum 7075 forgings for a structural wing component. While precise, each forging had minor dimensional variations from the CAD model due to the forging process. A standard CNC program risked either leaving excess material (“shiny spots”) or cutting into air, wasting time and tool life.
-
Sensor Solution: We employed an on-machine laser line scanner. At the start of the cycle, the scanner rapidly created a 3D point cloud of the raw forging clamped on the table. Specialized software compared this scan to the nominal CAD model and automatically generated a modified, “best-fit” toolpath. This adapted toolpath ensured a consistent finish stock allowance across the entire part before the final precision machining passes.
-
Outcome: This adaptive machining approach eliminated manual setup and trial cuts, reducing raw material preparation time by 40%. It guaranteed optimal material removal for every single forging, ensuring consistent final part weight and mechanical properties—a critical factor in aerospace weight-saving initiatives. Tool life also increased due to more consistent cutting conditions.
Case Study 3: Enabling Lights-Out Production for Automotive Components
-
Challenge: An automotive Tier 1 supplier needed to scale production of a high-volume transmission valve body machined from ductile iron. The goal was 24/7 lights-out manufacturing with minimal human intervention, but the complex part required post-machining deburring and validation of over 50 precision drilled holes.
-
Sensor Solution: JLYPT designed a fully automated cell featuring a 5-axis CNC mill, a 6-axis collaborative robot (cobot), and a suite of sensors. The cell utilized: 1) A machine vision system over the conveyor to confirm part presence and orientation before the robot picked it up. 2) A force-torque sensor on the cobot’s wrist, which allowed it to perform a compliant, sensor-guided deburring routine on all edges. 3) An in-process touch probe inside the CNC to verify critical hole positions after drilling. If the probe detected an out-of-tolerance condition, the part was automatically routed to a quarantine bin.
-
Outcome: The sensor-integrated cell achieved 95% uptime and ran unattended for two full shifts. The automated in-process inspection reduced the final audit failure rate to near zero. The client achieved the required production scale with a 30% reduction in per-part labor cost and complete process documentation for every component produced.
The Future: Sensor Fusion and the Path to Cognitive Machining
The next evolution in sensor-driven manufacturing is sensor fusion and edge computing. Instead of each sensor operating in a silo, data from force, vibration, thermal, and vision systems will be fused together in real-time on an industrial edge computing platform. Advanced algorithms and machine learning models will analyze this multimodal data stream to identify complex, non-obvious correlations—for example, how ambient temperature at the start of a shift might predict thermal drift patterns four hours later, or how a specific combination of vibration harmonics and force signatures indicates a developing bearing fault in the spindle long before it fails.
This evolution towards cognitive machining will see CNC systems not only reacting to conditions but predicting and optimizing the entire process. They will prescribe optimal tooling, tailor cutting parameters for specific material batches, and self-diagnose maintenance needs with pinpoint accuracy. For a precision machining provider like JLYPT, this means an even greater ability to guarantee outcome certainty, pushing the boundaries of what is manufacturable in terms of complexity, precision, and efficiency.
Conclusion: Sensing the Path to Absolute Precision
In precision CNC machining, the unmeasured is unmanaged. The sophisticated suite of sensors used in robotics provides the essential measurement and feedback that transforms a static program into a dynamic, intelligent manufacturing process. From ensuring the structural integrity of a medical implant to enabling the unattended production of automotive systems, these sensors are the unsung heroes of modern manufacturing reliability and quality.
At JLYPT, our investment in sensor-integrated machining technology is an investment in our clients’ success. It is the foundation for our ability to hold extreme tolerances, machine challenging materials, and deliver complex parts with guaranteed consistency. It moves us from being a shop that makes parts to a engineering partner that delivers certified, sensor-verified precision.
For your next project, partner with a manufacturer who sees the whole picture. Explore our sensor-driven capabilities and learn how we can bring unparalleled precision and reliability to your supply chain at JLYPT CNC Machining Services.
