UAV Antenna Mounts Manufacturing: CNC Machining Playbook for RF Performance, Vibration Survival, Materials, GD&T, Finishes, Inspection + 3 Production Case Studies
A UAV antenna is only as good as the mechanical interface that holds it in the right position, with the right electrical reference, under vibration, thermal cycling, and repeated maintenance. In the field, “RF problems” often trace back to very physical issues: a mount that loosens and de‑indexes, a ground path that becomes intermittent after anodizing, a cable that frets at the connector, or a bracket that warps just enough to tilt an antenna off its intended axis. That is why UAV antenna mounts manufacturing deserves the same engineering discipline you’d apply to flight‑critical hardware. It is not just bracket fabrication. It is precision CNC work shaped by RF constraints, environmental durability, and production repeatability. This long-form guide is written for:
- UAV OEM mechanical engineers integrating GNSS, LTE/5G, telemetry, video downlink, ADS‑B, or payload‑specific antennas
- RF engineers who want the mechanical team to stop “moving the antenna a little” late in the program
- procurement teams evaluating CNC suppliers for repeatable mounts, masts, and antenna interface plates If you’re sourcing a CNC partner for custom UAV components—including antenna brackets, ground-plane plates, payload mounting frames, and precision hardware—JLYPT supports full-cycle manufacturing here:
https://www.jlypt.com/custom-cnc-uav-parts-manufacturer/
Table of Contents
- What Makes an Antenna Mount “Good” in Real UAV Operations
- UAV antenna mounts manufacturing: Mount Architectures and When to Use Each
- RF‑Driven Mechanical Requirements (Ground Planes, Indexing, Cable Management)
- Vibration, Fatigue, and Fastener Locking: Designing Mounts That Stay Put
- Material Selection (6061/7075/Ti/SS/Brass/PEEK) + Corrosion & Galvanic Control
- CNC Machining Strategy: 3‑Axis vs 5‑Axis, Setup Planning, Tooling, and Datums
- RF Connector Interfaces (SMA/TNC Bulkheads): Critical Features to Machine Correctly
- Surface Finish and Coatings: Anodize, Chem Film, Passivation, Masking for Grounding
- Inspection & Validation: CMM, Functional Gauges, Torque Audits, Environmental Tests
- Detailed Tables: DFM Rules, Tolerance Map, Process Routing, QC Gates, Cost Drivers
- Three Production Case Studies (Common Failure Modes and How We Fixed Them)
- Why JLYPT for UAV antenna mounts manufacturing + RFQ Checklist
- External Engineering Links (DoFollow)
1) What Makes an Antenna Mount “Good” in Real UAV Operations
A UAV antenna mount is successful when it performs four jobs at once:
- Holds antenna geometry stable
- Maintains orientation (azimuth/elevation) and polarization alignment
- Prevents “index drift” after vibration and temperature cycles
- Provides the correct electrical reference
- Predictable grounding (when required)
- Controlled isolation (when required), with intentional bonding points
- Survives environmental loading
- Vibration, shock, repeated handling, rain and dust, salt exposure, UV, fuels/oils (depending on mission)
- Remains serviceable
- Accessible fasteners
- Replaceable wear points
- Cable routing that does not require disassembling half the aircraft In practice, UAV antenna mounts manufacturing fails when teams optimize only for weight or only for aesthetics. The mount must be a controlled interface—not a best-effort bracket.
Quick reality check: why “close enough” is not close enough
- A few degrees of tilt can change link margin or GNSS multipath behavior.
- A loose ground path can create intermittent noise and unpredictable radiation patterns.
- A connector that is slightly misaligned causes coax stress and micro‑fretting; RF degradation follows.
2) UAV antenna mounts manufacturing: Mount Architectures and When to Use Each
Different UAV platforms demand different mounting strategies. The best architecture is the one that balances RF performance, structural reliability, and manufacturability.
2.1 Common antenna mount types
- Flat ground-plane plate (top‑mounted GNSS, telemetry monopoles, etc.)
- Standoff + bracket (clearance above composite skin, antenna spacing)
- Mast mount (better line-of-sight; higher leverage loads)
- Underbelly skid/keel mount (payload bay coexistence; needs protection)
- Wingtip mount (separation; aerodynamic constraints)
- Gimbal/payload mount interface (moving frame; cable management critical)
- Conformal mount frame (aerodynamic; complex geometry)
Table 1 — Architecture vs Use Case vs CNC Implications
| Mount Architecture | Typical Antenna | Why It’s Chosen | CNC Machining Priorities | Common Failure Mode | Robust Design Fix |
|---|---|---|---|---|---|
| Ground-plane plate | GNSS patch, monopole | simple + predictable | flatness, surface finish, edge break | warp → tilt | symmetric pocketing + finish pass last |
| Standoff bracket | LTE/5G, telemetry whip | clearance over composite | perpendicularity, thread integrity | loosening | anti-rotation + locking hardware |
| Mast mount | telemetry/video | line-of-sight | bending stiffness, fillets, inserts | fatigue cracks | larger radii, stress relief, Ti/7075 |
| Underbelly mount | video downlink | protection + routing | impact edges, guarded connector | impact damage | bumper features, sacrificial cover |
| Wingtip mount | diversity antennas | separation | aerodynamic profile, weight | delamination/galvanic | crush sleeves + isolation washers |
| Gimbal interface | payload antennas | dynamic movement | cable strain relief, indexing | cable fatigue | guided strain relief + service loop |
| Conformal frame | aero‑optimized | drag reduction | 5-axis surfacing, datums | tolerance stack | datum scheme + functional gauge |
| This is the first “manufacturing truth” of UAV antenna mounts manufacturing: your mount type determines your CTQs (critical-to-quality dimensions). If CTQs are not explicitly identified, production will drift toward cosmetic dimensions and away from functional RF geometry. |
3) RF‑Driven Mechanical Requirements (Ground Planes, Indexing, Cable Management)
Even if your CNC supplier never runs an RF simulation, the mount must embody RF intent. The mechanical design should make correct RF behavior the default outcome.
3.1 Ground plane strategy: intentional, not accidental
Many UAV antennas (especially monopoles) assume a conductive ground plane. Others (some GNSS patches, certain embedded antennas) require controlled dielectric spacing and minimal conductive mass nearby. Manufacturing implications:
- You must define which faces are bonding surfaces (conductive contact) and which faces are isolated (no metal contact or intentionally masked).
- Coatings matter: anodize is typically electrically insulating; chem film can preserve conductivity.
3.2 Indexing and polarization alignment
A mount often needs a repeatable “clocking” feature:
- dowel pin holes
- key slot
- machined flat
- asymmetric hole pattern
This prevents “install rotation” that changes polarization alignment.
3.3 Cable routing and strain relief are part of the mount
The mount should:
- provide a controlled bend radius
- protect coax from chafing
- prevent connector torque from being reacted by the coax itself
- allow service access without cable damage
Table 2 — RF Intent → Machining Features
| RF Intent | Mechanical Feature | CNC Approach | Inspection |
|---|---|---|---|
| stable polarization | anti-rotation keying | broach/slot mill, dowel holes | functional fit check |
| controlled ground contact | masked pad + serration | face mill + micro-serration | continuity test |
| minimize multipath | standoff geometry | 3D surfacing + datums | CMM location |
| reduce cable stress | strain relief pocket | ball end + controlled edges | visual + radius gauge |
| consistent antenna tilt | flat mounting plane | finish pass + flatness check | surface plate / CMM |
| In strong programs, UAV antenna mounts manufacturing includes a “bonding plan” and a “cable plan,” not just a bracket drawing. |
4) Vibration, Fatigue, and Fastener Locking: Designing Mounts That Stay Put
UAV mounts live in a vibration environment. The failures are predictable—and preventable.
4.1 Typical failure modes
- screws back out; mount de‑indexes
- fretting corrosion at joints; bonding becomes intermittent
- fatigue cracks at sharp internal corners
- coax connector loosens; bulkhead nut loses torque
- thin brackets resonate and amplify vibration into the antenna
4.2 Mechanical design features that matter
- Generous fillet radii at load transitions (avoid “machined notch” fatigue starters)
- Anti‑rotation features (tab, key, dowel, serrations)
- Proper thread engagement and use of inserts when cycling is expected
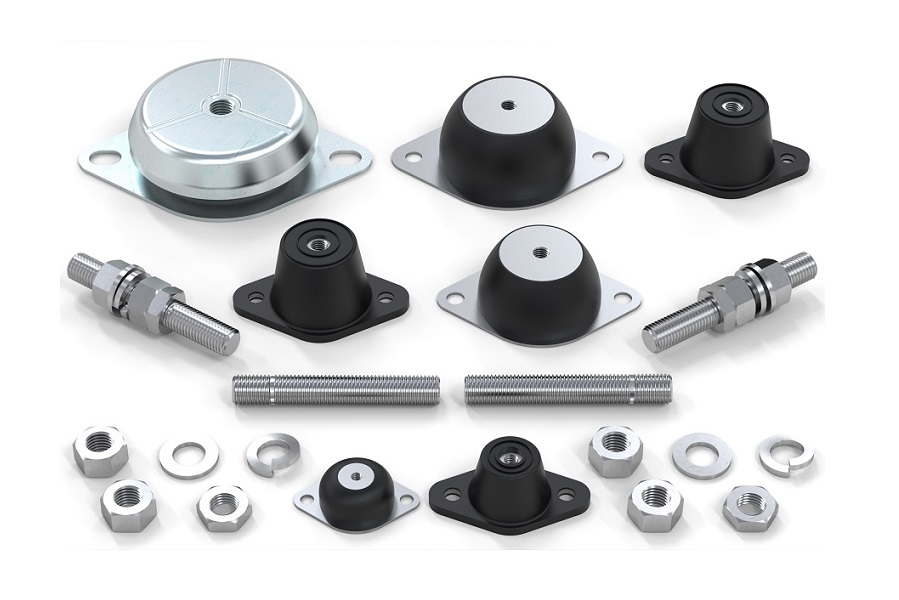
- Load spreading on composite skins (large washers, backer plates, crush sleeves)
Table 3 — Vibration‑Resistant Mounting Toolkit (Manufacturing‑Friendly)
| Problem | Recommended Hardware/Feature | Why It Works | Machining Notes |
|---|---|---|---|
| screw loosening | prevailing torque nuts, threadlocker, wedge-lock washers | maintains clamp load | ensure spotfaces are flat |
| joint slip | dowel pins / keys | takes shear off threads | ream holes after finish pass |
| fretting corrosion | controlled finish + contact pressure | reduces micro-motion | define Ra; avoid random blasting |
| fatigue at corners | internal radii | lowers stress concentration | use corner radius toolpaths |
| connector loosening | bulkhead flats + torque access | allows correct assembly | machine wrench flats/pockets |
| A mature UAV antenna mounts manufacturing plan treats locking strategy as a drawing requirement, not as a technician’s “best effort” on the assembly bench. |
5) Material Selection (6061/7075/Ti/SS/Brass/PEEK) + Corrosion & Galvanic Control
Material choice is not just weight vs strength; it is also conductivity, corrosion behavior, coating compatibility, and stiffness under temperature.
5.1 Common materials for CNC machined antenna mounts
- 6061‑T6 aluminum: excellent machinability, good corrosion resistance, ideal for most brackets and plates
- 7075‑T6 aluminum: higher strength and stiffness; good for masts and high‑load brackets; more corrosion‑sensitive
- Titanium (Ti‑6Al‑4V): high strength, corrosion resistance, premium choice for thin high‑stiffness parts; expensive machining
- Stainless (303/304/316): corrosion resistance; heavier; can be right for maritime environments or wear surfaces
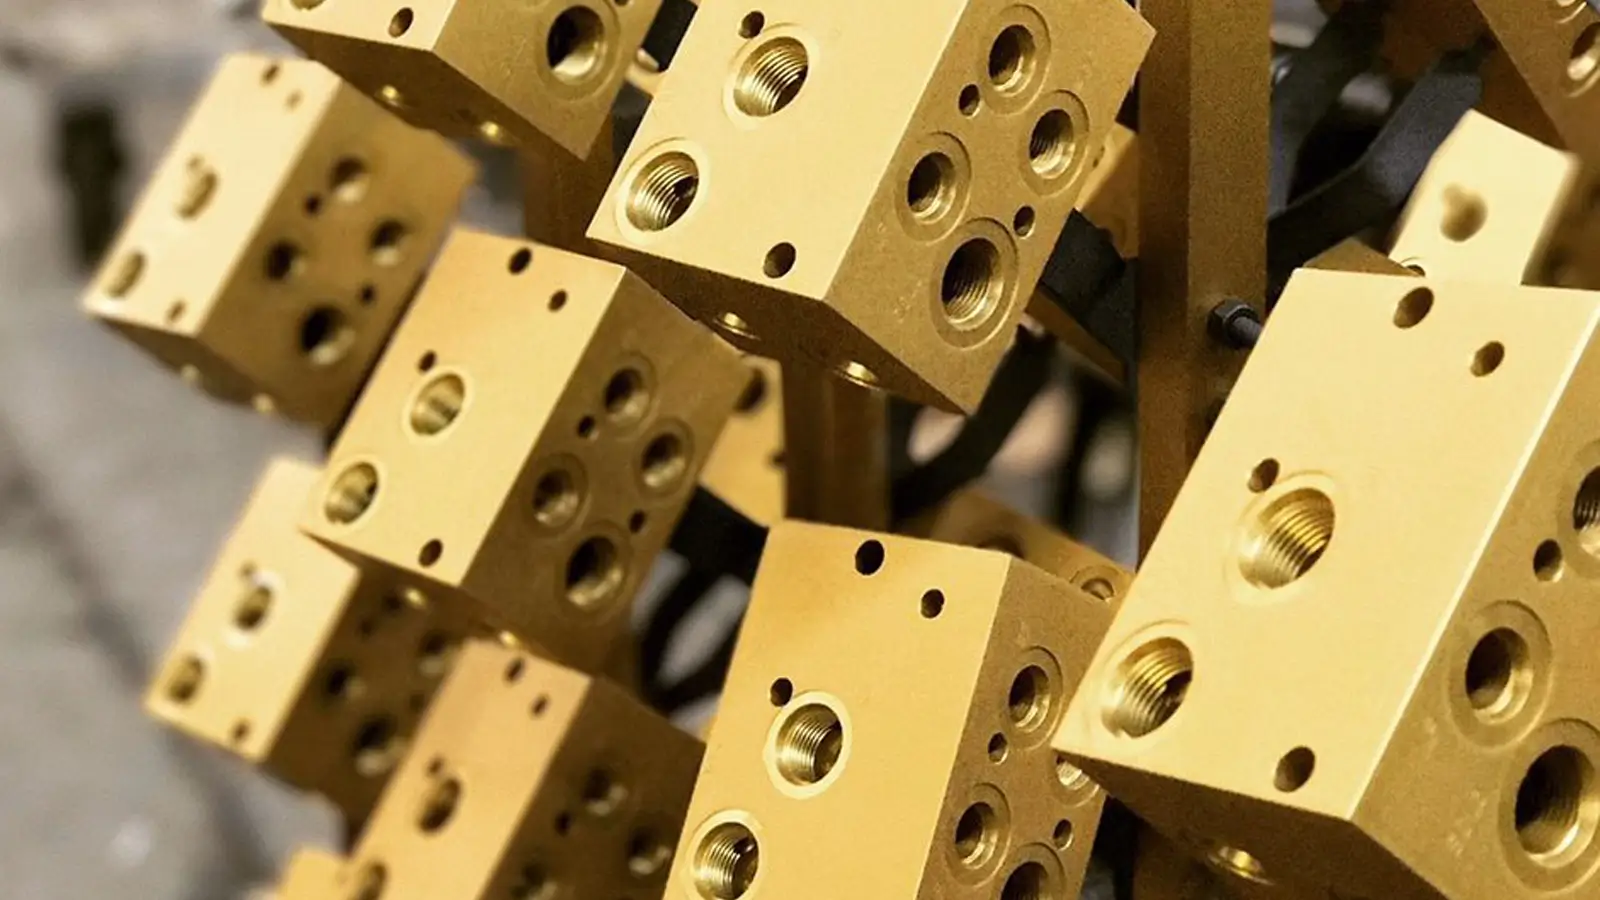
- Brass: excellent conductivity; sometimes used for grounding hardware or inserts
- PEEK/PEI/PTFE: electrical isolation, chemical stability; used for standoffs, isolators, dielectric spacers
5.2 Galvanic risk and composite airframes
Carbon fiber structures can accelerate galvanic corrosion when paired with aluminum in the presence of moisture. Countermeasures include:
- isolation washers and bushings
- chem film + sealant
- stainless/titanium hardware selection
- defined bonding points rather than uncontrolled metal-to-carbon contact
Table 4 — Material Selection Matrix for UAV antenna mounts manufacturing
| Material | Key Strength | Key Risk | Best Use | Finish Pairing |
|---|---|---|---|---|
| 6061‑T6 | machinability + stable | moderate stiffness | plates, brackets | anodize or chem film |
| 7075‑T6 | stiffness/strength | corrosion sensitivity | masts, thin stiff mounts | hard anodize + sealing |
| Ti‑6Al‑4V | high performance | cost + tool wear | ultra-light stiff parts | passivation / bead blast (non-bonding) |
| 316 stainless | corrosion resistance | weight | marine, harsh exposure | passivation |
| Brass | conductivity | softness | bonding lugs, inserts | nickel plating (optional) |
| PEEK | insulation + stability | cost | standoffs/isolators | none / controlled machining |
| A practical pattern is hybrid: aluminum structure + polymer isolators + stainless hardware. In UAV antenna mounts manufacturing, hybrids often outperform “single-material purity” in both reliability and serviceability. |
6) CNC Machining Strategy: 3‑Axis vs 5‑Axis, Setup Planning, Tooling, and Datums
Antenna mounts look small, but they can be deceptively complex: compound angles for antenna pointing, aerodynamic contours, and connector bosses requiring tight perpendicularity.
6.1 3‑axis vs 5‑axis decision
- 3‑axis works for most brackets and plates with smart fixture planning.
- 5‑axis shines when:
- you need angled faces without multi‑op stack error
- you want to hold coax bulkhead perpendicularity while machining contoured skins
- you want fewer setups to preserve true position between features
6.2 Datum scheme: choose functional datums
A common robust datum structure:
- Datum A: mounting interface to airframe (primary plane)
- Datum B: a machined side face used for clocking
- Datum C: a dowel hole / precision bore for repeatable location GD&T reference (DoFollow): https://www.iso.org/standard/63175.html
6.3 Tooling and toolpath notes (CNC‑specific)
- Use adaptive clearing for roughing pockets to reduce tool load and part distortion.
- Keep finishing passes consistent: constant stepover, stable tool stick‑out.
- Avoid “hand deburr as a process”: define a deburr map with controlled edge breaks for coax and bonding areas.
Table 5 — Example Process Routing for CNC Machined Antenna Bracket (6061)
| Op # | Setup | Key Operations | Toolpath Style | Primary Risk | Control Method |
|---|---|---|---|---|---|
| 10 | soft jaws, Datum A | face + rough profile | facing + adaptive | datum error | probing + finish face |
| 20 | same | pocketing + weight relief | adaptive clearing | chatter/warp | leave stock + stepdown control |
| 30 | same | finish mount plane + spotfaces | finish contour/face | flatness loss | finish last, stable clamp |
| 40 | same | drill/ream dowel + critical holes | spot-drill, drill, ream | true position drift | keep in same setup as datums |
| 50 | flip, pinned fixture | machine backside features | finish contour | datum transfer error | pins + probing routine |
| 60 | same | thread milling / insert seats | thread mill | thread fit issues | GO/NO‑GO gauges |
| 70 | bench | deburr per map + clean | controlled edge break | over-deburr | work instruction + QA check |
| 80 | finishing | anodize/chem film + masking | — | lost bonding | define masked grounding pads |
| Surface texture reference (DoFollow): https://www.iso.org/standard/52075.html | |||||
| This is the second manufacturing truth: UAV antenna mounts manufacturing succeeds when the routing is built around datums and CTQs, not around “shortest cycle time at any cost.” |
7) RF Connector Interfaces (SMA/TNC Bulkheads): Critical Features to Machine Correctly
A significant portion of antenna mount failures occur at connector interfaces—because the connector experiences torque during assembly and vibration during flight.
7.1 Bulkhead connector seats: what must be controlled
For SMA/TNC bulkheads (and similar):
- Perpendicularity of the mounting face to the connector axis
- Hole size and chamfer lead-in (avoid cutting the connector’s dielectric/insulator)
- Anti‑rotation: flats, D‑hole, or keyed pocket if the connector requires it
- Wrench access: tool clearance so the installer can torque correctly
- Cable strain relief features so the coax does not carry the connector’s bending load
7.2 Practical machining notes (shop-floor reality)
- If you hard anodize the bracket, mask the connector seat if electrical bonding is required.
- Avoid sharp edges near coax: specify edge break (e.g., 0.2–0.5 mm) in cable pass‑throughs.
- For thin walls, consider a backing boss to increase thread engagement and prevent ovalization under nut torque.
Table 6 — Connector Interface CTQs (Critical‑to‑Quality)
| Feature | Why It Matters | Typical Control | Best Inspection Method |
|---|---|---|---|
| seat face perpendicularity | prevents connector tilt, reduces stress | GD&T perpendicularity to Datum A | CMM or indicator fixture |
| bulkhead hole size | avoids slop or interference | tight limit tolerance | pin gauges |
| anti-rotation feature | prevents loosening | D-hole/flat/key | functional fit |
| spotface flatness | torque consistency | spotface spec | visual + flatness |
| cable exit radius | reduces coax fatigue | min radius requirement | radius gauge + visual |
| If you want reliable RF hardware, treat these as first-class features in UAV antenna mounts manufacturing, not as “just a hole.” |
8) Surface Finish and Coatings: Anodize, Chem Film, Passivation, Masking for Grounding
The finish is part of the electrical system. Many teams learn this only after field failures.
8.1 Anodize (Type II / Type III hardcoat)
- Pros: corrosion resistance, wear resistance, good cosmetics
- Cons: typically electrically insulating; thickness impacts dimensions
8.2 Chem film (conversion coating)
- Pros: corrosion resistance while maintaining conductivity (often preferred for bonding surfaces)
- Cons: wear resistance is lower than hardcoat
8.3 Stainless passivation
- Improves corrosion resistance by removing free iron and improving surface condition.
8.4 Masking plan (critical for grounding)
If you need a grounding point:
- specify masked pads for metal-to-metal contact
- include a bonding test (continuity target) in QC
Table 7 — Finish Selection Guide for UAV antenna mounts manufacturing
| Requirement | Recommended Finish | Why | Watch‑Out |
|---|---|---|---|
| durable mount, high wear | hard anodize | abrasion resistance | masking needed for bonding |
| consistent electrical bonding | chem film + controlled contact | conductive surface | protect from wear/fretting |
| marine corrosion | 316 SS + passivation | robust corrosion resistance | weight penalty |
| cosmetic premium | bead blast + anodize | uniform look | do NOT blast bonding pads |
| mixed-material isolation | anodize + isolation washers | prevents galvanic | verify electrical intent |
| Corrosion test reference (DoFollow): https://www.astm.org/b117-19.html |
9) Inspection & Validation: CMM, Functional Gauges, Torque Audits, Environmental Tests
A good mount design can still fail if production variation isn’t monitored. The inspection plan should be lightweight enough to run consistently—yet strong enough to catch drift.
9.1 Dimensional inspection
- CMM for hole true position, perpendicularity, profile features
- Pin gauges for bulkhead holes
- Surface plate + indicator for flatness on mounting planes
- Thread gauges for thread-milled holes / inserts
9.2 Functional inspection
- Fit gauge that simulates the airframe interface (especially for quick-swap payload bays)
- Torque audit for critical fasteners and bulkhead nuts
- Continuity test for defined bonding points (pass/fail threshold)
9.3 Documentation for aerospace‑style traceability
FAI reference (DoFollow): https://www.sae.org/standards/content/as9102/
Table 8 — Production QC Plan (Practical and Scalable)
| CTQ | Method | Frequency | What It Prevents |
|---|---|---|---|
| mounting plane flatness | indicator on surface plate | FA + sampling | antenna tilt drift |
| connector seat perpendicularity | CMM / fixture | FA + periodic | coax stress + RF variability |
| hole true position to datums | CMM | FA + periodic | misalignment to airframe |
| thread fit | GO/NO‑GO | 100% critical | loose mounts, stripped threads |
| bonding continuity | multimeter | per lot / per assembly | EMI issues, noisy RF |
| finish mask verification | visual + continuity | per lot | “insulating where should bond” |
| For UAV antenna mounts manufacturing, the highest ROI checks are: flatness, connector seat geometry, and bonding continuity. Those three catch a large percentage of field failures early. |
10) Detailed Tables: DFM Rules, Tolerance Map, QC Gates, Cost Drivers
10.1 DFM rules that reduce both cost and risk
Table 9 — DFM Rules (CNC‑First, Field‑Proven)
| Rule | Why | CNC Benefit | Field Benefit |
|---|---|---|---|
| avoid ultra-thin unsupported walls | prevents chatter/warp | stable machining | durability |
| specify edge breaks near cables | prevents insulation cuts | repeatable deburr | fewer coax failures |
| use dowels/keys for shear | protects threads | easier assembly | stable indexing |
| add spotfaces under fasteners | torque consistency | cleaner assembly | less loosening |
| design wrench/tool access | correct torque possible | fewer assembly errors | fewer intermittent faults |
| plan masked bonding pads | electrical intent preserved | predictable finishing | stable grounding |
10.2 Tolerance mapping: stop over‑tolerancing
Antenna mounts often get drawings with blanket ±0.05 mm everywhere. That’s expensive and usually pointless. Instead, tighten only what matters.
Table 10 — Tolerance Map (Function → Control)
| Feature | Function | Typical Control Type | Recommendation |
|---|---|---|---|
| mount-to-airframe plane | antenna pointing | flatness | control explicitly |
| antenna interface holes | indexing | true position | tie to datums A/B/C |
| connector seat face | coax alignment | perpendicularity | specify GD&T |
| cosmetic outer profile | aesthetics | profile/size | relax unless aerodynamic critical |
| internal pockets | weight | size | allow generous tolerance |
| cable pass-through | safety | edge break + radius | define min radius |
10.3 QC gates: where to stop scrap early
Table 11 — QC Gates for UAV antenna mounts manufacturing
| Gate | Stage | Check | Scrap Prevented |
|---|---|---|---|
| Gate 1 | after datum machining | flatness + datum integrity | compounding setup errors |
| Gate 2 | after connector features | seat perpendicularity + hole gauge | rework after finishing |
| Gate 3 | post-thread | GO/NO‑GO | field loosening/strip |
| Gate 4 | post-finish | mask verification + continuity | electrical failures |
| Gate 5 | final assembly | torque audit + fit gauge | intermittent faults |
10.4 Cost drivers (what actually changes the quote)
Table 12 — Cost Drivers Breakdown
| Cost Driver | What Increases It | How to Reduce Without Risk |
|---|---|---|
| setups | multi-face features with tight relationships | 5-axis or smarter datum planning |
| tight GD&T | over-control nonfunctional areas | tighten only CTQs |
| finishing complexity | masking + dual finishes | simplify bonding plan where possible |
| exotic materials | Ti/SS | use hybrid: Al structure + SS inserts |
| cosmetic requirements | full bead blast, perfect cosmetics | limit cosmetics to visible faces |
| inspection | 100% CMM on all dims | use functional gauges for high-volume |
11) Three Production Case Studies (Failure Modes → Corrective Manufacturing Plan)
These are representative production patterns we see when UAV antenna mounts manufacturing moves from prototype “works once” to fleet “works every time.”
Case Study 1 — GNSS/RTK Mount Plate: Unexpected Position Drift After Field Service
Symptoms: RTK performance became inconsistent after repeated maintenance. The antenna was reinstalled, but results varied flight to flight. Root cause (mechanical/RF interface):
- The mount plate had a symmetric hole pattern with no clocking feature.
- Technicians unintentionally rotated the antenna slightly during reassembly.
- The mounting surface was cosmetically blasted, and slight edge rounding changed seating repeatability. Corrective actions in UAV antenna mounts manufacturing:
- Added a dowel + asymmetric key slot to enforce indexing.
- Defined the antenna seat as a CTQ: controlled flatness and surface finish.
- Introduced a controlled edge break and removed blasting from the seat area. Outcome: Reinstallation became deterministic, and RTK repeatability stabilized across the fleet.
Case Study 2 — Video Downlink Bulkhead Bracket: Coax Failures and Connector Loosening
Symptoms: Intermittent video link, then eventual connector failure. Inspection showed coax stress and a bulkhead nut that had backed off. Root cause (connector interface + assembly access):
- Connector seat face was slightly out of perpendicular, forcing the coax into a constant bend.
- No anti-rotation feature was present; connector body rotated during torqueing.
- Wrench access was poor, leading to under-torque on the bulkhead nut. Corrective actions in UAV antenna mounts manufacturing:
- Added a spotface with GD&T perpendicularity to Datum A.
- Machined anti-rotation flats on the connector interface.
- Updated geometry to provide tool clearance for proper torque application.
- Added a simple torque audit and visual witness mark on assembly. Outcome: Connector loosening stopped, coax life improved, and field link stability increased.
Case Study 3 — Composite Airframe LTE Antenna Standoff: Corrosion and Unstable Grounding
Symptoms: After humid operations, the mount showed corrosion staining, and LTE performance degraded sporadically. Root cause (galvanic + bonding intent confusion):
- Aluminum mount contacted carbon composite with inconsistent sealing; moisture created a galvanic cell.
- Hard anodize insulated the intended ground path; bonding depended on random scratches and fretting. Corrective actions in UAV antenna mounts manufacturing:
- Introduced galvanic isolation: polymer washers + controlled interface stack.
- Defined a dedicated bonding pad with masking and a fastened bonding strap.
- Switched the main bracket finish to a coating strategy aligned with electrical intent (conductive where needed, insulated where not).
- Added continuity checks to incoming inspection. Outcome: Corrosion was controlled and grounding became repeatable; LTE stability improved.
12) Why JLYPT for UAV antenna mounts manufacturing + RFQ Checklist
If you want mounts that hold RF geometry in the real world, you need more than a CNC vendor—you need a process that connects drawings → machining → finishing → inspection → assembly intent. JLYPT supports UAV antenna mounts manufacturing with:
- CNC machining for brackets, plates, masts, standoffs, and keyed/indexed interfaces
- 3‑axis and 5‑axis capability planning to reduce setup stack error
- Thread milling, insert seats, spotfaces, controlled deburr maps
- Finish integration planning (anodize / chem film / passivation) with masking for bonding points
- Inspection support: CMM reporting for CTQs, functional gauging ideas for scale production Start here (requested link):
https://www.jlypt.com/custom-cnc-uav-parts-manufacturer/ Additional internal link:
https://www.jlypt.com/
RFQ Checklist
To quote fast and accurately, send:
- 3D CAD + 2D drawing with datums and CTQs
- antenna model/interface (hole pattern, torque requirements, connector type)
- bonding intent: which faces must be conductive vs insulated
- finish requirements and any masking zones
- target volumes (prototype / pilot / production)
- inspection needs (FAI, CMM for specific features, continuity test thresholds)
- airframe interface model or a simple gauge definition (recommended)
External Engineering Links
- ISO 1101 GD&T: https://www.iso.org/standard/63175.html
- Surface texture parameters: https://www.iso.org/standard/52075.html
- ASTM B117 salt spray: https://www.astm.org/b117-19.html
- SAE AS9102 FAI: https://www.sae.org/standards/content/as9102/
- FCC regulations overview: https://www.ecfr.gov/current/title-47