UAV Heat Sinks Machining: A CNC‑First Guide to Thermal Performance, Low Weight, and Production Repeatability
Thermal management on a UAV is a packaging problem disguised as a heat‑transfer problem. You’re trying to move watts out of a compact electronics stack while fighting mass limits, airflow uncertainty, vibration, altitude/temperature swings, and service constraints. The heat sink becomes more than “fins on a block”—it becomes a structural interface, a sealing surface, and often a datum that locates electronics, shields, and connectors.
That’s why UAV heat sinks machining is a specialized CNC discipline. A good heat sink for an unmanned aircraft has to be:
- Thermally effective (low interface resistance, adequate convection area, stable performance across flight regimes)
- Mechanically reliable (vibration and shock tolerant, stable fastener seats, no fin fatigue cracking)
- Manufacturable (repeatable toolpaths, predictable anodize effects, controllable burrs and edge breaks)
- Inspectable (flatness and roughness verified where the TIM actually contacts, not just overall dimensions)
- Serviceable (threads that survive maintenance cycles, robust alignment features, controlled torque seats)
This article is written from the machining and manufacturing side, using CNC‑machining terminology and decision logic that translates directly into better RFQs, cleaner DFM, and fewer thermal surprises after assembly. You’ll find detailed tables, practical tolerance guidance, process routing examples, and three real‑world style case studies.
If you need a manufacturer for custom UAV parts—heat sinks, housings, brackets, motor mounts, and more—JLYPT supports end‑to‑end CNC programs here:
https://www.jlypt.com/custom-cnc-uav-parts-manufacturer/
Table of Contents
- What Makes UAV Thermal Hardware Different
- UAV heat sinks machining: Heat Sink Types Used in Drones
- Thermal Requirements That Drive Machining Decisions
- Material Selection: 6061 vs 7075 vs Copper vs Hybrids
- Fin Geometry and Machinability (What You Can Really Cut)
- Base Flatness, Surface Roughness, and TIM Control
- CNC Process Planning: 3‑Axis HSM, 5‑Axis, and Secondary Ops
- Workholding and Distortion Control for Thin‑Fin Parts
- Deburring, Edge Breaks, and Cleanliness (Often the Real CTQ)
- Surface Finishes: Anodize, Chromate, Passivation, and Paint
- GD&T Strategy for Heat Sinks (Datums That Make Sense)
- Inspection Plans: CMM Flatness, Roughness, Thread Gaging
- Cost Drivers and Quoting Inputs That Prevent Rework
- Detailed Tables (DFM, tolerances, routing, QC gates)
- Three Case Studies (Prototype → Pilot → Production)
- Why JLYPT for UAV heat sinks machining
- Standards & External References (DoFollow Links)
1) What Makes UAV Thermal Hardware Different
Designing a heat sink for a bench‑top enclosure and designing one for a UAV are not the same task.
1.1 Variable airflow and partial blockage
In a UAV, the “airflow” is not a guaranteed constant. You can have:
- prop wash that changes with throttle
- ducting and grills that cause pressure drops
- payload mounting plates that partially block fin channels
- flight regimes with high speed but low convective effectiveness due to geometry
For UAV heat sinks machining, this uncertainty often pushes you toward:
- robust base conduction (minimize interface resistance)
- fin geometry that tolerates non‑ideal airflow
- mounting features that avoid warping the heat sink when torqued down
1.2 Mass constraints and center‑of‑gravity sensitivity
Every gram counts. But lightweight heat sinks can become too thin, too flexible, or too distortion‑prone after anodize. Successful CNC heat sinks balance:
- fin density vs fin stiffness
- base thickness vs flatness stability
- pocketing for weight reduction vs clamp distortion during machining
1.3 Vibration, fatigue, and fastener integrity
Thin fins are exposed cantilevers. Under vibration, fins can fatigue—especially when:
- tool marks create stress risers
- sharp internal corners remain from machining
- fins are too tall for their thickness and unsupported
A machining‑aware design avoids “thermally ideal but mechanically fragile” fins.
1.4 Electronics stacking and multifunction interfaces
UAV heat sinks often serve as:
- an electronics mounting plate
- a shielding plane (ground reference)
- a structural stiffener
- a sealing surface for gaskets
- a datum reference for connector alignment
That means your heat sink drawing needs real GD&T, not only linear dimensions.
2) UAV heat sinks machining: Heat Sink Types Used in Drones
Different UAV subsystems generate heat differently. ESCs create localized hot spots; onboard computers spread heat across packages; RF amplifiers may demand uniform base temperature; power distribution boards can heat trace regions unevenly.
Table 1 — Common UAV Heat Sink Architectures and When to Use Them
| Heat sink type | Typical UAV application | CNC‑machining implications | Key risks |
|---|---|---|---|
| Plate + straight fins (integral) | ESC, power modules, airflow paths | thin-fin milling, fin burr control | fin chatter, fin damage in handling |
| Pin-fin array (integral) | turbulent or multi-direction airflow | many tool entries, tool wear, deburr complexity | time/cost, trapped burrs |
| Pocketed baseplate + attached fins | electronics trays, compute modules | multi-part assembly, flatness control on base | interface resistance, assembly tolerance stack |
| Copper base + aluminum fins (hybrid) | high power density hotspots | dissimilar material joint, galvanic isolation | corrosion, joint reliability |
| Heat spreader plate for vapor chamber | RF payloads, compute | ultra-flat interfaces, surface finish targets | warp, poor TIM contact |
| Housing-as-heat-sink | sealed avionics box | 5-axis access, sealing surfaces, threads | leakage risk, distortion after finish |
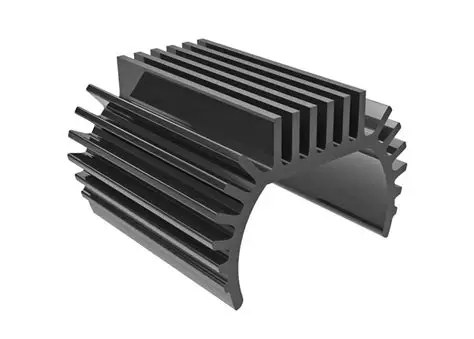
For UAV heat sinks machining, integral fin designs are common because they simplify assembly and reduce thermal contact resistances—but they put pressure on your CNC process to prevent fin damage, burrs, and distortion.
3) Thermal Requirements That Drive Machining Decisions
Heat sinks are often “thermally designed” but “machining forgotten.” In practice, machining decisions (flatness, roughness, finish, and assembly torque seats) can dominate thermal outcomes.
3.1 The thermal stack-up you can actually control
In many UAV assemblies, the biggest controllable variables are:
- base flatness at the TIM interface
- surface texture (affects TIM wetting and bondline thickness)
- mounting pattern position (affects contact pressure distribution)
- anodize planning (affects flatness and fit at interfaces)
3.2 Contact pressure and fastener layout matter
A heat sink base that’s “flat on CMM” can still perform poorly if the fastener layout bows the base away from the device. Machining can help by providing:
- stable spotfaces
- consistent counterbore depths
- controlled parallelism between device mount pads and reference datums
3.3 UAV‑specific thermal constraints
- Higher altitude can reduce air density → lower convective heat transfer
- Dust and debris can clog fin channels
- Enclosures may need IP‑rated sealing → limits airflow, increases reliance on conduction to outer surfaces
The CNC takeaway: emphasize low thermal resistance at interfaces and robust fin geometry, not just maximum surface area.
4) Material Selection for UAV Heat Sinks (Machining + Thermal Reality)
Material choice is not a one‑line decision. It affects tool selection, cycle time, finish behavior, and long‑term reliability.
Table 2 — Materials for UAV Heat Sinks Machining
| Material | Thermal conductivity (qualitative) | Weight | Machinability | Typical UAV use | Notes |
|---|---|---|---|---|---|
| 6061‑T6 aluminum | good | low | excellent | general heat sinks, housings | best cost/performance baseline |
| 7075‑T6 aluminum | moderate | low | good | structural heat sinks, load-bearing plates | stronger; sometimes chosen for stiffness over conductivity |
| Copper (C110/C101 type families) | very high | high | fair to difficult | hotspots, spreaders | heavy; burr control and tool wear matter |
| Aluminum‑copper hybrid | high (targeted) | medium | mixed | high power density modules | joint design is critical |
| 6063 aluminum | good | low | good | extruded profiles | common for extrusion; less common for fully custom CNC |
| Stainless steel | low | high | fair | rarely as heat sink | used more for strength; not a thermal choice |
Practical guidance: In UAV heat sinks machining, 6061‑T6 is the workhorse. 7075‑T6 is used when stiffness and thread strength are prioritized. Copper is used selectively—often as an insert, spreader, or localized base region—because of mass.
5) Fin Geometry and Machinability (What You Can Cut Without Regret)
A heat sink’s thermal performance often pushes toward thinner, taller, denser fins. CNC reality pushes back: tool deflection, chatter, burrs, and cycle time.
5.1 Key fin parameters that affect CNC success
- Fin thickness: too thin increases vibration and burr risk
- Fin height: tall fins amplify chatter and can warp during machining
- Fin pitch: tight spacing restricts tool access and chip evacuation
- Root fillet: sharp roots become fatigue initiators
- Leading edge: sharp fin tips bend during handling and blasting
5.2 Straight fins vs pin fins (CNC perspective)
- Straight fins are typically cut with slotting strategies; manage tool engagement and chip evacuation.
- Pin fins require repetitive toolpaths; burr removal becomes harder, and cycle time climbs quickly.
Table 3 — Fin Geometry vs CNC Method (UAV heat sinks machining)
| Geometry | Common CNC approach | Best tooling | Main failure mode | Prevention |
|---|---|---|---|---|
| straight channels | 3-axis HSM slotting | carbide end mills, optimized flute length | chatter, fin deflection | step-down control, rest machining, constant engagement |
| thin-fin arrays | rough + finish passes | reduced radial engagement tools | burrs at fin edges | dedicated deburr plan, edge break spec |
| pin-fin field | adaptive clearing + finish | stubby tools, high rigidity | trapped burrs, long cycle time | design for deburr access, consider pitch |
| tapered fins | 5-axis finishing | ball end mills for profiles | surface scallops | tighter step-over, stable tool orientation |
5.3 Thermal vs structural compromise (UAV reality)
UAVs experience vibration and occasional impacts. Fins should survive:
- shipping and assembly handling
- field maintenance
- vibration harmonics near motor/prop frequencies
A fin geometry that’s marginally better thermally but fragile mechanically often fails earlier—and costs more to replace than the thermal gains justify.
6) Base Flatness, Surface Roughness, and TIM Control
For many UAV electronics, thermal performance is decided at the TIM interface.
6.1 What “flat enough” means in practice
If the base is warped, the TIM layer thickens. TIM is almost always less conductive than metal, so thicker TIM = higher thermal resistance.
6.2 Surface roughness and TIM wetting
A surface that is too rough can trap voids; too smooth can cause pump-out behavior depending on TIM type and pressure cycling. Most importantly, roughness must be consistent and measurable.
Surface texture reference (parameters and definitions):
https://www.iso.org/standard/72083.html
6.3 Machining factors that move flatness
- pocketing patterns that release internal stresses
- clamping distortion during finishing
- heat input from aggressive milling
- post-process finishing (anodize can change local stresses and edge buildup)
Table 4 — TIM Interface Targets for UAV Heat Sinks Machining
| Interface feature | Why it matters | CNC control lever | Inspection method |
|---|---|---|---|
| flatness of device pad | bondline thickness control | finish pass strategy, low distortion fixturing | CMM flatness / surface plate indicator |
| parallelism to datum plane | alignment in stack | single-setup finishing | CMM parallelism |
| roughness (Ra/Rz) | TIM wetting and stability | tool selection, feed/speed, finishing pass | profilometer |
| spotface quality | stable clamp load | counterbore/spotface toolpath | visual + depth measurement |
7) CNC Process Planning: 3‑Axis HSM, 5‑Axis, and Secondary Ops
In UAV heat sinks machining, the best process plan is usually the one that:
- finishes the critical interface in a controlled setup
- keeps thin fins supported as long as possible
- minimizes re-clamping and datum stack-up
- creates predictable burr locations (so deburring can be standardized)
7.1 3‑axis high-speed milling (HSM)
3‑axis HSM is often sufficient for:
- straight-fin heat sinks
- pocketed baseplates
- heat sinks with perpendicular sidewalls and standard mounting patterns
7.2 5‑axis machining
5‑axis helps when you need:
- angled fin geometry integrated into housings
- multi-face features without re-clamping
- improved tool approach for finishing and deburring access
7.3 Secondary operations that shouldn’t be an afterthought
- tapping (rigid tapping vs thread milling)
- reaming for dowel alignment
- Helicoil / threaded insert installation
- ultrasonic cleaning for trapped chips in fin channels
- sealing surface finishing (if housing-as-heat-sink)
Table 5 — Example Process Routing (Integral Fin Heat Sink, 6061‑T6)
| Op # | Operation | Machine | Key output | CTQ focus |
|---|---|---|---|---|
| 10 | saw cut / prep | prep | blank size + ID | traceability |
| 20 | rough mill datum face | VMC | stable datum plane | flatness baseline |
| 30 | rough pocketing | VMC | weight reduction | distortion management |
| 40 | rough fin slotting | VMC HSM | fins formed (oversize) | avoid chatter |
| 50 | finish fin pass | VMC HSM | fin thickness + straightness | fin integrity |
| 60 | drill/tap mounting | VMC | threads + hole position | positional accuracy |
| 70 | finish device pad | VMC | final flatness/roughness | TIM performance |
| 80 | deburr + edge break | manual + fixtures | burr-free fins | cleanliness |
| 90 | anodize | finishing | corrosion protection | anodize-aware |
| 100 | final inspection | CMM + gauges | CTQ report | release |
8) Workholding and Distortion Control for Thin‑Fin Parts
Workholding is frequently the hidden factor behind inconsistent heat sink quality.
8.1 Common distortion mechanisms
- Over-clamping bows the base; release after machining → warp
- Thin fins vibrate under cutting load → scallops and bent fins
- Removing too much material too fast → stress relief warp
- Uneven toolpath heat → localized expansion and drift
8.2 Proven workholding strategies in UAV heat sinks machining
- Vacuum fixtures for baseplates (excellent for flatness if designed well)
- Soft jaws or dedicated nests that support the base uniformly
- Sacrificial support ribs (machined away at the end) to stabilize thin fins during roughing
- Leave the interface surface for last to correct minor warp (when process allows)
Table 6 — Workholding Guide for UAV Heat Sinks Machining
| Part type | Best workholding approach | Why | Watch-outs |
|---|---|---|---|
| flat baseplate with fins | vacuum fixture + perimeter support | minimizes clamp distortion | sealing integrity, chip contamination on vacuum seals |
| thick base + tall fins | soft jaws + support blocks | stabilizes mass and fins | access to fin channels |
| housing-as-heat-sink | 5-axis vises + locating datums | reduces re-clamping | ensure repeatable datums |
| copper spreader plates | flat clamping + low heat | reduces warp | thermal expansion, tool wear |
9) Deburring, Edge Breaks, and Cleanliness (Often the Real CTQ)
A heat sink can be dimensionally perfect and still fail assembly because of burrs.
9.1 Where burrs matter most
- fin tips and fin roots (cutting hazards and fatigue points)
- TIM interface perimeter (can prevent full contact)
- tapped holes and spotfaces (fastener seating and torque scatter)
- connector clearance edges (wire insulation damage)
9.2 Deburring for fin arrays
Fin arrays are hard because burrs can be:
- inaccessible to standard hand tools
- sharp but not obvious until you wipe a glove across them
- trapped deep in channels, later released into electronics
For UAV heat sinks machining, a “deburr plan” should be written like a process step, not left to interpretation.
Table 7 — Deburring Specification Examples (Manufacturing Language)
| Area | Edge requirement | Why | Verification |
|---|---|---|---|
| fin tips | light edge break, consistent | reduces handling damage and cuts | visual + tactile check |
| fin roots | avoid sharp notches | fatigue resistance | visual under magnification |
| device pad perimeter | controlled chamfer | prevents rocking on burr | feeler check / visual |
| spotfaces | burr-free | stable torque seat | fastener seat inspection |
| threads | no raised burr | prevents cross-threading | go/no-go + visual |
10) Surface Finishes: Anodize, Chromate, Passivation, Paint
Surface finish is not only cosmetic; it changes corrosion resistance, emissivity, and (sometimes) thermal contact behavior.
10.1 Anodize on aluminum heat sinks
- Type II anodize improves corrosion resistance and can provide electrical insulation.
- Type III hard anodize adds wear resistance but can increase dimensional change.
In UAV heat sinks machining, the most important anodize considerations are:
- masking requirements at the TIM interface (if bare metal contact is required)
- dimensional shift on tight fits (dowel holes, pocket widths)
- thread fit changes (especially small threads)
10.2 Chromate conversion (when conductivity matters)
Conversion coatings can preserve conductivity better than anodize in certain designs. The best choice depends on grounding needs and corrosion environment.
10.3 Stainless passivation
For fasteners or stainless thermal parts, passivation improves corrosion resistance without a thick build layer.
11) GD&T Strategy for Heat Sinks (Datums That Make Sense)
Heat sinks often serve as structural and alignment components. GD&T should reflect how the part is assembled and how heat flows.
Reference for GD&T terminology:
https://www.iso.org/standard/61456.html
11.1 Recommended datum scheme (typical UAV heat sink)
- Datum A: primary mounting plane (often the TIM contact face or the electronics mounting plane)
- Datum B: a long side face or locating rail used for alignment in the frame
- Datum C: a dowel hole or repeatable locating feature for clocking
11.2 Controls that actually protect performance
- Flatness of Datum A (TIM performance)
- Parallelism between mounting planes (stack alignment)
- True position of mounting holes relative to Datum A/B/C (assembly repeatability)
- Perpendicularity of spotfaces or boss faces (torque seat stability)
General tolerances reference (useful when deciding what NOT to over-control):
https://www.iso.org/standard/53671.html
Table 8 — GD&T-to-Function Map for UAV Heat Sinks Machining
| Feature | Function | Suggested GD&T | Why it matters |
|---|---|---|---|
| TIM contact face | thermal interface | flatness to A | controls bondline thickness |
| mounting hole pattern | assembly alignment | position to A | B |
| spotfaces | clamp load consistency | perpendicularity to A | reduces torque scatter |
| dowel holes | repeatable location | position + size control | stable reassembly |
| fin region | airflow interaction | profile (if needed) | prevents fin interference |
12) Inspection Plans: CMM Flatness, Roughness, Thread Gaging
An inspection plan for UAV heat sinks machining should prioritize the features that drive thermal and assembly outcomes.
12.1 Minimum recommended CTQs
- flatness of the device pad / TIM interface
- surface roughness of the TIM interface (if specified)
- hole true position for mounting patterns
- thread quality (go/no-go)
- fin thickness / spacing if airflow is constrained
Metrology background resource:
https://www.nist.gov/
Table 9 — Inspection Plan Template (UAV Heat Sink)
| CTQ | Tool | Sampling strategy | Notes |
|---|---|---|---|
| flatness of TIM face | CMM or surface plate + indicator | first article + per lot | measure after finish if anodized |
| roughness on TIM face | profilometer | first article + periodic | correlate to tool wear |
| hole pattern position | CMM | first article + capability sampling | critical for stack alignment |
| thread size | go/no-go gauge | 100% for critical | especially small threads in aluminum |
| fin thickness | mic/optical | early lots | also check fin straightness |
| cleanliness | visual + wipe test | per lot | chips in channels are common |
13) Cost Drivers and Quoting Inputs That Prevent Rework
Heat sinks can look simple and still quote high if the drawing hides cost drivers.
13.1 Major cost drivers in UAV heat sinks machining
- fin density and fin height (cycle time)
- deep narrow channels (tool reach, deflection)
- tight flatness on large footprints (fixturing + inspection time)
- extensive deburring requirements
- anodize masking and post-finish verification
- high thread count (many tapped holes)
13.2 RFQ information that speeds up correct manufacturing
- which face is the TIM contact surface (and target flatness/roughness)
- whether anodize is required, and if the TIM face must be masked
- assembly torque spec and fastener type (drives spotface quality needs)
- operating environment (salt, humidity, temperature range)
- expected production volumes and revision stability
14) Detailed Tables (DFM, Tolerances, Routing, QC Gates)
Table 10 — DFM Rules of Thumb for UAV Heat Sinks Machining
| DFM item | Common mistake | Better practice | Benefit |
|---|---|---|---|
| fin thickness too thin | fragile fins, chatter | increase thickness or add support ribs | higher yield |
| fin channels too narrow | chips pack, burrs trap | widen pitch or reduce height | better surface + cleaning |
| no relief fillets at fin roots | stress risers | add fillet radius | improved fatigue life |
| excessive tight tolerances | cost without benefit | tighten only CTQs | faster lead time |
| unplanned anodize | fit issues and warp | finish-aware tolerancing | fewer reworks |
| too many unique hole types | tool changes add time | standardize sizes | lower cycle time |
Table 11 — Practical Tolerance Targets (Conceptual)
(Final values depend on your module size, TIM choice, and power density.)
| Feature | Priority | Practical note |
|---|---|---|
| TIM pad flatness | very high | strongest driver of thermal contact |
| hole position (mounting) | high | prevents stress and misfit |
| fin thickness | medium-high | affects airflow and strength |
| cosmetic outer faces | low | use general tolerances |
| engraving | low | do after critical machining to avoid handling damage |
Table 12 — Example Process Routing (Housing‑as‑Heat‑Sink, 5‑Axis)
| Op # | Step | Machine | Key risks | Controls |
|---|---|---|---|---|
| 10 | rough external | 5‑axis | distortion | balanced stock removal |
| 20 | rough internal pockets | 5‑axis | chatter | toolpath smoothing |
| 30 | finish TIM pads | 5‑axis | flatness | stable workholding + finish pass |
| 40 | machine fins | 5‑axis | fin damage | staged rough/finish |
| 50 | drill/ream dowels | 5‑axis | positional error | datum strategy |
| 60 | tap threads | 5‑axis | thread quality | correct drill size + lubrication |
| 70 | deburr + clean | dedicated | trapped chips | cleaning validation |
| 80 | surface finish | vendor | mask needs | defined masking drawing |
| 90 | final inspection | CMM + gauges | missed CTQs | CTQ checklist |
Table 13 — QC Gates That Reduce Scrap on Heat Sinks
| Gate | What to check | Why it catches problems early |
|---|---|---|
| after roughing | warpage trend | prevents finishing a warped base |
| after finishing TIM face | flatness + roughness | locks thermal performance |
| before anodize | threads + hole positions | anodize can hide burrs; fix earlier |
| after anodize | functional assembly checks | confirm no fit shifts |
| packaging | fin protection | fins are damage-prone in transit |
15) Three Case Studies (Manufacturing‑Realistic, CNC‑Driven)
Case Study 1 — ESC Heat Sink With Thin Straight Fins (6061‑T6, High‑Speed Milling)
Scenario: A multirotor ESC module was running hot during extended hover. The electronics team increased power capability, but the existing heat sink had limited convection area and inconsistent contact to the MOSFET pad due to base distortion.
Key requirements
- increase fin surface area without making fins fragile
- maintain stable TIM contact (flatness and controlled roughness)
- fit within an existing envelope and mounting pattern
UAV heat sinks machining approach
- 3‑axis HSM fin channel strategy with controlled radial engagement to reduce fin chatter
- staged roughing: leave fins slightly thick, then finish pass to final thickness
- finish the TIM interface late in the process with minimal clamp distortion (fixture tuned for uniform support)
- counterbored/spotfaced mounting holes for repeatable clamp load
Inspection plan
- flatness verification on the TIM interface using CMM (first article + sampling)
- thread gauging for all tapped holes that see frequent service
- fin thickness check at multiple locations (root, mid, tip) to detect taper from tool deflection
Outcome Thermal performance improved primarily due to more consistent TIM contact and repeatable fin geometry, not only “more fins.” This is a typical lesson in UAV heat sinks machining: base flatness and process stability can outperform aggressive fin density.
Case Study 2 — Onboard Computer Heat Spreader Plate (7075‑T6 for Stiffness, Flatness‑Driven)
Scenario: A compact UAV compute module required a rigid plate that served as both a mounting structure and a heat spreader into a finned outer sink. The initial 6061 plate met thermal needs but flexed under assembly torque, causing uneven contact and throttling events under peak load.
Key requirements
- higher stiffness to maintain contact pressure distribution
- excellent flatness on the mating plane
- precise hole true position for a stacked assembly with dowels
UAV heat sinks machining approach
- material change to 7075‑T6 to improve stiffness and thread robustness
- controlled pocketing sequence to reduce stress-release warp
- use of dowel holes as functional datums (machined/reamed in a stable setup)
- thread milling on critical threads to improve consistency and reduce tap break risk in higher-strength alloy
Inspection plan
- CMM: flatness and parallelism of mating faces; true position of dowel holes and mounting patterns
- surface roughness check on mating face to match the selected TIM behavior
Outcome The improved stiffness stabilized the thermal interface during vibration and torque cycles. In UAV heat sinks machining, “better thermal material” is not always the winning move—sometimes you need the material that maintains geometry under clamp loads.
Case Study 3 — High Power Density RF Payload Base (Copper Insert Hybrid, Galvanic‑Aware)
Scenario: An RF payload amplifier produced concentrated heat at a small footprint. A pure aluminum heat sink could not spread heat fast enough without increasing size. A full copper heat sink was rejected due to mass.
Key requirements
- localized high conductivity under the amplifier footprint
- lightweight fins and structure
- corrosion resistance and galvanic risk management in a UAV environment
- reliable joint design between dissimilar metals
UAV heat sinks machining approach
- hybrid architecture: copper spreader insert seated into an aluminum body
- CNC-machined pocket for the insert with controlled depth and seating face finish
- mechanical retention strategy designed to maintain contact pressure (not relying on adhesive alone)
- attention to isolation strategy (coatings / interface design) to reduce galvanic corrosion risk
Inspection plan
- verify insert pocket flatness and depth (controls contact pressure and TIM thickness)
- verify assembled interface (spot checks) and ensure no burrs at the copper-aluminum boundary
- confirm hole patterns and spotfaces to maintain assembly torque integrity
Outcome The hybrid achieved a strong thermal improvement where it mattered, without the mass of a full copper part. This is a classic UAV heat sinks machining solution: place conductivity only where the heat enters, and keep the rest optimized for weight and manufacturability.
16) Why JLYPT for UAV heat sinks machining
A UAV heat sink is not just a “milled block with fins.” It’s an interface component where thermal performance depends on geometric discipline: flatness, surface texture, alignment, and repeatable assembly behavior. The manufacturing plan must treat the TIM face, spotfaces, and locating features as true CTQs—supported by process routing, workholding strategy, and inspection gates.
JLYPT supports custom UAV CNC projects—from prototypes to production—covering heat sinks, housings, mounts, and precision mechanical parts:
- UAV CNC manufacturing page: https://www.jlypt.com/custom-cnc-uav-parts-manufacturer/
- Company homepage: https://www.jlypt.com/
If you share your envelope, power dissipation, interface requirements, and finish needs, we can help translate thermal intent into a CNC plan that holds up in real flight conditions.
17) External References (DoFollow Links)
- GD&T definitions and framework: https://www.iso.org/standard/61456.html
- General tolerances: https://www.iso.org/standard/53671.html
- Surface texture parameters: https://www.iso.org/standard/72083.html
- Metrology background and measurement science: https://www.nist.gov/
