Custom FPV Drone Frame Machining: A CNC-First Guide to Building Frames That Assemble Cleanly, Survive Impacts, and Scale to Production
FPV builders are ruthless judges of hardware—because the aircraft is the test rig. If a frame is even slightly off, you feel it immediately: camera tilt drifts after a crash, motors no longer sit square, resonance moves into the mid-throttle band, stack gummies shear early, or a “minor” burr slices a phase wire during a fast battery swap.
That’s why Custom FPV drone frame machining is not just “making parts to a model.” It’s manufacturing work that has to respect three realities at the same time:
- Weight and stiffness are inseparable (the structure is the tuning fork).
- Impacts are part of normal operation (serviceability matters as much as strength).
- The assembly is a stack-up (hole patterns, datum strategy, and surface finish decide whether the build is clean or cursed).
This article is written for FPV brands, product engineers, and serious builders who want to move beyond one-off prototypes and into repeatable, production-minded manufacturing. It’s also designed for sourcing teams who need to qualify a CNC supplier using measurable criteria: process routing, fixturing, inspection discipline, and coating-aware tolerance planning.
If you’re evaluating a CNC partner for UAV components, you can also review JLYPT’s dedicated page here:
https://www.jlypt.com/custom-cnc-uav-parts-manufacturer/
Table of Contents
- What “Custom FPV Drone Frame Machining” Actually Covers
- FPV Frame Architectures and How They Change CNC Strategy
- Materials Selection: Aluminum, 7075, Titanium, Carbon Fiber, and Polymers
- CNC Process Planning: 3-Axis vs 3+2 vs 5-Axis for FPV Frames
- Thin-Wall, Pocketing, and Distortion Control (Where Frames Usually Go Wrong)
- Hole Patterns, Datums, and GD&T: Getting Stack Alignment and Motor Squareness Right
- CNC Turning for Standoffs, Spacers, and Hardware Interfaces
- Surface Finish and Coatings: Anodize, Hard Anodize, Chem Film, Paint, and Masking
- Deburring, Edge Quality, and Wire-Safe Geometry
- Inspection Strategy: CMM, Functional Gauging, and Practical CTQs for FPV
- Cost Drivers and DFM Rules That Reduce Scrap (Without Weakening the Frame)
- Detailed Manufacturing Tables (Tolerances, Tooling, Routing, Finishes, QC)
- Three Case Studies: Prototype-to-Batch Builds
- How to Work with JLYPT on Custom FPV Drone Frame Machining
- External Engineering References (DoFollow)
1) What “Custom FPV Drone Frame Machining” Actually Covers
A complete FPV frame “kit” is rarely a single manufacturing process. Depending on the design, it may include:
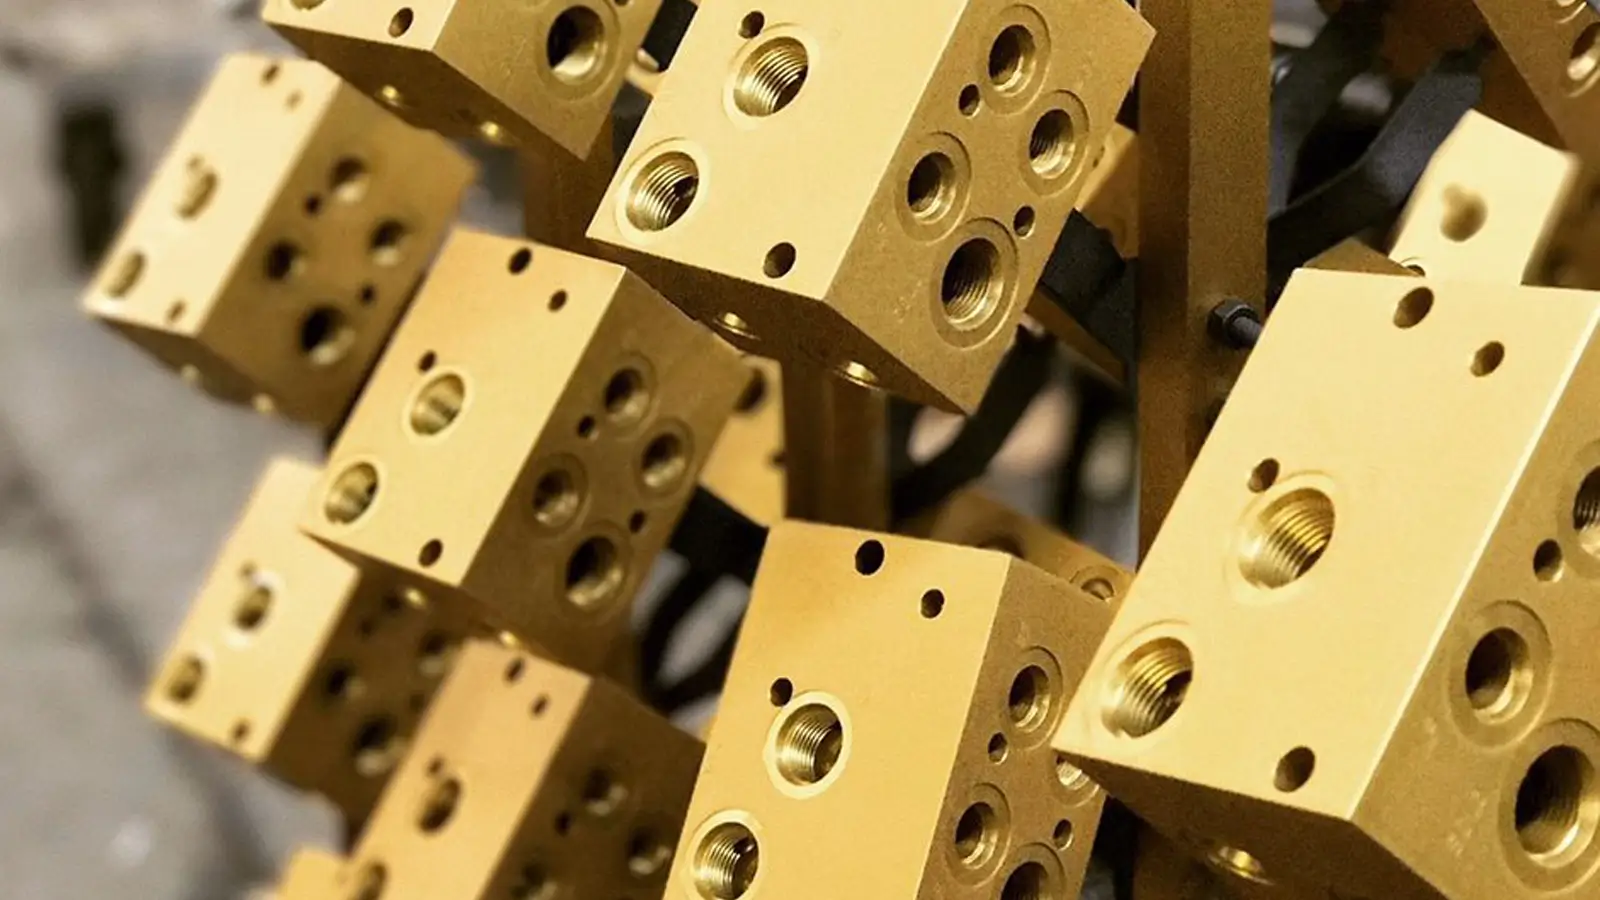
- CNC-milled metal parts: camera cages, arm clamps, motor mounts, gimbal-style plates, antenna mounts, heat spreaders
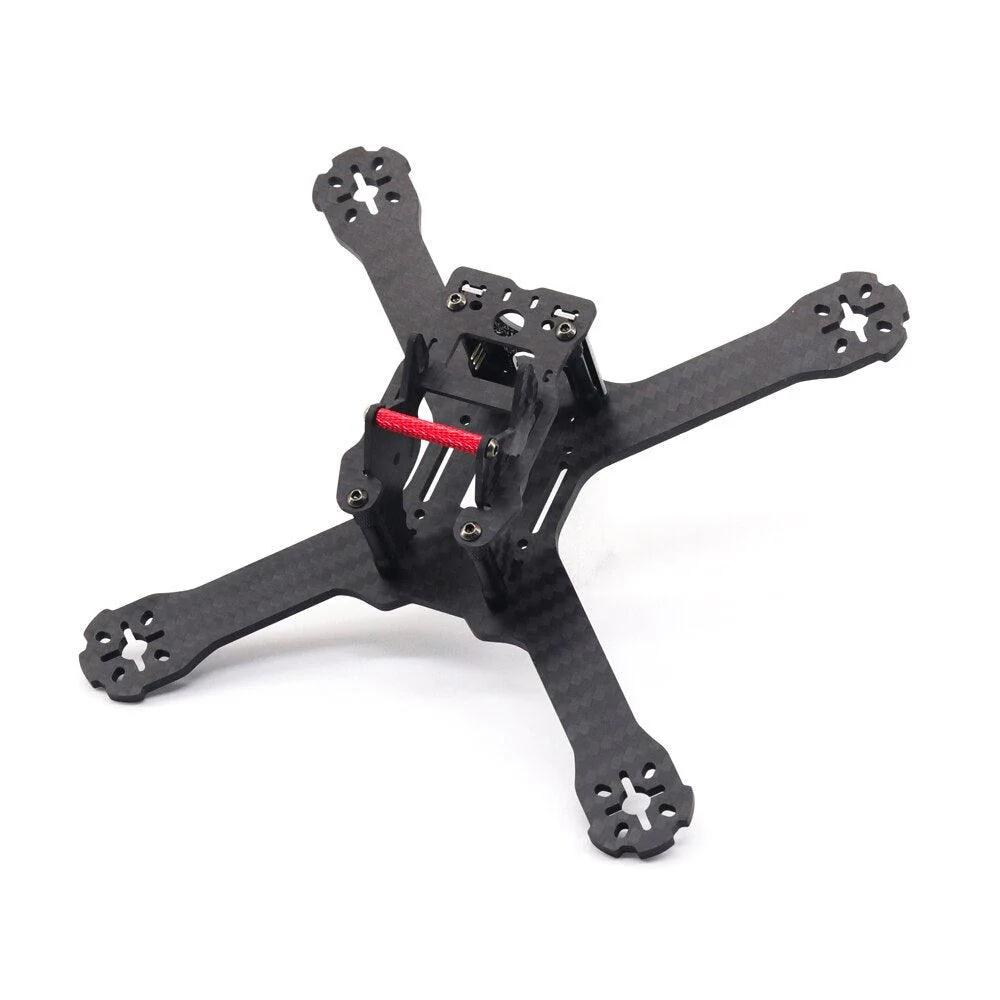
- CNC-routed carbon fiber plates: top/bottom plates, arms, braces
- CNC-turned parts: standoffs, spacers, bushings, threaded couplers
- Secondary operations: deburring, bead blast, anodize/hard anodize, laser marking, thread inserts
- Inspection deliverables: FAI, CMM reports, lot traceability (as required)
“Frame machining” also includes the decisions that prevent headaches later: where the datums live, which surfaces are functional, how the coating affects a fit, how the arms locate after a crash, and how you stop galvanic corrosion if carbon fiber is involved.
A supplier that’s truly strong in Custom FPV drone frame machining will talk about these topics before they talk about unit price.
2) FPV Frame Architectures and How They Change CNC Strategy
FPV frames are not all the same from a manufacturing viewpoint. The architecture changes the fixturing, the tolerance targets, and which features are “structural” versus “cosmetic.”
Table 1 — Common FPV Frame Types vs CNC/Manufacturing Priorities
| Frame type | Typical use | Key parts | Manufacturing priorities | Common manufacturing failure |
|---|---|---|---|---|
| 5″ freestyle | high-impact, aggressive tuning | arms + camera cage + top/bottom plates | impact durability, arm replacement, clean stack alignment | arm slip, cracked cage corners, misaligned camera plates |
| 5″ racing | light, high thrust-to-weight | minimal cage + stiff plates | weight reduction without chatter marks | thin-wall distortion, inconsistent hole patterns |
| 7″ long-range | lower RPM, heavier payload | longer arms, stronger motor mounts | stiffness vs weight, motor squareness, resonance control | oscillation due to asymmetry, arm twist after mild impact |
| cinewhoop | ducted, vibration sensitive | duct mounts, guards, camera plates | smooth surfaces, isolation features, repeatable assembly | misaligned ducts, uneven thrust, noisy footage |
| micro (2″–3″) | compact, tight packaging | tiny plates, small standoffs | burr control, thread reliability | stripped threads, shorting wires on sharp edges |
A practical takeaway: Custom FPV drone frame machining is usually a multi-part system problem. You can machine each part “in tolerance” and still end up with a poor build if datum choices and hole pattern control aren’t coordinated.
3) Materials Selection for FPV Frames (and What Machining Really Changes)
Material choice isn’t only about strength-to-weight. It changes tool selection, surface finish behavior, anodize response, and how the frame survives repeated service.
3.1 Aluminum alloys: 6061 vs 7075 (the FPV workhorses)
- 6061‑T6: very machinable, stable, good corrosion resistance, cost-effective
- Great for: top plates, camera side plates, brackets, general housings
- 7075‑T6: higher strength, excellent for compact high-load components
- Great for: arm clamps, motor mount blocks, crash-critical cages
- Often paired with Type III hard anodize for wear
3.2 Titanium: where it makes sense (and where it doesn’t)
Titanium can be compelling for parts that must remain compact but resist deformation—yet it increases cycle time and tooling wear. For FPV, titanium is typically justified for small high-load components, not large plates.
3.3 Carbon fiber: CNC routing vs CNC milling realities
Many FPV frames use carbon fiber plates for stiffness. While “machining” carbon fiber is often done via CNC routing, the manufacturing concerns are still CNC concerns:
- edge condition and fiber breakout
- hole quality and delamination risk
- consistent countersink geometry
- dust control and post-process sealing
3.4 Engineering plastics (e.g., PEEK, acetal)
Plastics show up in vibration isolation, antenna mounts, and ducts. The biggest issue is creep and thermal expansion, which can loosen assemblies if not designed correctly.
Table 2 — Material Comparison for Custom FPV Drone Frame Machining
| Material | Best-fit FPV parts | CNC behavior | Finish options | Watch-outs |
|---|---|---|---|---|
| 6061‑T6 Al | plates, cages, brackets | stable, fast to machine | anodize, bead blast | lower yield strength than 7075 |
| 7075‑T6 Al | clamps, motor mounts, cage cores | strong, clean milling | anodize, hard anodize | coating growth impacts fits |
| Ti alloy | compact load paths, specialty hardware | slower, heat sensitive | passivation, controlled finishes | higher cost, tool wear |
| Carbon fiber plate | arms, plates, braces | routing/abrasive cutting | edge sealing, clear coat | delam, dust, galvanic coupling |
| Acetal (POM) | spacers, antenna mounts | easy machining | none or dye | creep under load |
| PEEK | high-temp/chemical, premium isolators | machinable with care | none typically | expensive, design must avoid stress risers |
If you want a supplier that can scale with you, ask how they manage material lot consistency, especially when a tuned frame depends on stiffness repeatability.
4) CNC Process Planning: 3-Axis vs 3+2 vs 5-Axis for FPV Frames
A common misconception in FPV manufacturing is that “5-axis equals best.” In reality, the best process is the one that controls datums with minimal setups and predictable inspection.
4.1 When 3-axis is ideal
- flat plates (top/bottom plates, battery plates)
- simple brackets and spacers
- parts where all critical features are accessible in two setups
4.2 When 3+2 (indexing) wins
- camera cages with angled faces
- parts with side windows (USB access, antenna channels)
- drilling/tapping at compound angles while keeping a stable datum
4.3 When 5-axis is the right tool
- camera cages requiring smooth transitions and consistent wall thickness
- parts where multiple faces must remain tight to the same datum set
- designs that would otherwise require three or more separate fixtures
Table 3 — Axis Strategy for Custom FPV Drone Frame Machining
| Feature set | Recommended approach | Why it helps |
|---|---|---|
| angled camera side plates | 3+2 or 5-axis | preserves symmetry, reduces setup error |
| compact cages with internal pockets | 5-axis | reduces tool stick-out and secondary setups |
| flat carbon fiber plates | CNC routing (vacuum fixture) | fast, repeatable, low distortion |
| arm clamp blocks with side features | 4th-axis indexing | consistent hole relationships around perimeter |
| small standoffs/spacers | CNC turning | diameter control and repeatability |
A strong Custom FPV drone frame machining workflow starts by mapping critical datums to setups—not by choosing the fanciest machine.
5) Thin-Wall, Pocketing, and Distortion Control (Where Frames Usually Go Wrong)
FPV parts are frequently “lightweighted.” That means deep pockets, thin ribs, and minimal material. Those features invite:
- chatter and poor surface finish
- part movement under clamping force
- thermal growth during aggressive clearing
- distortion after release (especially in wide plates)
5.1 Toolpath strategy matters more than most people think
For aluminum frame parts, modern strategies (adaptive clearing / constant engagement) can reduce chatter and keep tool load consistent. But the real win is repeatability: consistent tool load yields consistent deflection.
5.2 Roughing/finishing discipline
A production-minded route often includes:
- roughing with stock allowance
- rest machining
- finishing passes with controlled step-over
- final contouring after internal features are stable
Table 4 — Distortion Risks and CNC Controls
| Problem | Typical cause | CNC control strategy | Design mitigation |
|---|---|---|---|
| thin plate “potato chips” | stress release + uneven pocketing | symmetric pocketing, staged rough/finish | add ribs, keep uniform wall thickness |
| chatter on long arms | tool stick-out, weak fixturing | shorter tools, better workholding | increase radius, reduce thin cantilevers |
| warped camera plates | clamp distortion | soft jaws or datum pads | add clamping bosses |
| misaligned stack holes | multiple re-clamps | machine pattern in one setup | use datums and dowels |
If your build relies on “arm symmetry” for clean tuning, distortion control is not optional—it’s the difference between a frame that feels locked-in and one that never quite settles.
6) Hole Patterns, Datums, and GD&T for FPV Frames
FPV frames are packed with standardized patterns:
- stack patterns: 20×20, 30.5×30.5
- motor patterns: commonly 16×16, 19×19 (varies by motor)
- camera side plates: consistent spacing to maintain lens centerline
- arm clamp patterns: repeatable arm location is crucial after crashes
The manufacturing trick is to make these patterns land consistently relative to functional datums.
6.1 Practical datum strategy (FPV-focused)
A reliable approach is:
- Primary datum: a stable mounting plane (e.g., bottom plate reference surface)
- Secondary: a long edge or reamed hole line to lock rotation
- Tertiary: a perpendicular face or second hole to eliminate remaining DOF
6.2 GD&T controls that actually matter
Not every feature needs tight tolerances. The ones that do tend to be:
- hole pattern position (stack and motor patterns)
- mounting face flatness (stack compression, camera tilt stability)
- side plate parallelism (camera cage geometry)
- bore relationships (if using bushings/dowels)
Table 5 — FPV Frame CTQs and Recommended GD&T/Controls
| Assembly function | Feature | Control | Why it matters in flight |
|---|---|---|---|
| stable stack alignment | 20×20 / 30.5×30.5 holes | position to datums | prevents board stress, clean soft-mount behavior |
| motor squareness | motor mount face | perpendicularity / flatness | reduces vibration and bearing wear |
| camera angle repeatability | cage side plates | parallelism + hole position | prevents camera shift after impacts |
| arm repeatable replacement | clamp interface | position + controlled edge geometry | arms don’t “toe in/out” after swap |
| clean cable routing | edges/slots | profile + deburr spec | prevents insulation damage |
For Custom FPV drone frame machining, GD&T is less about aerospace formality and more about preventing the “it should fit, why doesn’t it?” problem.
7) CNC Turning for Standoffs, Spacers, and Hardware Interfaces
Even when the “frame” is mostly plate-based, turned components often decide whether the build stays tight.
Common turned parts:
- M2/M3 standoffs (various heights)
- shoulder spacers for dampers
- bushings for camera tilt pivots
- threaded couplers or posts
- custom nuts (weight-optimized)
Table 6 — Turned Parts That Improve FPV Frame Serviceability
| Turned component | What it solves | CNC turning note |
|---|---|---|
| shoulder spacer | consistent compression on gummies | control shoulder length tightly |
| camera pivot bushing | smooth tilt with less slop | finish and diameter consistency |
| stack standoff | cleaner assembly | thread quality and straightness |
| arm clamp sleeve | prevents clamp gouging | choose wear-friendly material |
A supplier with full Custom FPV drone frame machining capability should treat turned parts as part of the system, not as “hardware you source elsewhere.”
8) Surface Finish and Coatings (Anodize Is Not Just Color)
Finishes affect:
- corrosion resistance (especially around sweat, rain, coastal air)
- wear (arm clamps, screw seats, sliding interfaces)
- dimensional changes (critical for press fits and tight pockets)
- cosmetic consistency batch-to-batch
8.1 Anodize vs hard anodize for FPV parts
- Type II anodize: good general corrosion resistance, color options
- Type III hard anodize: wear resistance; typically thicker and more dimensionally impactful
8.2 Masking strategy: the “quiet detail” that saves assemblies
In FPV frames, you may need:
- masked grounding pads (if electrical continuity is needed)
- masked bearing bores or press-fit zones
- masked threads (or controlled post-process thread cleanup)
Table 7 — Finishes Used in Custom FPV Drone Frame Machining
| Finish | Best use | Benefit | Engineering caution |
|---|---|---|---|
| Type II anodize | cages, plates, general parts | corrosion + appearance | define cosmetic vs functional surfaces |
| Type III hard anodize | arm clamps, wear points | wear resistance | thickness affects fits and thread feel |
| chem film | grounding surfaces | conductive corrosion protection | less cosmetic; may need paint |
| bead blast (pre-anodize) | premium cosmetic feel | uniform texture | can change sealing/fit expectations |
| laser marking | part IDs, revisions | traceability | place away from high-stress areas |
If you want fewer “mystery fit” issues, specify which surfaces are fit-critical and require coating control. This is a hallmark of mature Custom FPV drone frame machining programs.
9) Deburring, Edge Quality, and Wire-Safe Geometry
FPV builds are dense. Wires are pulled tight, zip ties are aggressive, and crashes shove everything into everything. A sharp edge is not a cosmetic issue; it’s a failure mode.
Deburring goals for FPV frames:
- consistent edge break (not random hand-feel)
- burr-free slots and wire pass-throughs
- safe countersink/counterbore transitions
- no “raised lips” around drilled holes that prevent plates from seating
Table 8 — Edge/Chamfer Guidelines That Improve Field Reliability
| Location | Recommended edge condition | Why |
|---|---|---|
| wire slots | smooth radius or controlled chamfer | prevents insulation damage |
| carbon fiber plate edges | sealed edge after cut | reduces splintering and moisture ingress |
| countersinks | clean, concentric | prevents screw head rocking |
| clamp interfaces | consistent chamfer | reduces stress risers and galling |
In well-run Custom FPV drone frame machining, deburring is a defined operation with acceptance criteria—not an afterthought.
10) Inspection Strategy: What to Measure (and What Not to Waste Time On)
FPV frames don’t need aerospace paperwork by default, but they do need smart inspection on the features that create assembly yield and consistent flight behavior.
10.1 Practical CTQs for FPV frame machining
- stack hole pattern position
- motor mounting pattern position and face flatness
- camera cage symmetry and plate parallelism
- arm clamp alignment features
- thickness on mating faces (stack-ups)
10.2 CMM vs functional gauges
- CMM: excellent for verifying positional tolerances and relationships
- Functional gauges: fast and production-friendly (e.g., “stack pattern go/no-go plate”)
Table 9 — Inspection Methods for Custom FPV Drone Frame Machining
| Feature | Suggested measurement | Production advantage |
|---|---|---|
| 20×20 / 30.5×30.5 hole pattern | CMM or gauge plate | verifies fit without forcing screws |
| motor face flatness | surface plate + indicator / CMM plane | reduces vibration risk |
| countersink geometry | optical comparator / sample check | consistent screw seating |
| part thickness | micrometer / caliper + SPC | controls stack height |
| anodize thickness (if fit-critical) | coating thickness gauge | prevents “it got tight after anodize” |
A disciplined inspection plan also reduces rework loops and prevents small shifts from becoming “a batch problem.”
11) Cost Drivers and DFM Rules (So the Frame Is Affordable and Repeatable)
Cost in Custom FPV drone frame machining usually comes from a few predictable sources:
- too many setups (datums not accessible in one orientation)
- extremely thin features requiring slow feeds
- tiny internal radii forcing small tools
- unnecessary tight tolerances everywhere
- complex cosmetic requirements without defining “what matters”
Table 10 — DFM Rules That Reduce Cost Without Weakening the Frame
| DFM issue | Why it hurts | Better approach |
|---|---|---|
| deep narrow pockets | chatter + long tools | open the pocket, add ribs instead |
| sharp internal corners | tiny end mills, long cycle | add internal radii matched to tooling |
| tight tolerances on non-functional geometry | inspection time + scrap | apply tight tolerances only to CTQs |
| mixed finishes on adjacent surfaces | masking complexity | group finish zones logically |
| no defined datum surfaces | setup drift | add datum pads or stable reference planes |
A supplier worth keeping will offer DFM feedback that’s specific: which feature drives the cost, what change reduces setups, and what performance tradeoff (if any) comes with it.
12) Detailed Manufacturing Tables (Routing, Tolerances, Tooling, QC)
This section is deliberately practical—meant to be copied into an RFQ checklist or internal design review.
Table 11 — Example Process Routing for CNC-Milled FPV Camera Cage (Aluminum)
| Op # | Operation | Machine/Method | Key controls |
|---|---|---|---|
| 10 | Rough mill + adaptive clearing | 3-axis or 5-axis mill | leave uniform stock |
| 20 | Semi-finish walls and pockets | same setup | stabilize thin walls |
| 30 | Drill/ream alignment holes (if used) | probing + reaming | positional control |
| 40 | Finish critical faces (camera interface, stack faces) | finishing toolpath | control Ra + flatness |
| 50 | Deburr + edge break | defined spec | wire-safe edges |
| 60 | Bead blast (optional) | controlled media | consistent cosmetic |
| 70 | Anodize / hard anodize | masked as needed | coating-aware tolerances |
| 80 | Final inspection + marking | CMM / gauges | CTQ verification |
Table 12 — Tolerance Guidance (FPV-Appropriate, CNC-Realistic)
| Feature | Typical tolerance target | Notes |
|---|---|---|
| stack hole patterns | tight positional tolerance (application-defined) | prioritize position over hole diameter “tightness” |
| general non-mating dimensions | moderate CNC tolerance | keep cost sane |
| motor mount face flatness | controlled flatness | helps vibration and screw seating |
| press/slip fits (bushings) | fit-based callouts | plan for coating impact |
| countersinks | controlled angle + diameter | ensures consistent clamp load |
(Exact numeric tolerances depend on your design intent, materials, and finishing route. The key is to treat hole position and functional planes as CTQs.)
Table 13 — Tooling/Programming Notes That Improve Finish and Consistency
| Feature type | Preferred CNC approach | Why |
|---|---|---|
| thin ribs | constant engagement roughing + light finish pass | reduces chatter and wall push-off |
| long slots | ramp entry + climb milling | avoids burr buildup |
| countersinks | dedicated countersink tool + controlled feed | repeatable head seating |
| threads | thread milling where appropriate | strong threads, better control in aluminum |
| chamfers | chamfer mill with consistent path | uniform edge breaks |
Table 14 — Finishing Plan vs Dimensional Risk
| Finish | Fit risk level | Planning action |
|---|---|---|
| Type II anodize | medium | define masking on tight fits |
| Type III hard anodize | high | tolerance strategy must assume growth |
| chem film | low | good for conductive needs |
| paint/powder | high (variable thickness) | keep off mating faces and patterns |
Table 15 — Packaging and Handling for Frame Kits
| Part type | Packaging priority | Why |
|---|---|---|
| anodized cages | separate wrap + scratch control | cosmetic consistency |
| carbon plates | edge protection | prevents splintering/chipping |
| small turned hardware | labeled bags by length | prevents assembly errors |
| matched left/right parts | paired labeling | reduces kitting mistakes |
13) Three Case Studies (Prototype → Pilot → Batch)
These examples illustrate the decisions that repeatedly show up in real Custom FPV drone frame machining programs: setup strategy, wear surfaces, inspection, and coating planning.
Case Study 1 — 5″ Freestyle Camera Cage with Crash-Focused Geometry (7075 + Hard Anodize)
Goal: A stiff, compact camera cage that holds angle after repeated impacts without turning into a “bent tuning fork.”
Key parts: two side plates + front brace + integrated stack interface
Material/finish: 7075‑T6, Type III hard anodize (black)
Challenges observed in early prototypes
- camera side plates drifted out of parallel after anodize (fit got “tight”)
- small burrs at countersinks caused screw head rocking
- the cage assembled fine in isolation but fought the carbon plates due to hole position drift
Manufacturing approach
- re-sequenced routing so the functional planes (camera interface + stack interface) were finished late
- kept critical hole patterns within a single controlled setup using probing
- controlled countersink tool wear (fresh tool threshold) to maintain head seating consistency
- planned masking for fit-critical contact surfaces where anodize growth would create interference
Inspection plan
- CMM verification of hole pattern position relative to datums
- parallelism check of camera plates (functional, not purely cosmetic)
- sample torque test on fasteners to confirm consistent seating
Outcome Batch builds assembled with less “frame persuasion,” camera angle stayed consistent longer, and post-crash service time dropped—exactly the kind of result that makes Custom FPV drone frame machining worth doing properly.
Case Study 2 — 7″ Long-Range Arm Clamp System (7075, Wear Surfaces, and Repeatable Arm Replacement)
Goal: Arms that can be replaced in the field without losing motor alignment or introducing new vibration.
Key parts: clamp blocks + locating features + optional dowel alignment
Material/finish: 7075‑T6, anodize/hard anodize depending on wear requirement
Primary CTQs
- arm location repeatability (yaw alignment)
- clamp face flatness (even clamping pressure)
- thread longevity (multiple arm swaps)
Manufacturing approach
- added reamed alignment holes to decouple location from bolt clearance
- used soft jaws that locate on stable datum pads, not thin walls
- specified thread strategy based on service life (thread milling + inserts where appropriate)
Inspection plan
- functional gauge to confirm arm location repeatability
- thread gauging and clamp face checks
- sampling plan scaled with volume
Outcome Arms could be swapped without chasing tune changes. That’s a manufacturing-driven performance win—one of the most overlooked advantages of disciplined Custom FPV drone frame machining.
Case Study 3 — Cinewhoop Duct Mount Ring (Lightweight, Smooth Finish, Tight Pattern Control)
Goal: Reduce vibration and keep ducts aligned for consistent thrust and safer proximity flying.
Key parts: duct mount rings + camera plate interfaces + stack mounts
Material/finish: 6061‑T6 aluminum, Type II anodize; optional polymer isolation components
Challenges
- duct mount pattern needed positional consistency or ducts would “toe” and create uneven thrust
- sharp internal edges chewed through wire sleeving during hard landings
- cosmetic finish needed to be consistent for a consumer product line
Manufacturing approach
- machined duct patterns in a single datum-controlled setup
- specified a wire-safe deburr standard (edge breaks on all pass-throughs)
- used bead blast before anodize for consistent cosmetic texture
- introduced turned spacers to standardize compression on isolators
Inspection plan
- gauge-plate check for hole pattern fit
- visual + tactile edge acceptance criteria (defined, not subjective)
- spot checks on anodize thickness if fit-critical
Outcome Smoother assembly, fewer field returns related to vibration, and more consistent visual quality across batches—benefits that come directly from mature Custom FPV drone frame machining practices.
14) How to Work with JLYPT on Custom FPV Drone Frame Machining
If you want a CNC partner that can support FPV frames from early prototypes through repeatable batch production, the fastest path is to align on: datums, CTQs, finish requirements, and the intended assembly stack-up.
JLYPT supports CNC manufacturing for UAV components, including frame-related parts such as cages, clamps, mounts, and precision spacers. You can review capabilities and start a conversation here:
https://www.jlypt.com/custom-cnc-uav-parts-manufacturer/
Additional internal link:
https://www.jlypt.com/
RFQ package checklist (what to send for accurate quoting)
- STEP/IGES model + 2D drawing (datums/GD&T if defined)
- material + temper (e.g., 6061‑T6, 7075‑T6)
- finish callout (Type II / Type III anodize, masking zones, cosmetic zones)
- quantity targets (prototype + expected batch size)
- what you consider CTQ (stack pattern, motor mount, camera interface, etc.)
- mating part details (carbon plate thickness, screw head style, inserts, isolators)
A good Custom FPV drone frame machining partnership feels less like buying parts and more like building a stable manufacturing route that protects your design intent.
15) External Engineering References (DoFollow)
For standards context (terminology, measurement fundamentals, materials), these are useful starting points: